
Tools
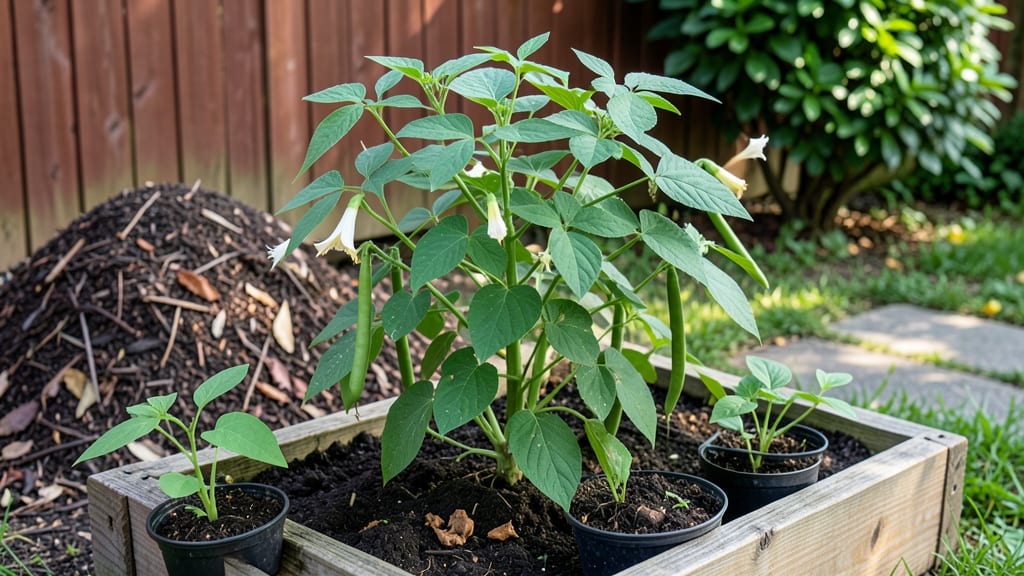
Planting string beans in compact gardens just got easier with bush varieties that skip the trellis. 🌱 I’ve grown these for years, and they produce just as much—if not more—than their climbing cousins, without taking up extra space.
The secret lies in proper soil prep, spacing, and timing, which I’ll walk you through step by step. Start with loose, well-draining soil mixed with compost—beans hate soggy roots. For bush varieties, space seeds 3-4 inches apart in rows 18-24 inches apart.
Plant them 1 inch deep, and keep them in full sun (at least 6-8 hours daily). They germinate fast, so keep the soil consistently moist until they sprout.
Once planted, you’ll see those first true leaves in 7-10 days, followed by bushy plants producing pods within 50-60 days. The key is consistency: water at the base (not overhead) and avoid disturbing the roots as they grow. For cooler climates, wait until soil reaches 60°F before planting.
These varieties thrive in small spaces, containers, or even raised beds. No trellis needed—just patience and the right setup. Ready to grow your own? Let’s get those seeds in the ground!
📚 In This Guide
- What you need
- Instructions
- Tips and common mistakes
- Wrapping up and next steps
What you need
- ● String Bean Seeds: 2–4 lbs (or ~100–200 seeds) of bush variety (e.g., 'Contender,' 'Blue Lake,' or 'Kentucky Wonder').
- ● Well-draining potting mix or garden soil: 1–2 cubic yards (or enough to fill 2–4 raised beds, 4’x8’). Test soil pH (6.0–7.0 ideal).
- ● Compost or organic fertilizer: 1–2 cups per 10 sq ft (balanced 10-10-10 or bean-specific blend).
- ● Watering can or hose with gentle nozzle: 1–2 gallons per plant during dry spells.
- ● Hand trowel: 1 (for planting seeds 1" deep).
- ● Garden rake: 1 (to loosen soil before planting).
- ● Measuring tape or ruler: 1 (for spacing seeds 3–4" apart, rows 18–24" apart).
- ○ Mulch (straw or grass clippings): Optional but recommended (2–3" layer to retain moisture).
- ○ Plant markers (optional): Small stakes or labels to track varieties.
- ● Sunlight: Full sun (6–8+ hours daily).
- ● Warm soil: Wait until nighttime temps stay above 50°F (10°C) (use a soil thermometer if unsure).
- ● Last frost date: Plant 2–3 weeks after your area’s last frost (check local almanac).
Step-by-step instructions for planting string beans
Here's how to grow productive, space-saving bush beans without needing a trellis.
🌱 Step 1: Prepare the Planting Site
Choose a location with full sun exposure (6+ hours daily) and well-draining soil. Bush beans thrive in slightly acidic to neutral soil with a pH between 6.0 and 7.0. Work in a 2-inch layer of compost into the top 6 inches of soil to improve fertility and drainage—this prevents the roots from sitting in soggy conditions, which causes rot.
Loosen the soil to a depth of 12 inches with a garden fork or tiller, breaking up any compacted layers. Avoid working the soil when it's wet; aim for a time when it's crumbly but not clinging to your tools. This preparation ensures roots can spread easily and access nutrients without resistance.
🌱 Step 2: Plant Seeds at the Right Depth and Spacing
Plant 4-5 seeds per hill, spacing hills 4-6 inches apart in rows that are 18-24 inches apart. Push seeds 1 inch deep into the soil—deeper planting delays germination because the seedling must push through more soil. I like to use a small stick or my finger to create a shallow hole, drop in the seeds, and then cover them gently with soil.
Water the soil lightly after planting to settle the seeds in place, but avoid soaking it. Overwatering at this stage can wash seeds deeper than intended or create a crust on the soil surface that blocks germination. Aim for moist but not soggy soil—you should see slight dampness at a depth of 1 inch when you check with your finger.
💧 Step 3: Provide Consistent Moisture and Warmth
Keep the soil evenly moist until germination, which typically occurs in 7-14 days depending on your climate. Use a soaker hose or drip irrigation to water gently at the base of the plants—this prevents disturbing the seeds and ensures moisture reaches the roots. Avoid overhead watering, which can spread disease and create uneven soil conditions.
String beans prefer warm soil (60-85°F) for optimal growth. If your spring is cool, consider using black plastic mulch to warm the soil and speed up germination. Once seedlings emerge, reduce watering slightly to let the soil dry out a bit between waterings, but never let it become bone-dry. You’ll know moisture is right when the top 1-2 inches of soil feel slightly damp to the touch.
☀️ Step 4: Thin Seedlings and Monitor Growth
When seedlings reach 2-3 inches tall, thin them to 2-3 plants per hill, leaving the strongest, most vigorous plants. Use scissors to snip unwanted seedlings at the base—this prevents disturbing the roots of the plants you’re keeping. Thinning ensures each plant has enough space and nutrients to grow strong, reducing competition for sunlight and water.
Watch for first true leaves (the second set after the initial seed leaves) to appear, which signals that the plants are established. At this stage, apply a balanced fertilizer (10-10-10) lightly around the base of the plants, keeping it 2-3 inches away from the stems to avoid burning the roots. Bush beans are relatively low-maintenance, but this extra boost encourages bushier growth and higher yields.
✂️ Step 5: Harvest and Maintain for Continuous Production
Begin harvesting when pods reach 4-6 inches long and are firm but tender. Pick beans regularly—every 2-3 days—to encourage more production. I like to harvest in the morning when the pods are crisp and full of flavor. Use a sharp pair of scissors or your fingers to snap the pods cleanly from the vine, being careful not to damage the plant.
Continue harvesting until the plants stop producing, which usually happens 6-8 weeks after planting. After the main harvest, you can let a few pods mature fully on the plant to save seeds for next season. Once the plants are done, pull them up and compost the debris to return nutrients to the soil for future plantings.
Tips & tricks for perfect trellis-free bush bean planting
Here's what nobody tells you about growing bush beans that'll make all the difference in your garden's productivity.
Soil Temperature Matters: The ideal soil temperature range of 60-85°F is crucial for germination. I've learned the hard way that cool spring soil below 60°F can delay germination by weeks. If your soil is too cold, try covering the planting area with black plastic mulch for a few days before planting to warm it up. This simple trick can speed up germination from 14 days to just 7 days in cool climates.
Precision Planting Technique: When creating those 1-inch deep holes for your 4-5 seeds per hill, I recommend using a small stick or your finger to make the hole rather than just pressing seeds into the soil. This ensures consistent depth and prevents seeds from being planted too deep, which can delay or prevent germination entirely. The goal is to create a cozy, snug environment for those seeds to sprout.
Thinning Strategy: The 2-3 inch height threshold for thinning is actually a bit flexible. I've found that waiting until seedlings reach 2.5-3 inches gives you more time to identify the strongest plants. Look for seedlings with the darkest green leaves and most vigorous stems—they're the ones that will produce the most beans. Use clean scissors to snip at the base rather than pulling, which can damage nearby roots.
Harvesting Rhythm: Those 2-3 day harvest intervals might seem frequent, but they're essential for continuous production. I've noticed that when I skip a harvest day, the pods quickly become tough and fibrous. Morning harvests yield the crispest beans, but if mornings don't work, aim for late afternoon when pods are still firm. The key is to pick when pods are 4-6 inches long—this is when they're at their peak flavor and tenderness.
Pro Tips for Planting String Beans
- Here's what nobody tells you about growing bush beans that'll make all the difference in your garden's productivity.
- Soil Temperature Matters: The ideal soil temperature range of 60-85°F is crucial for germination. I've learned the ha...
- Precision Planting Technique: When creating those 1-inch deep holes for your 4-5 seeds per hill, I recommend using a ...
Frequently asked questions
Got questions about growing string beans without a trellis? You’re in the right place!
Whether you're a beginner or just need a quick refresher, here are answers to the most common queries about planting bush varieties in compact spaces.
When is the best time to plant string beans?
String beans thrive in warm soil, so wait until after the last frost when temperatures consistently stay above 50°F (10°C). For most regions, this means planting in late spring or early summer. If you live in a hot climate, you can even try a fall planting for a second harvest!
How far apart should I space bush bean plants?
Bush varieties are compact, but they still need room to breathe. Space plants 4–6 inches apart in rows that are 18–24 inches apart. This spacing ensures good airflow, reducing the risk of fungal diseases like rust or powdery mildew.
Can I grow string beans in containers instead of a garden bed?
Bush beans are perfect for containers. Use a pot at least 12 inches deep and wide, with drainage holes. Plant 2–3 seeds per container, and place them in a sunny spot (6+ hours of sunlight daily). Just keep the soil consistently moist but not soggy.
What should I do if my string beans get pests like aphids or bean beetles?
Start with preventive measures: row covers early in the season to deter flying pests, and handpick beetles in the morning. For aphids, spray with a mix of water + mild soap or introduce beneficial insects like ladybugs. If infestations persist, opt for organic neem oil or insecticidal soap.
How long does it take for bush beans to produce pods?
Most bush varieties mature in 50–60 days from planting, depending on the specific cultivar. You’ll start seeing pods in 2–3 weeks after flowering. For continuous harvests, pick pods regularly—they taste best when young and tender!
Wrapping up and next steps
Growing string beans—especially trellis-free bush varieties—is a rewarding way to enjoy fresh, homegrown produce in even the smallest of gardens! 🌱 With the right soil, spacing, and care, you’ll be harvesting crisp, flavorful beans in no time.
Whether you’re a beginner or a seasoned gardener, these compact plants make it easy to turn your space into a thriving veggie patch.
Now that you’re armed with tips and answers, roll up your sleeves and start planting! Keep an eye on your beans, and soon you’ll be savoring the taste of success—literally. Happy gardening! 🌟