
Planting
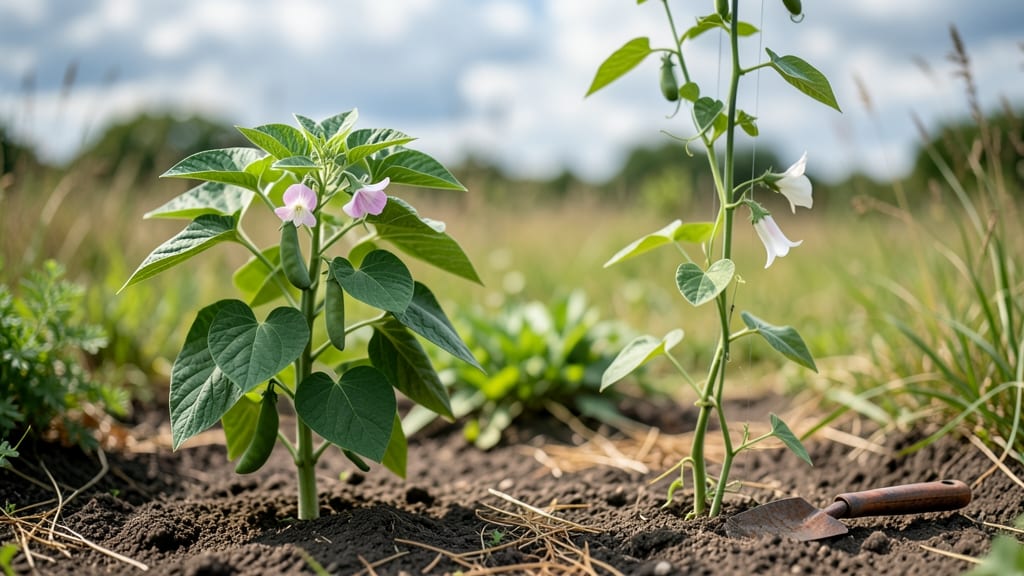
Picking the right bean plant types can turn your garden from a side project into a summer dinner staple. 🌱 I’ve grown all three main varieties—bush, pole, and runner beans—and each has its own superpower: bush beans for quick harvests, pole beans for space-saving climbs, and runner beans for those showstopping flowers.
The key difference? Growth habit and space needs. Bush beans stay compact (2–3 feet tall) and produce all their pods at once, while pole beans need trellises (6–10 feet tall) but keep yielding for weeks. Runner beans?
They’re the fancy cousins, with edible flowers and vines that can reach 12 feet if given support. You’ll end up with fresh, tender beans straight from your garden—whether you’re snapping pods for salads or shelling for soups. The right variety fits your space, season, and even your cooking style.
Let’s match you with the perfect one!
Confession: I used to overlook runner beans until I saw how their bright pink blooms attract pollinators and produce edible flowers. That’s when I realized beans aren’t just a vegetable—they’re a whole ecosystem in your garden.
Bush beans thrive in small pots or tight rows, while pole beans stretch vertically, saving ground space for other crops. The payoff? Higher yields and longer harvests. Pole beans, for example, can produce 3–4 times more than bush beans over the same season—if you give them the right trellis.
And once you try heirloom varieties like ‘Kentucky Wonder’ or ‘Blue Lake,’ you’ll never go back to store-bought.
Here’s the game-changer: disease resistance. Some varieties, like ‘Provider’ bush beans, resist common blights, while others, like ‘Rattlesnake’ pole beans, tolerate heat better. Your climate and soil will dictate the best pick, but the right choice means fewer pests, fewer failures, and more homegrown meals.
Whether you’re a balcony gardener or a backyard farmer, there’s a bean type that fits. Next up: how to pick the best spot, trellis, and companion plants to maximize your harvest!
📚 In This Guide
- What you need
- Instructions
- Tips and common mistakes
- Wrapping up and next steps
What you need
- ● Bean Seeds: Choose your preferred type—dwarf (e.g., 'Blue Lake'), pole (e.g., 'Kentucky Wonder'), or bush (e.g., 'Contender'). Buy 1–2 lbs (enough for a small garden) or more for larger plots.
- ● Well-draining soil: Aim for loamy, fertile soil with a pH of 6.0–7.0. Amend with compost if needed.
- ● Organic fertilizer: A balanced 10-10-10 or compost-based fertilizer (1–2 cups per 10 sq ft).
- ● Watering can or hose: With a gentle spray nozzle to avoid disturbing seedlings.
- ● Garden trowel or transplanter (for digging small holes).
- ● Rake (to loosen soil before planting).
- ● Measuring tape or ruler (for spacing seeds—2–4 inches apart for bush/dwarf, 4–6 inches apart for pole beans).
- ● Trellis or stakes (for pole beans): 5–6 ft tall bamboo stakes or wire trellises (1 per plant).
- ○ Mulch (optional but recommended): Straw or grass clippings to retain moisture and suppress weeds.
- ● Sunlight: Full sun (6–8 hours daily)—beans are sun-worshippers!
- ● Warm soil: Wait until soil temps reach at least 60°F (15°C) (use a soil thermometer if unsure).
- ● Last frost date: Plant 2–3 weeks after the last frost in your area.
- ● Patience: Germination takes 7–14 days—keep soil moist until sprouts appear!
How to choose and grow the right bean variety for your garden
Beans aren't one-size-fits-all—each type thrives with different support and care. Here's how to match the perfect variety to your space and growing style.
🌱 Step 1: Understand the Three Core Bean Types
Bush beans grow 2-3 feet tall and produce all their pods within 6-8 weeks of planting. They're perfect for small spaces or containers because they don't need trellises. Varieties like 'Blue Lake' or 'Roma' deliver quick harvests and are ideal for beginners. The trade-off? You'll need to replant every 4-6 weeks for continuous production.
Pole beans climb 6-10 feet tall using natural tendrils or require a sturdy trellis. They produce pods over a longer 2-3 month period and yield more per square foot than bush varieties. 'Kentucky Wonder' and 'Rattlesnake' are classic choices that make vertical gardening efficient. The key difference here is patience—you'll wait 8-10 weeks for first harvests, but the continuous output makes it worth it.
Dwarf pole beans (like 'Blue Lake Bush' or 'Contender') bridge the gap at 3-4 feet tall and produce like pole beans but with bush-like convenience. They're my go-to for small gardens where I want pole bean productivity without the space commitment.
☀️ Step 2: Match Varieties to Your Growing Conditions
All beans need full sun (6-8 hours daily) and well-draining soil with a pH between 6.0-7.0. But their support needs vary dramatically. Bush beans thrive in 5-gallon containers or 12-inch deep garden beds with 18-24 inches between plants. Their compact growth means they don't compete for space, making them ideal for interplanting with lettuce or radishes.
Pole beans, however, demand strong vertical support—either a 6-foot tall trellis or a 10-foot tall teepee structure. I use powder-coated metal cages because they resist rust and last multiple seasons. Space plants 4-6 inches apart at the base of the trellis to encourage even climbing. Dwarf pole beans need 3-foot tall supports and 6-inch spacing.
Soil temperature matters too—beans won't germinate until soil reaches 60°F. I always check with my finger: when the top 1 inch feels warm to touch, it's time to plant. Cold soil slows germination to 2-3 weeks instead of the usual 7-10 days.
💧 Step 3: Plant and Maintain Each Type Correctly
For bush beans, sow seeds 1 inch deep and 2-3 inches apart in rows 18 inches apart. Thin to 4-5 inches between plants once seedlings have 2 true leaves—this prevents crowding and improves air circulation. Water 1 inch per week, keeping soil consistently moist but never soggy. You'll know you're doing it right when the soil surface feels damp but not wet to the touch.
Pole beans get planted ½ inch deep at the base of their support structure. I like to plant 3-4 seeds per location and thin to the strongest plant after germination. The climbing habit means you'll need to gently tie vines to the trellis with soft twine every 1-2 weeks as they grow. Water deeply 2-3 times per week during flowering to prevent pod drop.
Here's where dwarf pole beans shine: they combine the best of both worlds. Plant them 1 inch deep with 4-inch spacing around a 3-foot tall support. Water consistently—these varieties are more sensitive to drought than bush beans but produce more like pole beans. You'll see the difference when your harvest extends over 6-8 weeks instead of just 4.
✂️ Step 4: Harvest and Extend the Season
Bush beans reach harvest when pods are 4-6 inches long and firm to the touch. I pick every 2-3 days to encourage more production—waiting too long makes them tough and stringy. For continuous harvests, succession plant every 2 weeks until 8 weeks before first frost.
Pole beans need regular picking too, but their long vines mean you'll harvest from the bottom up. Start picking when pods reach 5-7 inches and continue until frost. The secret to pole bean success? Prune back old growth after 6-8 weeks to encourage new flowering. You'll see fresh pods forming within 2-3 weeks.
Dwarf pole beans offer the longest harvest window. Pick when pods are 5 inches long and continue until frost. Their compact size means you can tuck them into corners or along fences where space is limited. I've had dwarf pole beans produce 10 weeks in my garden—far longer than bush varieties.
🌿 Step 5: Prevent Common Problems Variety-Specific
Bush beans often suffer from root rot if overwatered. The fix? Water at the base only and never let soil stay soggy. You'll know you're doing it right when leaves stay deep green—not yellowing at the edges. Watch for bean beetles too—they love bush beans. Handpick adults and use row covers early in the season.
Pole beans face different challenges: powdery mildew thrives in humid conditions. Improve airflow by spacing plants properly and avoid overhead watering. I always water in the morning so foliage dries quickly. For both types, watch for Japanese beetles—they skeletonize leaves overnight. A quick spray of soapy water in the evening keeps them at bay.
Dwarf pole beans combine the vulnerabilities of both types. They need the consistent moisture of pole beans but the air circulation of bush beans. The solution? Plant in raised beds with 12-inch spacing and mulch heavily to maintain even moisture. You'll see healthier plants and fewer pests when you give them these specific conditions.
Tips & tricks for perfect bean plant selection
Here's what nobody tells you about maximizing your bean harvest—these tricks will transform your garden's productivity.
Soil Temperature Secret: That 60°F soil temperature isn't just a starting point—it's a critical threshold. Use a soil thermometer for accuracy, especially in spring. I've seen germination stall completely when soil was just 58°F, even when air temps were warm. The top inch test with your finger works, but for serious gardeners, a thermometer removes guesswork. Plant only when you're consistently above 60°F for at least 3 days.
Support Structure Game-Changer: For pole beans, I've found that powder-coated metal cages (like those from Tractor Supply) last 5+ years and prevent the rust issues I had with cheaper options. The key is installing them at planting time—don't wait until vines appear. You'll need to bend the cages slightly as you insert them to avoid damaging roots. For dwarf pole beans, those 3-foot supports are non-negotiable—they need something sturdy to climb or they'll sprawl like bush beans.
Harvest Timing Strategy: The 2-3 day picking window for bush beans is non-negotiable for tender pods, but here's the pro move: mark your calendar for 6 weeks after planting and start checking every other day. I use a small notepad to track when I planted each variety—this prevents missed harvests. For pole beans, harvest from the bottom up to encourage upward growth. The pods at the top will be ready within 2-3 weeks after the lower ones.
Pest Prevention Insight: Japanese beetles are the silent destroyers, and they strike at dusk. I've had success with a homemade spray of 1 tablespoon dish soap + 1 quart water + a few drops of neem oil. Spray in the evening when beetles are active, and repeat every 3-4 days. For powdery mildew on pole beans, I've switched to drip irrigation exclusively—no overhead watering at all. The difference in plant health after one season is dramatic.
Pro Tips for Bean Plant Types
- Here's what nobody tells you about maximizing your bean harvest—these tricks will transform your garden's productivity.
- Soil Temperature Secret: That 60°F soil temperature isn't just a starting point—it's a critical threshold. Use a soil...
- Support Structure Game-Changer: For pole beans, I've found that powder-coated metal cages (like those from Tractor Su...
Frequently asked questions
Got questions about growing different bean plant types? You’re not alone! Whether you're a beginner or a seasoned gardener, here are some of the most common queries—and their answers—to help you thrive with your bean patch.
Which bean type is easiest for beginners?
Start with bush beans—they’re compact, don’t need trellises, and mature quickly (60-70 days). Varieties like Blue Lake or Kentucky Wonder (pole beans) are also beginner-friendly if you’re up for a little extra care with stakes or cages.
How long do beans take to grow from seed to harvest?
Most bean plant types take 50-70 days to mature, but timing varies by variety. Pole beans often take slightly longer (70-90 days) because they focus energy on climbing. Check seed packets for exact days-to-maturity—it’s your harvest timeline!
Can I grow pole beans without a trellis?
Technically yes, but they’ll sprawl everywhere and produce fewer beans. If you skip the trellis, plant them in a wide row (3 feet apart) and mulch heavily to contain vines. For best yields, though, invest in a 5-6 foot tall trellis or sturdy stakes.
Why are my beans getting holes or wilting?
Holes? Bean beetles or Mexican bean beetles are likely culprits. Wilting could mean underwatering, overcrowding, or root rot (from soggy soil). Try neem oil for pests and ensure 1-2 inches of water per week. Space plants 4-6 inches apart for airflow.
Are there cold-hardy bean varieties?
Yes! Black turtle beans and pinto beans tolerate cooler temps better than others. Plant them after the last frost (soil temps should be 60°F+) and choose early-maturing varieties (like Contender or Provider) to beat summer heat.
Wrapping up and next steps
From dwarf to pole and bush varieties, beans offer a world of possibilities for gardeners of all skill levels! 🌱 Whether you’re working with limited space or aiming for a bountiful harvest, there’s a bean type perfect for your needs.
Each variety brings unique benefits—whether it’s ease of care, high yield, or compact growth.
Ready to grow your green thumb? Start by choosing the variety that fits your garden’s layout and goals, then grab your seeds and get planting! For even more success, explore companion planting or organic fertilizers to maximize your harvest. Happy gardening! 🌿