
Vegetables
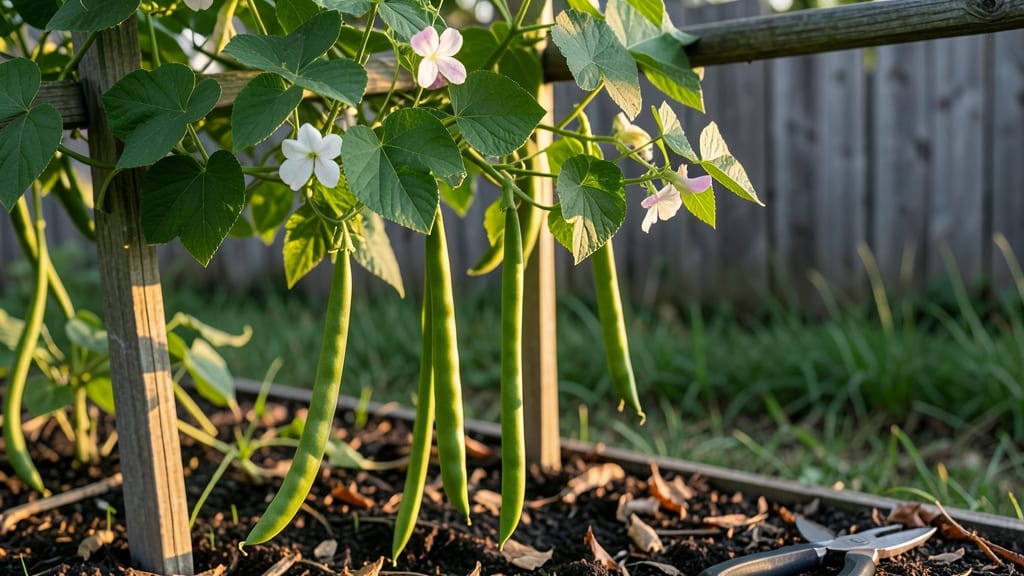
Growing Dutch runner beans means climbing vines and bountiful harvests in just 80 square feet—no sprawling garden needed. 🌱 These aren’t your grandma’s beans: Dutch runners produce long, flat pods packed with flavor, and they thrive on trellises where bush beans would flop.
I’ve grown them for years, and the secret to their success lies in the right trellis, soil, and a little patience with their quirky germination.
The key difference between runner beans and bush beans is their growth habit: runners climb, bush beans don’t. That means you’ll need a sturdy trellis—think 6-foot-tall poles or a strong wire frame—to support their vines.
Plant them in well-draining soil rich in compost, and keep the soil consistently moist but never soggy. They love warmth and hate cold, so wait until after your last frost to sow seeds directly in the ground.
By mid-summer, you’ll be picking pods that taste sweeter than store-bought beans, and the vines will keep producing until frost. The best part? One plant can yield enough beans to feed a family for weeks.
Just watch for bean beetles and keep an eye out for powdery mildew—shade cloth helps in humid climates. Works in zones 5-10, from containers to in-ground beds. Let’s get those vines growing!
📚 In This Guide
- What you need
- Instructions
- Tips and common mistakes
- Wrapping up and next steps
What you need
- ● Dutch runner bean seeds: 10–20 seeds (depending on desired yield; opt for heirloom or disease-resistant varieties like ‘Scarlet Emperor’ or ‘Fortune’).
- ● Pole trellis or sturdy support: 1–2 bamboo poles (6–8 ft tall, 2–3 inches in diameter) or
- ● A pre-made A-frame trellis (4–6 ft wide, 6–8 ft tall).
- ● Garden soil or potting mix: 1–2 cubic yards (well-draining, rich in organic matter; amend with compost if needed).
- ● Fertilizer: Balanced organic fertilizer (e.g., 5-5-5 or 10-10-10) or
- ● Composted manure (aged, 2–3 cups per planting hole).
- ● Watering can or hose with gentle spray nozzle: For consistent moisture without damaging seedlings.
- ● Garden twine or soft ties: To secure vines to the trellis (10–15 ft of twine).
- ● Gloves and kneeling pad: For comfort and protection while planting.
- ● Mulch (straw or wood chips) to retain moisture and suppress weeds.
- ● Row covers or shade cloth (for early planting in cooler climates).
- ● Drip irrigation system for automated watering.
- ● Plant markers to label varieties (if growing multiple types).
- ● Pest deterrents like neem oil or row covers for aphids/beans.
Step-by-step instructions for growing Dutch runner beans on a pole-trellis
Here's how I grow these prolific climbers—tight, productive, and ready for harvest in just a few months.
🌱 Step 1: Choose and Prepare Your Trellis System
Dutch runner beans thrive on sturdy trellises that support their 6-10 foot vines without bending. I use 4-foot-tall bamboo poles spaced 2 feet apart in a row, tied together at the top with garden twine for stability. The key is keeping the structure compact—wide spacing leads to sprawling, tangled vines.
Drive poles into the ground until they're firmly planted (about 6 inches deep). For extra security in windy areas, bury them deeper or weigh the base with bricks. If using a pre-made trellis, ensure it's at least 4 feet tall and has horizontal crossbars every 12 inches for vines to cling to.
🌿 Step 2: Plant Seeds at the Right Time and Depth
Wait until after the last frost when soil temperatures reach at least 60°F. Dutch runner beans hate cold, and seeds won’t germinate below 55°F. I plant mine in late May in most climates—check your local frost dates to avoid delays.
Dig holes 1 inch deep, spacing them 4-6 inches apart along the trellis line. Drop 2-3 seeds per hole (they germinate slowly, so extra seeds ensure success). Cover lightly with soil—don’t press down hard, or the seeds may struggle to push through. Water gently to settle the soil, but avoid soaking the seeds.
☀️ Step 3: Train Vines and Provide Support Early
Once seedlings reach 4-6 inches tall (about 2-3 weeks after planting), gently guide the strongest stem toward the trellis. Use soft plant ties or twine to secure it loosely—never tie too tight, or you’ll restrict growth. Dutch runners climb by twining, so they’ll latch on naturally if given a chance.
Watch for side shoots forming at the base—these compete with the main vine for energy. Pinch them off early to encourage one strong central leader. As vines climb, weave them between the trellis bars every 1-2 feet to prevent tangling. You’ll know you’re doing it right when the trellis looks like a dense, green ladder.
💧 Step 4: Water and Fertilize for Maximum Yield
Keep soil consistently moist but not soggy—Dutch runners need 1-1.5 inches of water per week, especially during flowering and pod development. Water at the base, not overhead, to prevent fungal diseases like rust. I use a soaker hose for deep, even moisture without wetting the leaves.
Side-dress with balanced fertilizer (10-10-10) when flowers appear, following package rates. Too much nitrogen makes vines leafy but fruitless—cut back if you see all leaves and no pods. Mulch around the base with 2-3 inches of straw to retain moisture and suppress weeds. Harvest begins in 60-70 days—watch for pods that feel firm but still tender.
✂️ Step 5: Prune and Harvest for Continuous Production
Harvest pods every 2-3 days when they’re 4-6 inches long and still flat—waiting too long makes them tough and stringy. Cut stems with clean scissors, leaving ½ inch above the next leaf. This encourages more flowers and pods to form, extending the harvest season.
If vines slow down in late summer, give them a light trim—cut back old, woody stems to stimulate new growth. Dutch runners often produce a second flush of beans if you keep them pruned and well-watered. Stop harvesting when pods turn yellow and dry—this signals the end of the season.
Tips & tricks for growing Dutch runner beans on a trellis
Here's what I've learned after years of growing these prolific climbers—these secrets make all the difference for compact, productive vines.
Trellis Stability is Non-Negotiable: I've seen trellises collapse under Dutch runner beans' weight—don't make that mistake! For extra security, use 4-foot bamboo poles spaced 2 feet apart and tie them together at the top with sturdy garden twine. Bury the poles 6 inches deep and add bricks at the base if you're in a windy area. The goal is a rigid structure that won't sway when vines reach their full 6-10 foot height.
Timing Your Planting Makes All the Difference: Dutch runner beans are finicky about temperature—plant too early and they'll rot, too late and you'll miss the season. Wait until soil temperatures hit at least 60°F after your last frost. I always check my local frost dates and aim for late May in my zone. The seeds need warmth to germinate, so don't rush it—patience here pays off with faster growth later.
The Early Training Secret: When your seedlings reach 4-6 inches tall (about 2-3 weeks after planting), gently guide the strongest stem toward the trellis using soft plant ties. The key is to start this process early—waiting too long means you'll have to wrestle with thicker, more stubborn vines. I also make sure to pinch off any side shoots forming at the base to encourage one strong central leader. This creates that perfect "green ladder" look that maximizes sunlight exposure for your plants.
Watering Wisdom for Maximum Yield: Consistent moisture is crucial, but don't drown your plants! Aim for 1-1.5 inches of water per week, delivered at the base using a soaker hose. Overhead watering can spread fungal diseases like rust, which I've seen ruin entire crops. And here's a pro tip: mulch with 2-3 inches of straw after planting to help retain that moisture and keep weeds at bay. The beans will thank you with bigger, tastier pods.
Pro Tips for Dutch Runner Beans
- Here's what I've learned after years of growing these prolific climbers—these secrets make all the difference for com...
- Trellis Stability is Non-Negotiable: I've seen trellises collapse under Dutch runner beans' weight—don't make that mi...
- Timing Your Planting Makes All the Difference: Dutch runner beans are finicky about temperature—plant too early and t...
Frequently asked questions
about Dutch runner beans—your quick guide to troubleshooting, timing, and growing tips!When is the best time to plant Dutch runner beans?
Plant Dutch runner beans after the last frost when soil temps hit 60°F (15°C). In most U.S. zones, this means late spring to early summer (May–June). For cooler climates, start indoors 2–3 weeks earlier. Avoid planting too early—they hate cold soil!
How long do Dutch runner beans take to grow and produce?
From seed to harvest, expect 8–12 weeks for mature pods. Vines grow 10–15 feet tall but stay compact on trellises. Flowers appear in 5–6 weeks, and beans follow 2–3 weeks later. Pick pods regularly to encourage more production!
Can I grow Dutch runner beans in containers or small spaces?
Use a 5-gallon container or deeper with a trellis or pole (6+ feet tall). Ensure good drainage and fertilize lightly with compost. Just avoid overcrowding—space plants 4–6 inches apart for airflow. Perfect for balconies, patios, or small gardens!
What pests or diseases should I watch for with Dutch runner beans?
Common pests include aphids, bean beetles, and spider mites. For diseases, rust and powdery mildew can strike in humid conditions. Prevent issues by:
- Pruning vines for airflow
- Using row covers early
- Rotating crops yearly
- Spraying neem oil if pests appear
What can I do if my Dutch runner beans aren’t flowering or producing?
Lack of flowers? Check these fixes:
- Sunlight: Ensure 6–8+ hours of full sun daily.
- Water: Keep soil consistently moist (not soggy).
- Fertilizer: Add a low-nitrogen, high-phosphorus feed (like 5-10-10) at planting and when flowering starts.
- Pollinators: Plant nearby bee-friendly flowers (e.g., marigolds, nasturtiums).
Wrapping up and next steps
Growing Dutch runner beans is a rewarding journey that combines ease with stunning results—compact vines, high yields, and minimal space needs!
With the right trellis, soil prep, and care, you’ll enjoy a bountiful harvest of tender, flavorful pods all season long. Now’s your chance to turn a small corner of your garden into a thriving bean haven!
Ready to dive in? Start by gathering your supplies and sketching a simple trellis plan. Then, plant your seeds and watch your Dutch runner beans climb toward success—one vine at a time! 🌱💚