
Vegetables
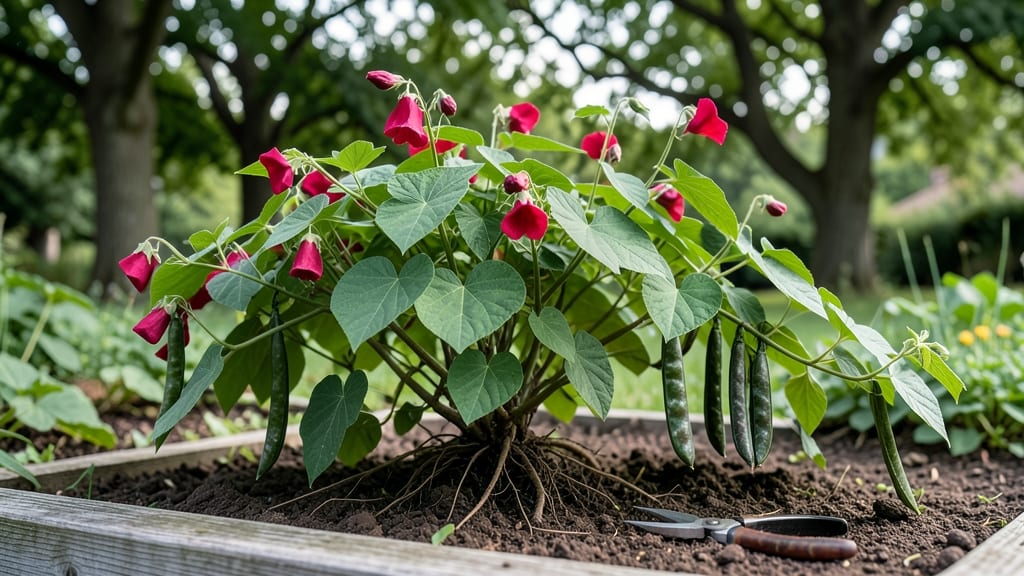
Growing scarlett runner beans from seed means three-foot vines bursting with edible flowers and tender pods by midsummer. 🌱 I planted mine last spring and watched them transform a bare corner of the garden into a living trellis of crimson blooms—all from seeds costing less than a dollar.
The best part? These beans double as a stunning ornamental and a productive vegetable, making them the ultimate garden multitasker.
You’ll need a sunny spot with well-draining soil, sturdy trellis or fence, and patience for the first few weeks while seeds germinate. Most beginners struggle with slow starts, but scarlett runner beans reward persistence with 90-day harvests that keep coming until frost.
The key is consistent moisture and regular pruning to encourage bushier growth—my first attempt flopped because I watered too much, soaking the roots.
By late summer, you’ll be harvesting bright red flowers for garnishes and tender young pods for stir-fries, all while the vines climb higher than your head. The beans even attract hummingbirds, turning your garden into a living showpiece.
Companion plants like lettuce or radishes thrive in their shade, maximizing every square foot of space.
Whether you’re growing for food, beauty, or both, scarlett runner beans deliver bold results with minimal fuss.
The only real mistake is not planting them sooner—my second batch is already climbing a trellis near the patio, and I can’t wait to share the harvest with neighbors who’ve never seen anything like it.
📚 In This Guide
- What you need
- Instructions
- Tips and common mistakes
- Wrapping up and next steps
What you need
- ● Scarlett Runner Bean Seeds: 10–20 seeds (or 1–2 seed packets). Choose Phaseolus coccineus varieties like 'Scarlet Emperor' or 'Dwarf Scarlet.'
- ○ Growing Containers (Optional): 5-gallon pots (2–3 per plant) or
- ● Fabric grow bags (12" diameter x 18" deep)
- ● Garden Space: Full sun (6+ hours/day) and well-draining soil. Trellises or stakes (6–8 ft tall) are a must for climbing varieties!
- ● Compost or Fertilizer: 2–3 cups of balanced organic fertilizer (10-10-10) or compost per planting area.
- ● Mulch: Straw or shredded leaves to retain moisture and suppress weeds.
- ● Hand Trowel (for planting seeds 1–2" deep).
- ● Watering Can or Hose with a gentle spray nozzle.
- ● Pruning Shears (for trimming vines later in the season).
- ○ Garden Gloves (optional but helpful for handling seeds and soil).
- ○ pH Test Kit (optional): Aim for soil pH 6.0–7.0.
- ○ Row Cover or Netting (optional): Protects young plants from pests like Mexican bean beetles.
- ● Patience! Scarlett runner beans take 90–120 days to mature.
- ● A warm season (after last frost) or a greenhouse for early starts.
- ● Consistent watering (1–1.5 inches per week) during dry spells.
Step-by-step instructions for growing scarlett runner beans
Here's how to coax those vibrant red flowers and plump pods from seed in just three months.
🌱 Step 1: Start Seeds Indoors 2-3 Weeks Before Last Frost
Scarlett runner beans need warmth to germinate, so I begin seeds indoors using biodegradable peat pots filled with seed-starting mix. Plant 2-3 seeds per pot at a depth of 1 inch, pressing lightly to ensure good soil contact. The seeds contain toxins that can inhibit germination, so I soak them overnight in lukewarm water first—this softens the seed coat and speeds up sprouting.
Cover the pots with a clear plastic dome or wrap them in plastic wrap to retain moisture and warmth. Place them in a warm location (70-80°F)—a seedling heat mat works wonders if your home runs cooler. Germination typically takes 7-14 days, but don't be surprised if it takes longer in cooler conditions. Once sprouts emerge, remove the cover immediately to prevent damping-off.
☀️ Step 2: Harden Off and Transplant After Frost
When seedlings develop 2-3 true leaves (not just the initial seed leaves), they're ready for hardening off. Start by placing them outside in a shaded, sheltered spot for 2-3 hours the first day, gradually increasing exposure over 7-10 days. Watch for wilting or yellowing leaves—if you see these signs, they're not ready for full sun yet.
Transplant after the last frost date when soil temperatures reach at least 60°F. Choose a sunny spot with 6-8 hours of direct sunlight daily—these beans are heavy feeders and won't tolerate shade. Bury the entire peat pot 1 inch deeper than it was indoors to encourage stronger root growth. Space plants 6-8 inches apart in rows 3 feet apart to allow for climbing.
🪴 Step 3: Provide Support and Encourage Climbing
Scarlett runner beans are vigorous climbers, so install 5-6 foot tall trellises, stakes, or strong fences before planting. I use wooden dowels or metal cages for support—they're sturdy enough to handle the weight of the vines and pods. As soon as the plants are 6 inches tall, gently tie the main stems to the trellis with soft plant ties or old fabric strips.
These beans thrive when their leaves can photosynthesize efficiently, so avoid overcrowding. Prune any side shoots that form below the first 12 inches of the vine to direct energy upward. You'll know the plants are happy when they produce bright red flowers within 6-8 weeks—each flower will eventually develop into a 6-inch pod if pollinated properly.
💧 Step 4: Water and Fertilize for Maximum Yield
Keep the soil consistently moist but not soggy—1 inch of water per week is ideal, though you may need to water more in hot, dry climates. Water at the base of the plant in the morning to reduce fungal risks. Mulch around the base with 2-3 inches of straw or grass clippings to retain moisture and suppress weeds.
Feed plants every 2-3 weeks with a balanced fertilizer (10-10-10) or a low-nitrogen, high-phosphorus blend to encourage flowering and pod development. Stop fertilizing 4-6 weeks before the first frost to allow the plants to mature properly. Harvest pods when they're 4-6 inches long and firm to the touch—this ensures the best flavor and texture.
✂️ Step 5: Harvest and Extend the Season
Begin harvesting when pods reach 4-6 inches—they'll continue to grow if left on the vine, but they become tough and stringy. Pick pods every 2-3 days to encourage more production. The more you harvest, the more the plant will produce—this is key to a bold harvest in 90 days. Use pruning shears to cut pods cleanly without damaging the vine.
To extend the harvest, succession plant every 2 weeks after the initial planting. Scarlett runner beans are heat-tolerant, so they'll keep producing until frost threatens. Once the first frost hits, pull up the plants and compost them—don't leave them in the garden, as they can harbor pests and diseases for next year.
Tips & tricks for growing scarlett runner beans
Here's what I've learned after years of growing these vibrant climbers—simple secrets that make all the difference between a decent harvest and a garden full of bold, flavorful pods.
Germination Hack: The overnight soak in lukewarm water isn't just about speed—it's about breaking through those tough seed coats that contain natural germination inhibitors. I've found that using distilled or rainwater instead of tap water prevents mineral buildup that can further delay sprouting. After soaking, place the seeds between damp paper towels in a sealed container for 24 hours to jumpstart germination before planting. This method cuts germination time by almost half in cooler conditions.
Harden Off Strategically: When you're increasing outdoor exposure during hardening off, focus on morning hours when temperatures are cooler. I've noticed that seedlings hardened off in the afternoon often show stress signs by evening. Start with just 1 hour the first day, then gradually add time—this gives their roots time to adjust without shock. Watch for leaves that perk up within 30 minutes of being brought back inside; that's your sign they're ready for more sun.
Support System Insight: For trellises, I've had the most success with wooden lattice panels or metal cattle panels—they're sturdy enough to handle the weight of mature vines and pods while allowing good airflow. The key is installing supports before planting, not after. If you're using wooden dowels, pre-drill holes at the top for easy tying. I also recommend adding a second support wire halfway up the trellis to prevent vines from flopping over during heavy rain.
Harvesting Timing: Those 4-6 inch pods are sweetest when harvested in the morning after the dew has dried. I've learned to check plants every 2 days during peak production—waiting just one more day can turn tender pods into tough, stringy ones. Use clean, sharp pruning shears and cut pods at a 45-degree angle just above a leaf node to encourage more branching and production. The first harvest often triggers a second flush of flowers within 10-14 days.
Pro Tips for Scarlett Runner Beans
- Here's what I've learned after years of growing these vibrant climbers—simple secrets that make all the difference be...
- Germination Hack: The overnight soak in lukewarm water isn't just about speed—it's about breaking through those tough...
- Harden Off Strategically: When you're increasing outdoor exposure during hardening off, focus on morning hours when t...
Frequently asked questions
Got questions about growing scarlett runner beans? You’re not alone! Here are answers to the most common queries to help you cultivate a thriving harvest.
How long do scarlett runner beans take to grow from seed?
Scarlett runner beans are fast growers! With the right conditions, you can expect vines to climb and produce pods in about 90 days from planting. Early varieties may even flower sooner—keep an eye out for those first delicate blossoms!
When is the best time to plant scarlett runner beans?
These beans thrive in warm soil, so wait until after the last frost when temperatures consistently stay above 50°F (10°C). In cooler climates, start seeds indoors 2–3 weeks before the last frost, then transplant seedlings outdoors. For tropical or warm zones, plant in early spring.
Can I grow scarlett runner beans in containers?
Runner beans are perfect for containers if you provide at least 10–12 inches of depth and a sturdy trellis or pole for climbing. Choose a large pot (12+ inches wide) with drainage holes, and use a light, well-draining potting mix. Just ensure the container gets full sun (6+ hours daily).
What should I do if my scarlett runner beans get pests?
Common pests like aphids, bean beetles, or spider mites can target your plants. Start with neem oil or insecticidal soap for mild infestations. For beetles, handpick them early in the morning. Encourage beneficial insects like ladybugs by planting companion flowers (e.g., marigolds or nasturtiums).
Are scarlett runner beans edible, and how do I use them?
Yes! Both the pods and beans are edible. Young pods (harvested before they thicken) are great in salads or stir-fries, while mature beans can be dried and cooked like other beans. Fun fact: The flowers are also edible—add them to garnishes for a pop of color!
What’s the ideal temperature for growing scarlett runner beans?
Runner beans love warmth! They grow best in temperatures between 70–85°F (21–29°C). If nights dip below 50°F (10°C), growth slows, and flowers may drop. Use row covers or mulch to protect plants in cooler weather, or opt for heat-tolerant varieties like ‘Scarlet Emperor.’
Wrapping up and next steps
Growing scarlett runner beans is a rewarding journey that brings vibrant blooms and delicious harvests to your garden in just 90 days! With the right soil, sunlight, and care, these fast-growing climbers can transform your space into a lush, productive haven.
Whether you're a beginner or a seasoned gardener, their bold flavors and striking beauty make them a standout addition.
Ready to dive in? Start by planting your seeds this season—your future harvest (and happy taste buds!) will thank you. Happy gardening! 🌱✨