
Planting
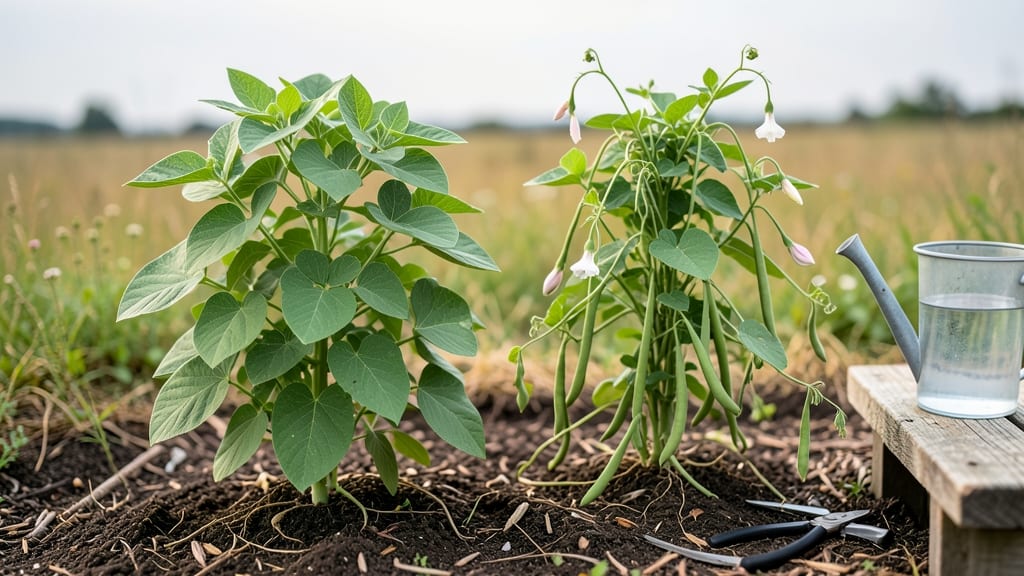
Fast-germinating garden beans are the quickest way to turn a patch of soil into a fresh food factory. 🌱 I remember my first harvest—just 50 days after planting—when I finally understood why gardeners swear by these easygoing plants.
They thrive in warm weather but can also stretch your growing season with the right planning.
You only need a sunny spot, loose soil, and a little patience. Most varieties pop up in 3-7 days, and you’ll see pods forming within weeks. Bush beans stay compact (great for small spaces), while pole beans climb trellises for continuous harvests.
The secret? Plant seeds 1 inch deep, keep soil moist but not soggy, and watch for those first green tendrils breaking through.
By mid-summer, you’ll be harvesting tender pods every 2-3 days. The key is consistency—water deeply when flowers appear, and watch for pests like Mexican bean beetles. With the right care, your plants will reward you with weeks of fresh harvests, far outlasting store-bought beans.
Works in containers or ground beds, and even in cooler climates with season extension. Let’s get those seeds in the soil!
📚 In This Guide
- What you need
- Instructions
- Tips and common mistakes
- Wrapping up and next steps
What you need
- ● Garden bean seeds: Choose fast-germinating varieties (e.g., Blue Lake, Kentucky Wonder, or Contender). Buy 1–2 lbs (or ~500–1,000 seeds) for a full harvest.
- ● Well-draining potting mix or garden soil: 5–10 gallons (for containers) or amend garden beds with compost for nutrients.
- ● Fertilizer: A balanced 10-10-10 or organic compost (1 cup per 10 sq ft). Avoid high-nitrogen fertilizers.
- ● Watering can or hose with a gentle spray nozzle: Beans need consistent moisture but hate soggy roots.
- ● Garden trowel or transplanting tool: For digging holes (1–2 inches deep) or sowing seeds.
- ○ Trellis or stakes (optional but recommended): 4–6 ft tall for climbing varieties (e.g., pole beans). Use bamboo stakes or wire mesh.
- ● Mulch (straw or grass clippings): 2–3 inches to retain soil moisture and suppress weeds.
- ○ Pruning shears (optional): For trimming excess foliage or dead plants.
- ● Sunlight: Full sun (6–8 hours daily). Partial shade is tolerable but may reduce yields.
- ● Temperature: Ideal soil temps: 60–85°F (15–29°C). Avoid planting until soil warms (use a soil thermometer if needed).
- ● Spacing: Variety Spacing (inches) Bush beans 4–6 inches apart, rows 18–24 inches apart Pole beans 4–6 inches apart, rows 3–4 feet apart (with trellis)
- ● Water: 1–1.5 inches per week (drip irrigation or deep watering 2–3 times weekly).
Step-by-step guide for planting fast-germinating garden beans
Here's how to get your beans sprouting within days and thriving for continuous harvests.
🌱 Step 1: Prepare the Soil for Optimal Germination
Beans love warm, well-draining soil with a pH between 6.0 and 7.0. Work in 2-3 inches of compost into the top 6 inches of soil to provide nutrients without compacting the root zone. I avoid heavy clay or sandy soils—beans need soil that holds moisture but drains freely to prevent rot.
Loosen the soil to a depth of 12 inches with a garden fork, breaking up any clumps. This creates space for roots to establish quickly. If your soil is cold from winter, spread a black plastic mulch 2-3 weeks before planting to warm the soil—beans germinate best when soil temperatures reach 60-65°F.
🌱 Step 2: Plant Seeds at the Right Depth and Spacing
Sow seeds 1 inch deep and 3-4 inches apart in rows spaced 18-24 inches apart for bush varieties. For pole beans, plant seeds 4-5 inches apart along trellises or supports. I like to plant in short, staggered rows rather than long ones—this makes it easier to thin seedlings later without disturbing nearby plants.
Place 2-3 seeds per hole since not all will germinate. After germination, thin to the strongest seedling per spot. Water gently after planting to settle the soil around seeds, but avoid soaking—excess moisture can cause seeds to rot before sprouting. Keep the soil consistently moist until germination, which typically occurs in 5-10 days for fast varieties.
☀️ Step 3: Provide Consistent Moisture and Sunlight
Beans need full sun (6-8 hours daily) to grow vigorously. If planting early in the season, use floating row covers to extend the growing period and protect young plants from cold snaps. Water deeply once a week, aiming for 1 inch of water per week—more during flowering and pod development. I water in the early morning to reduce evaporation and fungal risks.
Watch for wilting leaves—this is your signal to water immediately. Beans are shallow-rooted, so they need frequent, even moisture. Avoid overhead watering once plants are established to prevent fungal diseases like rust. Mulch with straw or grass clippings to retain moisture and suppress weeds, which compete for nutrients.
✂️ Step 4: Train and Support Vining Varieties
If growing pole beans, install trellises or stakes at planting time—beans hate being transplanted later. I use 5-foot bamboo stakes or wire trellises for vertical growth. As vines reach 6-8 inches tall, gently weave them around the support to encourage upward growth. This not only saves space but also improves air circulation, reducing disease risk.
For bush varieties, no support is needed, but watch for overcrowding. If plants start touching, thin to the strongest stems. Harvest regularly to encourage more production—beans produce continuously when pods are picked frequently. You'll know they're ready when pods are smooth, firm, and reach full size (usually 4-6 inches for most varieties).
🌿 Step 5: Maintain and Harvest for Continuous Yields
Fertilize lightly 2-3 weeks after germination with a balanced 10-10-10 fertilizer or compost tea. Beans fix nitrogen in the soil, so they don’t need heavy feeding—too much nitrogen promotes leafy growth at the expense of pods. I side-dress with a handful of compost mid-season to boost production without overfeeding.
Harvest beans every 2-3 days during peak production to keep plants producing. Use clean scissors or fingers to snap pods at the stem—this prevents damage to the plant. Store fresh beans in the fridge for up to 5 days or freeze for long-term storage. If left unharvested, pods will dry on the vine, but this reduces future production.
Tips & tricks for perfect garden bean planting
These insider tricks will help you skip the common pitfalls and get your fast-germinating beans thriving from day one.
Soil Temperature Secret: While the instructions mention 60-65°F as ideal, I’ve found that soil thermometers are your best friend here. If your soil feels cool to the touch, delay planting—beans simply won’t germinate below 60°F. I’ve planted in 55°F soil and waited weeks for sprouts, while 68°F soil gave me germination in just 4 days. A simple soil thermometer costs under $10 and prevents this common frustration.
Planting Precision: The 1-inch depth recommendation is perfect, but here’s what I’ve learned about spacing: For bush varieties, I actually plant my seeds 2 inches apart instead of 3-4 inches. This gives me a slightly denser stand that still thins easily, while the extra plants provide living mulch that reduces weed competition. Just be prepared to thin aggressively to the strongest 3-4 inch spacing once they’re 2-3 inches tall.
Germination Guard: That 5-10 day germination window can feel like an eternity, especially when you’re watching for sprouts. To speed things up, I pre-soak my seeds overnight in a damp paper towel before planting. This doesn’t change the planting depth or spacing, but it consistently cuts 24-48 hours off my germination time. Just make sure to plant them immediately after soaking—they’ll start sprouting in the towel if left too long.
Watering Wisdom: The once-weekly watering guideline works for established plants, but newly planted beans need more frequent attention. I water mine every other day for the first week after planting, using just enough to keep the top inch of soil damp. This prevents the "damping off" disease that can kill seedlings before they emerge. Think of it as creating a mini greenhouse effect around each seed until they break through the soil.
Pro Tips for Garden Bean Plant
- These insider tricks will help you skip the common pitfalls and get your fast-germinating beans thriving from day one.
- Soil Temperature Secret: While the instructions mention 60-65°F as ideal, I’ve found that soil thermometers are your ...
- Planting Precision: The 1-inch depth recommendation is perfect, but here’s what I’ve learned about spacing: For bush ...
Frequently asked questions
Got questions about growing your own garden beans? You’re not alone! Here are some of the most common queries—plus quick, practical answers to help you grow like a pro.
How long does it take for garden bean seeds to germinate?
Most garden bean varieties sprout in 7–14 days after planting, depending on soil temperature and moisture. For faster results, soak seeds overnight before planting and keep the soil consistently warm (60–85°F). Pro tip: Use a seedling heat mat if your climate runs cool!
Can I grow garden beans in containers or small spaces?
Bush beans thrive in containers 12+ inches deep, while pole beans need a 5-gallon pot or trellis. Just ensure they get 6–8 hours of sun daily and well-draining soil. Bonus: Grow them vertically to save space!
Why are my bean leaves turning yellow or spotted?
Yellowing leaves often signal overwatering, nutrient deficiency (like nitrogen), or pests (e.g., aphids or spider mites). Check soil moisture, fertilize lightly with compost, and inspect undersides of leaves. Fix it fast: Spray with neem oil if pests are the culprit.
When is the best time to harvest garden beans?
Harvest when pods are firm, 4–6 inches long, and snap easily (usually 50–60 days after planting). Pick regularly to encourage more production! Warning: Wait too long, and beans become tough and stringy.
Can I replant beans in the same spot every year?
While beans are nitrogen-fixers (great for soil), planting them in the same spot yearly can deplete other nutrients. Rotate crops with non-legumes like tomatoes or peppers every 2–3 years for best results. Pro move: Add compost to replenish soil!
Wrapping up and next steps
Growing your own garden bean plant is a rewarding journey that brings fresh, homegrown goodness to your table—no matter the season! 🌱 From selecting fast-germinating varieties to mastering planting techniques, you now have all the tools to cultivate a thriving bean patch.
Whether you're a beginner or a seasoned gardener, the key is patience, consistency, and a little love for the soil.
Ready to take the next step? Start small—plant a few seeds this week and watch your garden transform! Need inspiration? Try experimenting with dwarf varieties in containers or trellising pole beans for vertical growth. Happy planting, and may your harvests be bountiful! 🌟