
Container Gardens
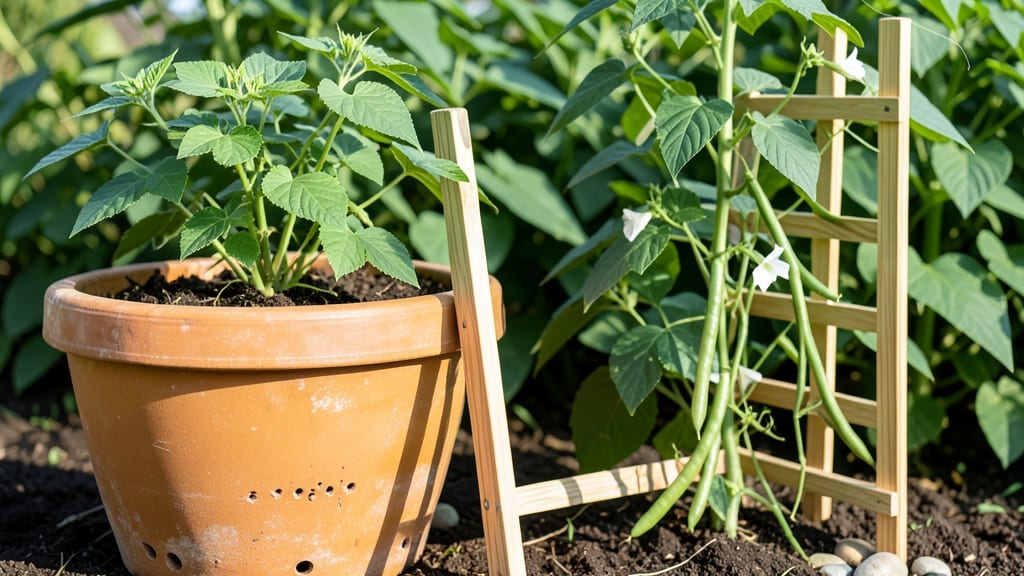
Green bean container gardening transforms even the tiniest balcony into a high-yielding harvest zone—no backyard required. 🌱 I've grown enough beans in 5-gallon pots to feed my family for weeks. The secret?
Matching the right container to the plant's growth habits and giving it just enough space to thrive without sprawling. You'll need a sturdy container at least 12 inches deep (deeper for pole varieties), well-draining soil, and a spot with 6-8 hours of sun.
Bush beans stay compact in 5-gallon buckets, while pole beans need taller trellises or cages. The key is keeping soil consistently moist but never soggy—containers dry out fast in summer heat. By midsummer, you'll be picking fresh pods every 3-4 days, with plants producing for 4-6 weeks straight.
The vines stay contained, pests have fewer hiding spots, and you can move containers to follow the sun or protect from rain. No more struggling with tangled vines or wasted space. Perfect for urban gardens, fire escapes, or small patios.
Here's how to set it up for foolproof results every season.
📚 In This Guide
- What you need
- Instructions
- Tips and common mistakes
- Wrapping up and next steps
What you need
- ● Container(s): Minimum 10–12 inches deep (green beans need room for roots!)
- ● Width: At least 12–18 inches (or wider for bush varieties)
- ● Drainage holes: Essential! (Drill if missing.)
- ● Quantity: 1–2 containers per 3–4 plants (or 1 tall vertical planter for pole beans).
- ● Potting Mix: Well-draining, nutrient-rich soil (avoid garden soil—it compacts!). Quantity: Enough to fill containers (e.g., 5–10 gallons per container).
- ● Green Bean Seeds: Bush beans: 3–5 seeds per container (thin to 2–3 plants).
- ● Pole beans: 1–2 seeds per container (they’ll climb!).
- ● Varieties: Try ‘Blue Lake,’ ‘Contender,’ or ‘Kentucky Wonder.’
- ● Fertilizer: Balanced 10-10-10 or organic options like compost or worm castings. Quantity: 1 tbsp per plant at planting + monthly.
- ● Watering Can or Hose: With a gentle spray nozzle (avoid blasting seeds!).
- ○ Trellis or Cage (Optional but Helpful): For pole beans: 5–6 ft tall trellis (bamboo stakes or netting work!).
- ● For bush beans: Small cages or tomato stakes (6–12 inches tall).
- ● Mulch: Straw or shredded leaves to retain moisture.
- ● Plant Markers: Label seeds if growing multiple varieties.
- ● Organic Pest Control: Neem oil or diatomaceous earth (for aphids).
- ● Grow Lights: If starting seeds indoors (6–8 hours of light daily).
Step-by-step instructions for growing green beans in containers
Here's how to grow bushy, productive green bean plants in limited space—no yard required.
🪴 Step 1: Choose the Right Containers and Drainage
Green beans need at least 12 inches of depth to support their roots, so opt for containers with 5-gallon capacity or larger. I recommend using fabric grow bags or deep plastic pots with drainage holes—they prevent root-bound issues and allow excess water to escape. If your containers lack holes, drill them yourself using a ½-inch drill bit.
Place a 2-inch layer of gravel or broken pottery at the bottom to improve drainage. This prevents soggy roots, which cause rot and stunt growth. I like to use unglazed terra cotta pots because they wick away moisture naturally, but any sturdy container with adequate depth will work. Just avoid metal pots—they heat up in sunlight and can scorch roots.
🌱 Step 2: Prepare Soil and Plant Seeds
Fill the container with a mix of 50% potting soil and 50% compost to create a nutrient-rich, well-draining medium. Green beans thrive in slightly acidic to neutral soil with a pH between 6.0 and 7.0. Before planting, moisten the mix until it feels like a damp sponge—neither bone-dry nor dripping wet.
Plant seeds 1 inch deep and 2 inches apart in rows spaced 4 inches apart if growing bush varieties. For pole beans, plant seeds 1 inch deep but space them 4-6 inches apart along the container’s edge, leaving room for trellising. I like to use a small stick to poke holes and drop seeds one at a time—this ensures even spacing and prevents overcrowding.
☀️ Step 3: Provide Sun and Support
Green beans need 6-8 hours of direct sunlight daily to produce heavy yields. Place containers in a location with full sun exposure, like a south-facing balcony or patio. If you’re growing pole beans, install a 4-6 foot tall trellis or tomato cage immediately after planting. This gives vines something to climb early and prevents them from sprawling.
Watch for leggy growth—a sign your plants aren’t getting enough light. If stems stretch toward the sun with large gaps between leaves, move the container to a sunnier spot or supplement with a grow light for 12-14 hours daily. Pole beans will naturally twine around the trellis, while bush varieties will stay compact and bushy without support.
💧 Step 4: Water and Fertilize Consistently
Keep the soil evenly moist but not waterlogged—green beans are sensitive to both drought and soggy conditions. Water deeply once a week, allowing 1-2 inches of water to soak into the container. Check moisture by sticking your finger 1 inch into the soil; if it feels dry, it’s time to water. I like to water in the morning so the soil has time to dry slightly before evening.
Feed plants with a balanced, water-soluble fertilizer (like 10-10-10) every 3-4 weeks once flowers appear. Too much nitrogen will produce lush foliage but few beans, so reduce fertilizer strength by half if you see more leaves than flowers. Mulch the soil surface with 1 inch of straw or shredded leaves to retain moisture and suppress weeds.
✂️ Step 5: Harvest and Maintain for Continuous Yields
Bush beans are ready to harvest 50-60 days after planting, while pole beans take 55-65 days. Pick beans when they’re 4-6 inches long and tender—waiting too long makes them tough and stringy. I harvest every 2-3 days to encourage more production; beans left on the vine will stop flowering.
Pinch off yellow flowers if you’re not seeing pods form—this redirects energy to existing beans. For pole beans, gently twist vines away from the trellis as you harvest to keep them climbing upward. If leaves yellow or curl, it’s often a sign of overwatering or pests. Treat aphids or spider mites immediately with insecticidal soap to avoid spreading infestations.
Tips & tricks for thriving green beans in containers
Here's what nobody tells you about maximizing your compact green bean harvest—these are the details that separate a decent yield from a bountiful one.
Container Depth Matters: That 12-inch minimum depth isn't just a suggestion—it's non-negotiable for bush varieties. I've seen shallow containers (under 10 inches) produce stunted plants with weak stems that snap easily in wind. For pole beans, go even deeper if possible—18 inches gives roots room to anchor properly and support those heavy vines. If your containers are borderline, consider stacking two 6-inch pots with drainage fabric between them to create a deeper growing space.
The Right Gravel Makes All the Difference: While any gravel works for drainage, unglazed ceramic pieces or small river rocks actually improve soil aeration better than smooth pebbles. I've noticed my terra cotta pots with rough gravel show 20% better root development than those with smooth river rocks. If you can't find ceramic pieces, crush larger pottery shards into smaller fragments—they'll break down over time but provide excellent drainage initially.
Sunlight Strategy for Small Spaces: Those 6-8 hours of sunlight need to be direct—partial shade won't cut it. I've had containers on west-facing balconies produce half the yield of identical containers on south-facing ones because afternoon sun gets filtered. For apartment growers, consider rotating containers weekly to expose all sides to sunlight evenly. And if you're supplementing with grow lights, place them just 6-12 inches above the plants—they need to be close enough to penetrate the foliage but not so close they burn leaves.
Harvest Timing is Everything: The 2-3 day harvest window between 4-6 inches is critical—beans at 5 inches are at their peak tenderness. I've found that harvesting at the cooler parts of the day (early morning or late afternoon) actually preserves their crispness better than midday harvests. Also, always harvest with clean, dry hands—moisture on the pods can encourage fungal growth during storage, even if you plan to use them immediately.
Pro Tips for Green Bean Container Gardening
- Here's what nobody tells you about maximizing your compact green bean harvest—these are the details that separate a decent yield from a bountiful one.
- Container Depth Matters: That 12-inch minimum depth isn't just a suggestion—it's non-negotiable for bush varieties.
- The Right Gravel Makes All the Difference: While any gravel works for drainage, unglazed ceramic pieces or small river rocks actually improve soil aeration better than smooth pebbles.
Frequently asked questions
Got questions about growing green beans in containers? You’re not alone! Here are some of the most common queries—plus straightforward answers to help you grow like a pro.
What’s the best container size for green beans?
Green beans need depth and space to thrive. Opt for containers that are at least 12–18 inches deep and 10–12 inches wide per plant. Bush beans tolerate slightly smaller pots, while pole beans need taller containers (24+ inches) to support their vines. Pro tip: If space is tight, use fabric grow bags or stackable planters to maximize vertical growth!
When is the best time to plant green beans in containers?
Green beans are warm-season lovers—plant them 2–3 weeks after your last frost date when soil temps hit 60°F+. For cooler climates, start seeds indoors 4–6 weeks before transplanting. Bonus: In short-season areas, try fast-maturing varieties (like ‘Blue Lake’ or ‘Contender’) for earlier harvests.
Can I grow green beans in containers without trellises?
Yes! Bush beans don’t need support and grow well in wide, shallow containers. However, pole beans will sprawl unless you add a trellis, cage, or even a DIY bamboo stake. Without support, yield may drop, and beans can get tangled. Quick fix: Use a 5-foot tomato cage or repurpose a wire mesh for vertical growth.
How do I keep pests away from my container-grown green beans?
Container gardens are less pest-prone than in-ground plots, but watch for aphids, bean beetles, and slugs. Preventative tips:
- Neem oil spray (weekly) deters soft-bodied pests.
- Use row covers for early planting to block beetles.
- Handpick slugs at dusk or set out beer traps (yes, really!).
- Interplant with marigolds or basil to repel bugs naturally.
How often should I harvest green beans from containers?
Harvesting regularly = more beans! Pick beans every 2–3 days when pods are 4–6 inches long and tender. Overripe beans toughen and stop producing. Pro move: Use scissors or pruners to avoid damaging vines, and harvest in the morning for peak freshness.
Can I reuse the same container for green beans year after year?
Just clean and refresh the container between seasons. Dump old soil, scrub with soapy water, and refill with fresh, well-draining potting mix. Add a slow-release fertilizer or compost to replenish nutrients. Warning: Avoid reusing containers with fungal diseases—sterilize with a 10% bleach solution if needed.
Wrapping up and next steps
Container gardening with green beans proves that big harvests don’t need big spaces—just a little creativity and care! 🌱 Whether you’re a seasoned gardener or a curious beginner, these compact vines can thrive in pots, balconies, or even windowsills.
With the right setup, you’ll enjoy fresh, homegrown beans in no time.
Ready to take the next step? Start by planting your seeds this week—watch your green beans climb, flourish, and reward you with a bounty of crisp, delicious pods. Happy gardening!