
Vegetables
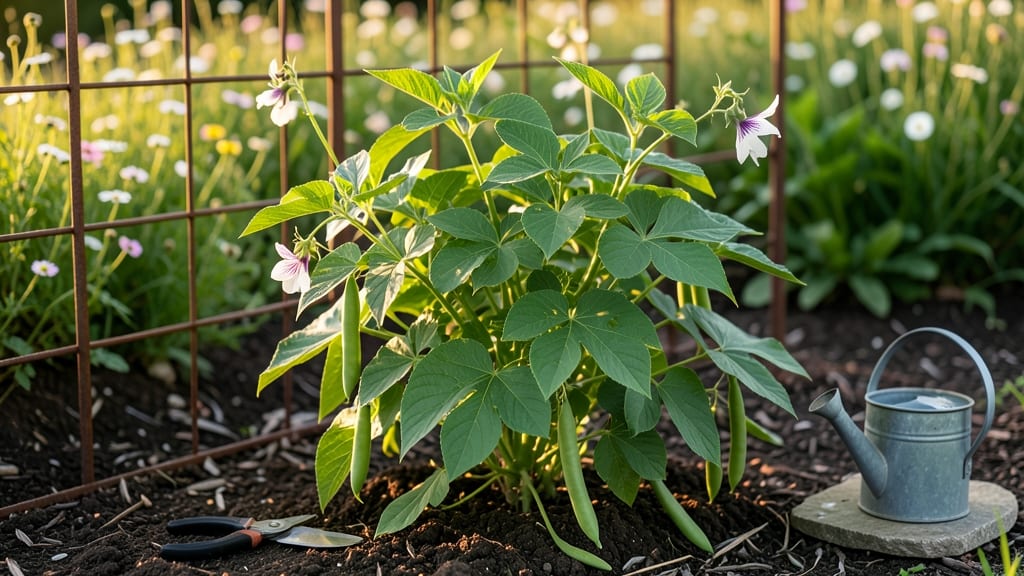
Growing green beans in raised beds cuts the guesswork out of a crop that can be finicky in the ground. 🌱 I’ve learned the hard way that soil drainage and warmth make all the difference—my first attempt in regular garden beds left me with stunted plants and half the yield.
Raised beds solve those problems while keeping pests at bay and making harvesting a breeze.
The secret starts with soil: mix in 3 inches of compost and a handful of aged manure before planting. Green beans thrive in loose, well-draining soil, and raised beds warm up faster in spring, giving you a jump on the growing season.
Space seeds 4-6 inches apart in rows 18 inches apart—this keeps air circulating and makes it easy to reach every plant without disturbing the soil.
By mid-summer, you’ll be snapping fresh pods straight from the vine, and with successive plantings every 2-3 weeks, your harvest stretches from June through September. The key is consistent moisture—1 inch of water per week—and a little shade cloth on hot afternoons to prevent strings from toughening.
Even in small spaces, a 4x8-foot raised bed can produce enough beans to feed a family for months.
For organic pest control, plant nasturtiums around the edges—they deter aphids and add a pop of color. The biggest mistake? Overcrowding or planting too late. Green beans grow fast, but they need warm soil (60°F+) to germinate.
Start seeds indoors 2-3 weeks before your last frost if your spring is chilly, and you’ll avoid the disappointment of slow starts.
📚 In This Guide
- What you need
- Instructions
- Tips and common mistakes
- Wrapping up and next steps
What you need
- ● Raised bed: 4’ x 8’ (minimum) or custom size (height: 6–12” for easy access). Use untreated wood (cedar or redwood) or composite materials.
- ● Quality soil: 1 cubic yard of well-draining garden soil mixed with 2–3 inches of compost or aged manure.
- ● Green bean seeds: 1–2 lbs (pole beans: 10–12 seeds/foot; bush beans: 3–4 seeds/foot). Choose heirloom varieties like ‘Blue Lake’ or ‘Contender’ for best results.
- ● Fertilizer: Balanced organic fertilizer (10-10-10) or compost tea (follow package rates).
- ● Mulch: Straw or shredded leaves (2–3 inches) to retain moisture.
- ● Trellis or stakes: For pole beans: 6–8 ft tall trellis or 5–6 ft stakes (1 every 3–4 ft).
- ● Drip irrigation or hose: Soaker hoses work best for consistent moisture.
- ● Gloves & kneeling pad: For comfortable planting and weeding.
- ● Row covers (frost protection or pest deterrent).
- ● Organic pest control (neem oil, diatomaceous earth).
- ● Soil pH tester (ideal range: 6.0–7.0).
- ● Seedling heat mat (if starting indoors early).
- ● Label markers (to track varieties).
Step-by-step instructions for planting green beans in raised beds
Here’s how to grow vigorous green beans in raised beds—no guesswork, just reliable harvests.
🌱 Step 1: Prepare the Raised Bed Soil for Planting
Start by removing any weeds or debris from the bed. Green beans thrive in loose, well-draining soil with a pH between 6.0 and 7.0. Amend the soil with 2-3 inches of compost mixed into the top 6-8 inches of the bed. This ensures nutrients are accessible but not compacted.
For raised beds, I like to add a 5-10-10 fertilizer at a rate of 1 pound per 100 square feet to give the beans a strong start. Work it into the soil, then lightly rake the surface to create a fine, crumbly texture. Avoid heavy tilling—beans have shallow roots and need a loose environment to spread.
🌱 Step 2: Choose and Plant the Right Variety
Select a bush or pole variety suited to your climate. Bush beans mature faster (about 50-60 days) and are ideal for smaller raised beds, while pole beans take longer (60-70 days) but produce continuously. I plant ‘Blue Lake’ bush beans for early harvests and ‘Kentucky Wonder’ pole beans for a prolonged yield.
Plant seeds 1 inch deep and 3-4 inches apart in rows spaced 12-18 inches apart. For pole beans, install trellises or stakes along one side of the bed before planting—beans will twine upward naturally. Water the soil thoroughly after planting to settle the seeds and encourage quick germination.
☀️ Step 3: Provide Consistent Water and Light
Green beans need 1-1.5 inches of water per week, delivered consistently. I water mine deeply 2-3 times per week rather than daily shallow watering, which prevents root rot and encourages deeper root growth. Check moisture by sticking your finger 1 inch into the soil—if it feels dry, it’s time to water.
Place the raised bed in full sun (6-8 hours daily) for best production. If your climate is hot, provide afternoon shade during peak summer months to prevent beans from bolting (flowering too early). You’ll know they’re getting enough light when the leaves stay dark green and glossy without yellowing.
🌿 Step 4: Maintain and Harvest for Continuous Yields
Keep the bed free of weeds, which compete for nutrients. Mulch with straw or grass clippings to retain moisture and suppress weeds. When beans begin flowering, watch for white or purple blossoms—this signals fruit will form in 7-10 days. Harvest when pods are 4-6 inches long and crisp for the best flavor.
Pole beans will need gentle guidance up the trellis as they grow. Pinch off any side shoots that form below the first 6 inches of the main stem to encourage upward growth. If you notice yellowing leaves, it’s often a sign of overwatering or nutrient deficiency—adjust watering or add a balanced fertilizer at half strength.
⏰ Step 5: Extend the Season with Succession Planting
For a year-round harvest, plant successive crops every 2-3 weeks during the growing season. In cooler climates, use row covers to extend the season into early spring or late fall. I’ve grown beans well into October with simple frost blankets when temperatures dip below 50°F.
After the first harvest, let a few plants mature and dry on the vine. The beans will turn brown and harden—save these for seed next year or use them in soups and stews. Clean up the bed after the last harvest by removing old plants and adding fresh compost for the next planting.
Tips & tricks for perfect green beans in raised beds
Here's what I've learned from years of growing green beans in raised beds—these tricks will help you avoid common pitfalls and maximize your harvest.
Soil Preparation Secret: When amending your raised bed with compost, don't just spread it on top—work it into the top 6-8 inches of soil as instructed. I've found that adding a handful of perlite or vermiculite to the mix improves drainage even more, especially if your soil tends to compact. This loose structure is crucial because green beans have shallow roots that need room to spread and access nutrients efficiently.
Planting Depth Matters: The 1-inch planting depth recommendation is perfect for most climates, but in hotter regions, you can plant seeds slightly deeper—about 1.5 inches—to keep them cooler and moister. Just be prepared for a slightly longer germination time (7-10 days instead of 5-7). For cooler climates, stick to the 1-inch depth to encourage faster sprouting.
Watering Wisdom: Those 2-3 weekly waterings should be deep enough to reach the full 6-8 inches of amended soil. I use a long-handled trowel to check moisture depth—if the soil feels dry at that depth, it's time to water. This approach prevents surface drying while encouraging roots to grow deeper, which makes your plants more drought-resistant once established.
Pole Bean Trellis Hack: For pole beans, I've had the most success with flexible garden twine rather than rigid stakes. String the twine between sturdy posts at the corners of your raised bed, then loosely weave additional twine horizontally every 12 inches. This creates a gentle lattice that guides the vines upward without restricting their natural growth pattern. The beans will cling to this support system beautifully.
Pro Tips for Green Beans Raised Bed
- Here's what I've learned from years of growing green beans in raised beds—these tricks will help you avoid common pitfalls and maximize your harvest.
- Soil Preparation Secret: When amending your raised bed with compost, don't just spread it on top—work it into the top 6-8 inches of soil as instructed.
- Planting Depth Matters: The 1-inch planting depth recommendation is perfect for most climates, but in hotter regions, you can plant seeds slightly deeper—about 1.5 inches—to keep them cooler and moister.
Frequently asked questions
Got questions about growing green beans in raised beds? You're not alone! Here are answers to the most common queries to help you cultivate a thriving harvest with confidence.
When is the best time to plant green beans in a raised bed?
For bush beans, plant after the last frost when soil reaches 60–65°F (15–18°C). Pole beans can handle slightly cooler soil (55°F/13°C). In warm climates, plant in early spring or fall to avoid summer heat stress. Succession plant every 2–3 weeks for continuous harvests!
How long does it take for green beans to grow in a raised bed?
Bush beans mature in 50–60 days**, while pole beans take 60–70 days. Factors like sunlight (6+ hours/day), soil warmth, and moisture speed up growth. Check seed packets for exact varieties—some dwarf types may be ready in as little as 45 days!
What pests or diseases should I watch for in raised bed green beans?
Common culprits include bean beetles, aphids, and whiteflies. Prevent issues with row covers or neem oil. Watch for rust or powdery mildew—improve airflow and avoid overhead watering. Crop rotation and healthy soil (add compost!) reduce long-term risks.
Can I grow green beans in a raised bed over winter?
In mild climates (Zones 8–10), use cold-hardy varieties (like 'Christmas Limas') and protect with row covers or mulch. In colder areas, grow in greenhouses or containers with supplemental light. Most beans need 60+ days of warmth, so plan accordingly!
What can I plant after green beans in a raised bed?
Green beans are light feeders, so follow with heavy nitrogen users like corn, potatoes, or leafy greens. Avoid replanting beans (or other legumes) in the same spot for 2–3 years to prevent soil-borne diseases. Cover crops (e.g., clover) can refresh the bed between seasons!
Wrapping up and next steps
Growing green beans in raised beds is a rewarding way to enjoy fresh, homegrown produce—even in small spaces! With the right setup, you’ll harvest crisp, flavorful beans all year long while keeping weeds and pests under control.
Whether you’re a beginner or a seasoned gardener, this method makes success simple and satisfying.
Ready to dive in? Start by sketching your raised bed layout and gathering your supplies—then watch your garden thrive! 🌱✨