
Container Gardens
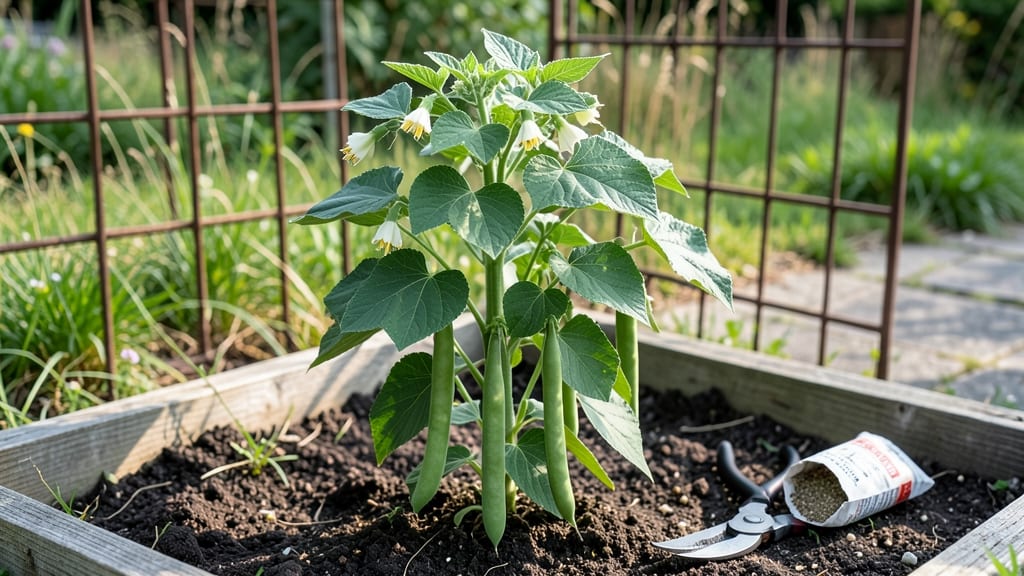
Growing bush green beans isn't just about waiting for harvest—it's about transforming a small patch of soil into a 50-day salad bar that outproduces anything you'd buy at the store. 🌱 I learned the hard way that skipping soil prep or crowding plants cuts yields by half, but when done right, these beans deliver pounds of crisp pods with almost no effort.
The secret lies in loose, well-draining soil mixed with compost (no fancy amendments needed) and spacing plants 4-6 inches apart in rows 18 inches apart. They thrive in full sun but tolerate partial shade, and watering just 1-2 inches per week keeps them happy without the hassle of daily checks.
Most varieties like 'Blue Lake' or 'Contender' germinate in 7-10 days—just plant seeds 1 inch deep and keep the soil warm. By day 40, you'll be harvesting 1-2 pods daily from each plant, and the more you pick, the more they produce.
The beans stay tender and sweet when harvested young, and the plants naturally resist many pests thanks to their bushy growth habit. Even my blackest thumb can't kill these if you follow the basics. Works in containers, raised beds, or in-ground plots—just avoid heavy clay soil.
Here's how to get started without overcomplicating it!
📚 In This Guide
- What you need
- Instructions
- Tips and common mistakes
- Wrapping up and next steps
What you need
- ● Bush green bean seeds – Choose a fast-maturing variety like Blue Lake or Contender (1–2 lbs covers ~1,000 sq ft).
- ● Well-draining soil – Mix 60% topsoil, 30% compost, and 10% perlite/sand for optimal aeration.
- ● Containers or garden bed – Minimum 6-inch depth; 5-gallon pots or raised beds (12" wide x 12" deep) work well.
- ● Organic fertilizer – 5-10-10 or compost tea (1 tbsp per plant at planting).
- ● Mulch – Straw or shredded leaves (2–3 inches) to retain moisture.
- ● Garden trowel or transplanter – For digging holes (1–2 inches deep).
- ● Watering can or hose with nozzle – Keep soil consistently moist (not soggy!).
- ○ Trellis or stakes (optional) – Only if growing pole beans (not bush types).
- ○ Row cover or shade cloth (optional) – Protects from pests like Mexican bean beetles.
- ● Plant markers – Label seeds if growing multiple varieties.
Step-by-step instructions for growing bush green beans
Here's how I grow bush beans that produce heavy harvests in just 50 days—no trellis needed.
🌱 Step 1: Prepare the Soil for Optimal Germination
Bush beans thrive in warm, well-drained soil with a pH between 6.0 and 7.0. Work in 2-3 inches of compost (or aged manure) into the top 6 inches of soil to improve fertility and drainage. I like to add a handful of bone meal at planting time—it provides phosphorus for strong root development and early flowering.
If your soil is heavy clay, mix in 1-2 inches of coarse sand or perlite to prevent waterlogging. Bush beans hate soggy roots, which leads to rot and poor germination. Test your soil moisture by squeezing a handful—it should hold together but not feel sticky. If it's too compact, add more organic matter and work it in thoroughly.
☀️ Step 2: Plant Seeds at the Right Depth and Spacing
Wait until the soil temperature reaches at least 60°F before planting—cold soil slows germination and can cause seed rot. Plant seeds 1 inch deep and 3-4 inches apart in rows spaced 18-24 inches apart. Bush beans grow in compact bushes, so crowding them too closely reduces airflow and increases disease risk.
I plant 3-4 seeds per hill and thin to the strongest seedling once they're 2 inches tall. This ensures you don't lose your entire harvest if one seed fails to germinate. Water gently after planting to settle the soil around the seeds, but avoid soaking the area—excess moisture can wash seeds deeper than intended.
💧 Step 3: Maintain Consistent Moisture Without Overwatering
Keep the soil evenly moist but never soggy during the first 3 weeks after planting. Bush beans need about 1 inch of water per week, but they're drought-tolerant once established. I water deeply 2-3 times per week in dry climates, focusing on the base of the plants to prevent fungal diseases like rust.
Watch for yellowing leaves—this is often a sign of uneven moisture. If the soil feels dry 1 inch below the surface, it's time to water. Mulch with 2-3 inches of straw or grass clippings to retain moisture and suppress weeds. This also keeps the soil temperature stable, which is critical for consistent pod production.
✂️ Step 4: Harvest at Peak Freshness for Maximum Yield
Bush beans are ready to harvest when pods are 4-6 inches long and snap easily when bent. I pick every 2-3 days to encourage more production—beans left too long on the plant become woody and tough. Harvest in the morning when pods are crispest, and always pick from the bottom up to avoid breaking stems.
For the best flavor, use freshly picked beans within 24 hours. If you can't harvest daily, pick every other day and store pods in the fridge for up to 5 days. Stop harvesting when pods turn yellow or dry out—this signals the end of the plant's productive cycle. After the first harvest wave, you'll often see a second flush of beans in 7-10 days.
🌿 Step 5: Extend the Season with Succession Planting
To keep a steady supply, plant new seeds every 2 weeks after the first harvest until 6-8 weeks before your first frost. Bush beans grow quickly, so this strategy ensures you have fresh pods throughout the season. I mark planting dates on a garden calendar to avoid overlapping harvests.
If your growing season is short, choose early-maturing varieties (like 'Blue Lake' or 'Contender') that produce in 45-50 days. For cooler climates, use black plastic mulch to warm the soil and extend the season by 2-3 weeks. This simple trick can make the difference between a failed crop and a bountiful harvest.
Tips & tricks for perfect bush bean harvests
Here's what nobody tells you about growing bush beans that actually delivers results.
Soil Temperature Secret: That 60°F soil temperature isn't just a suggestion—it's the magic threshold where seeds actually germinate. I've planted in cooler soil and watched them rot in the ground. Use a soil thermometer for 3 consecutive days to confirm you've reached this temperature before planting. If you're in doubt, wait—your beans will thank you with faster, stronger growth.
Thinning Technique: When you thin to the strongest seedling at 2 inches tall, don't just pull the weak ones—cut them at the base with scissors. This prevents disturbing the roots of your remaining plants. I also recommend thinning on a cloudy day to reduce stress on the plants from direct sunlight.
Harvest Timing: Those 4-6 inch pods should snap cleanly when bent—this is your perfect harvest window. If you wait until they're fully mature, the beans inside become tough and mealy. I set a timer to check every 2-3 days starting about 24 hours after flowering begins, which is when pods first appear.
Season Extension: For that 2-3 week extension in cooler climates, lay down black plastic mulch 2 weeks before planting. This warms the soil faster than any other method. I've seen soil temperatures rise 10°F+ in just 48 hours after covering with black plastic—enough to get a jumpstart on the growing season.
Pro Tips for Growing Bush Green Beans
- Here's what nobody tells you about growing bush beans that actually delivers results.
- Soil Temperature Secret: That 60°F soil temperature isn't just a suggestion—it's the magic threshold where seeds actually germinate.
- Thinning Technique: When you thin to the strongest seedling at 2 inches tall, don't just pull the weak ones—cut them at the base with scissors.
Frequently asked questions
Got questions about growing bush green beans?
Here are the answers to the most common ones—so you can harvest crisp, flavorful beans with confidence!
How long does it take for bush green beans to mature?
Bush green beans typically mature in 50–60 days from planting, depending on the variety and climate. Some fast-maturing types (like ‘Blue Lake’ or ‘Contender’) may be ready in as little as 45 days. Check the seed packet for exact days-to-harvest—it’s your best guide!
What’s the best temperature for growing bush beans?
Bush beans thrive in warm soil (60–70°F) and air temperatures between 70–85°F. They’re not frost-tolerant, so wait until after the last frost to plant. If your spring is chilly, opt for heat-tolerant varieties like ‘Blue Lake’ or ‘Kentucky Wonder.’
Why are my bush bean leaves turning yellow?
Yellow leaves usually signal overwatering, nutrient deficiency, or disease. Check the soil—it should be moist but not soggy. If leaves are yellow with brown spots, it may be bacterial blight; remove affected plants and improve airflow. For pale yellow leaves, add compost or a balanced fertilizer (like 10-10-10).
Can I grow bush beans in containers? If so, what size pot do I need?
Bush beans are perfect for containers—just use a pot at least 12–18 inches deep and 12–18 inches wide per plant (or 2–3 plants in a larger container). Ensure it has drainage holes and fill with well-draining potting mix. Pro tip: Add a trellis or cage to save space!
How do I know when bush green beans are ready to harvest?
Pick beans when they’re 4–6 inches long and bright green, with a slight snap when bent. Harvest every 2–3 days to encourage more production. Wait too long? Beans turn stringy and tough—so stay on top of it! Use sharp scissors or pinch them off to avoid damaging the plant.
Wrapping up and next steps
Growing bush green beans is a rewarding and efficient way to enjoy a fresh, homegrown harvest in just 50 days—perfect for small spaces or container gardens! 🌱 With the right soil, sunlight, and care, you’ll soon be savoring crisp, flavorful beans straight from your garden.
Whether you’re a beginner or a seasoned gardener, this fast-growing crop is a fantastic addition to your edible landscape.
Now that you’re armed with tips and tricks, take the next step: grab your seeds, prep your containers, and plant! Watch as your tiny seeds transform into a thriving bush full of delicious pods. Happy gardening—and enjoy that first harvest! 🌟