
Vegetables
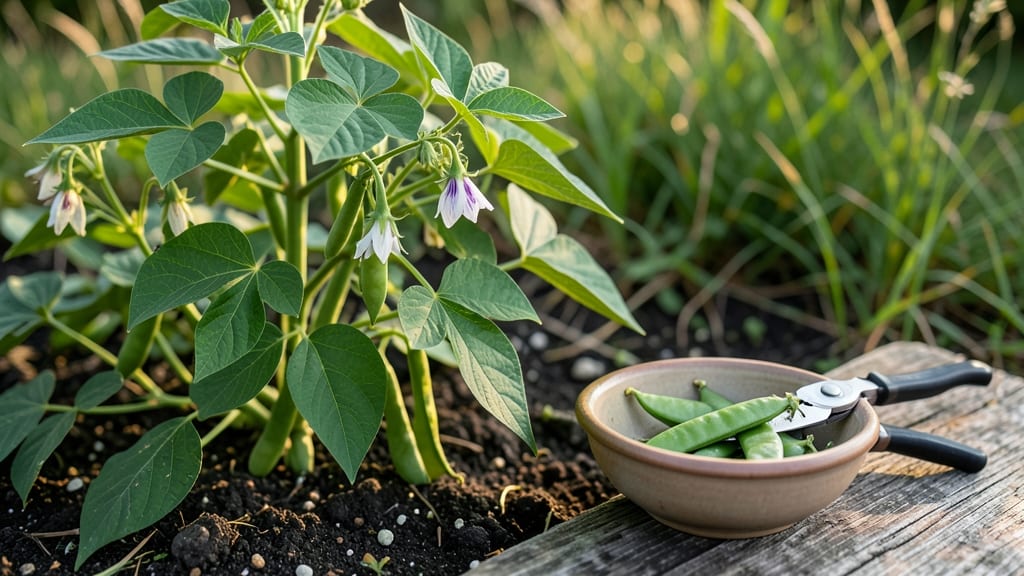
Learn how to collect green bean seeds from your harvest so next year’s plants grow true to type—no store-bought surprises. 🌱 I’ve turned my garden’s best beans into seeds that produce plants identical to their parents, and it’s easier than you’d think once you know the right pods to pick and how to dry them properly.
The secret starts with letting a few pods stay on the vine until they turn completely dry and papery—no harvesting them early for eating. You’ll need just a few supplies: a sharp knife, paper bags for drying, and a cool, dark spot for storage.
Most varieties mature in about 80-90 days, but some heirlooms take longer, so patience is key. Once fully dried, the seeds inside will rattle when you shake the pod. That’s your cue to crack them open, clean the seeds, and store them in an airtight container.
Properly saved seeds stay viable for 3-5 years, giving you a head start on next season’s harvest every time. This method works for bush beans, pole beans, and even those tricky heirloom varieties you can’t find at the store. Let’s get those seeds ready for planting!
📚 In This Guide
- What you need
- Instructions
- Tips and common mistakes
- Wrapping up and next steps
What you need
- ● Mature green bean plants: Choose healthy, disease-free plants from open-pollinated (not hybrid) varieties like 'Blue Lake,' 'Kentucky Wonder,' or 'Provider' (1-3 plants per variety recommended for variety).
- ● Scissors or pruning shears: Sharp, clean pair to avoid damaging pods (sterilize with rubbing alcohol if reusing).
- ● Paper bags or breathable seed-saving envelopes: 3-5 per plant (brown paper bags or kraft paper work best).
- ● Permanent marker: For labeling pods with plant variety and harvest date.
- ● Drying tray or screen: A clean, elevated surface (like a wire rack or cardboard) to air-dry pods.
- ● Fine-mesh sieve or colander: To separate seeds from dried pod debris.
- ● Small glass jars or airtight containers: For long-term seed storage (quart-sized mason jars work well).
- ○ Silica gel packets (optional but helpful): To absorb moisture in storage containers (2-3 packets per jar).
- ● Desiccant packets: Pre-made silica gel packets for easier moisture control.
- ● Humidity indicator cards: To monitor storage conditions (keeps seeds viable longer).
- ● Label maker or sticky notes: For extra-organized labeling (include variety, year, and location).
- ● Seed catalog or notebook: To track germination rates and notes on each variety.
- ● Fine paintbrush: For gently removing seeds from stubborn pods (great for small batches).
Step-by-Step instructions for collecting green bean seeds
Here's how to save seeds from your best beans—simple steps that ensure strong, true-to-type plants next season.
🌱 Step 1: Select the Healthiest, Most Productive Plants
Choose 4-6 of your strongest, most productive plants from the harvest—look for vines with the most pods and no signs of disease. I pick the ones that yield consistently over the entire season, not just early or late bloomers. Avoid plants with any brown spots, yellowing leaves, or stunted growth, as these traits can carry over to next year's seeds.
Harvest a few pods from each selected plant to confirm they're fully mature. The pods should be fully dry and papery on the vine, with seeds rattling inside when shaken gently. If they snap easily or feel soft, they're not ready yet. Let them stay on the vine until they're completely dry—this usually takes 2-3 weeks after the last harvest.
🌿 Step 2: Harvest and Dry the Pods Properly
Use clean, sharp scissors to cut the pods from the vine, leaving a small stem attached. Lay them out in a single layer on a clean, dry surface—like a baking sheet or cardboard box—where they can dry completely. I place mine in a well-ventilated spot (like a garage or covered porch) away from direct sunlight, which can cause them to overheat and crack.
Turn the pods every 2-3 days to ensure even drying. They're ready when the pods are completely brittle and the seeds inside rattle loudly when shaken. If you press a pod and it crumbles easily, it's time to process. This whole drying process takes about 2-3 weeks depending on your climate's humidity levels.
✂️ Step 3: Extract and Clean the Seeds
Once the pods are fully dry, place them in a paper bag and crush them gently by hand or with a rolling pin. The pods will shatter easily, releasing the seeds. I like to do this outside or over a bowl to catch any stray seeds. Remove any debris, chaff, or broken seed pieces—only keep the plump, whole seeds that look uniform in size and color.
Spread the clean seeds on a clean surface to air-dry for another 3-5 days. This final drying step ensures they'll store properly without molding. Store them in a paper envelope or airtight container in a cool, dark place. Label with the variety and date—seeds stay viable for 3-4 years when stored correctly.
💧 Step 4: Test Seed Viability (Optional but Recommended)
Before planting next season, do a quick viability test to ensure your seeds will germinate. Place 10 seeds between two damp paper towels in a sealed plastic bag. Keep them in a warm spot (70-75°F) and check daily. If 70% or more sprout within 7-10 days, your seeds are good to go. If fewer sprout, you may need to plant extra seeds to compensate.
This simple test saves you from planting dozens of seeds only to have them fail. I always do this test—it's the best way to confirm you've done everything right in the seed-saving process. If the test fails, try storing the seeds in a slightly cooler, drier place for another month before retesting.
Tips & tricks for perfect green bean seed collection
These little details make all the difference when saving seeds that'll grow into next year's best harvest.
Pod Maturity Matters: In Step 1, those 2-3 weeks on the vine are non-negotiable. I've learned the hard way that rushing pods off the vine too soon means shriveled, non-viable seeds. Test readiness by gently squeezing a pod—if it crumbles like a dry leaf, it's perfect. The seeds should rattle like marbles inside. If they don't, give them another week.
Drying Strategy: During Step 2's drying process, humidity is your enemy. If your climate is damp, consider using a small fan on low setting near your drying pods to circulate air. I've found that adding a silica gel packet to the drying container helps absorb excess moisture, especially in humid climates. Remember, the pods need to be completely brittle—not just dry to the touch.
Seed Selection: When cleaning seeds in Step 3, don't overlook this crucial step: use a fine-mesh sieve to separate seeds from chaff. I've seen people skip this and end up with seeds mixed with pod debris, which can cause mold during storage. For extra cleanliness, place your seeds between two sheets of paper towel and gently rub them together to remove any remaining chaff.
Storage Wisdom: After your 3-5 days of final drying, store seeds in a glass jar rather than plastic for better moisture control. I've had better success with glass jars because they allow me to monitor condensation buildup, which is a sign of excess moisture. Label each jar with both the variety name and the year—this helps track seed age and viability over time.
Pro Tips for Collect Green Bean Seeds
- These little details make all the difference when saving seeds that'll grow into next year's best harvest.
- Pod Maturity Matters: In Step 1, those 2-3 weeks on the vine are non-negotiable.
- Drying Strategy: During Step 2's drying process, humidity is your enemy.
Frequently asked questions
Got questions about saving your own green bean seeds? You’re not alone—here are the most common ones, answered clearly!
When is the best time to harvest seeds from green bean pods?
Wait until the pods are fully mature and dry on the vine—usually 4–6 weeks after flowering. For bush beans, this means the pods turn brown and crispy; for pole beans, they’ll shatter open. Harvest seeds when the weather is dry to avoid mold. Pro tip: Pick seeds on a sunny day and let them dry indoors for 1–2 weeks.
Can I save seeds from store-bought green beans?
Probably not! Most grocery-store beans are hybrids (marked "F1" or "hybrid"), meaning their seeds won’t grow true to the parent plant. For reliable seeds, use heirloom or open-pollinated varieties from seed savers or your own garden. Look for labels like "OG," "OP," or "heritage."
What do I do if my seeds sprout mold or smell bad?
Mold or foul odors mean high humidity or poor drying. If caught early, spread seeds in a single layer on paper towels in a warm, dry place (like a sunny windowsill) for 2–3 days. Discard any seeds with fuzzy mold—these won’t germinate. For future batches, thin seeds frequently to prevent clumping.
How long can I store green bean seeds before planting?
Properly dried and stored seeds last 2–5 years in cool, dark conditions (below 40°F). Use paper envelopes or airtight containers with a silica packet to absorb moisture. Label each with the variety and date! Test viability by planting a few seeds—if <70% sprout, it’s time to refresh your stash.
Are there easy green bean varieties for beginners?
Start with heirloom or open-pollinated types like:
- Kentucky Wonder (pole bean, reliable seeds)
- Blue Lake Bush (disease-resistant, great for drying)
- Contender (tolerates heat, pods stay productive)
Wrapping up and next steps
Collecting green bean seeds is a rewarding way to ensure a thriving garden next season! By selecting healthy pods, drying them properly, and storing seeds correctly, you’ll have a head start on fresh, homegrown beans. Your patience and care today will pay off with a bountiful harvest tomorrow.
Now that you’re equipped with the know-how, why not try it this year? Grab those ripe pods, follow the steps, and share your success with fellow gardeners. Happy seed-saving—and here’s to a garden full of green bean magic! 🌱✨