
Size
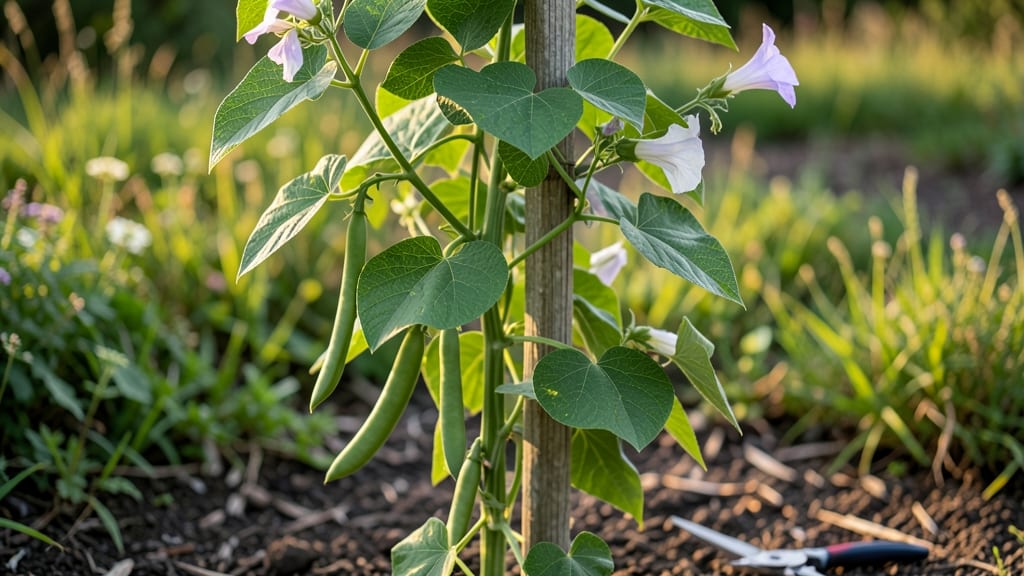
Growing green pole beans in just 55 days transforms a small corner of your garden into a lush, climbing green machine. 🌱 I learned the hard way that these beans aren't just fast—they're space-saving superstars, turning vertical what others grow sprawling.
The secret starts with soil that drains well but holds moisture, and a sturdy trellis before the first seed hits the ground.
Most beginners overlook the trellis setup, but these beans need support from day one to avoid tangled messes. A simple 4-foot tall mesh or twine trellis works wonders, and you'll see those first tendrils latch on within 10 days.
Water consistently—about 1 inch per week—but never let them sit soggy, or you'll invite fungal problems that slow growth.
By week 6, you'll be harvesting 6-inch pods that snap fresh from the vine, their bright green color signaling peak sweetness. The plants keep producing for months if you keep them pruned and fertilized lightly, giving you a steady supply without sacrificing garden space for sprawling rows.
Even in cooler climates, these beans thrive with the right timing—plant after your last frost when soil reaches 60°F. If pests like bean beetles appear, a quick spray of neem oil keeps them at bay without harming pollinators.
The real magic? Watching those vines climb higher than your fence while your neighbors struggle with bush beans in the ground.
📚 In This Guide
- What you need
- Instructions
- Tips and common mistakes
- Wrapping up and next steps
What you need
- ● Green pole bean seeds: Choose a variety like ‘Kentucky Wonder’ or ‘Blue Lake’ (1–2 lbs for a small garden, 3–5 lbs for larger harvests).
- ● Vertical trellis or support: Tall bamboo stakes (8–10 ft) or a DIY wire trellis (1–2 per 10 sq ft of garden).
- ● Netting or twine (for securing vines, 50–100 ft roll).
- ● Well-draining soil: Mix compost (2–3 inches) into garden beds or use potting mix for containers (1–2 bags per 4 sq ft).
- ● Watering can or hose: With a gentle spray nozzle (1–2 gallons capacity).
- ○ Fertilizer (optional but helpful): Balanced 10-10-10 or organic compost tea (1 tbsp per plant at planting time).
- ● Avoid high-nitrogen fertilizers (they promote leafy growth over beans!).
- ● Sunlight: Full sun (6–8 hours daily). Partial shade is tolerable but may reduce yield.
- ● Spacer: 4–6 inches between seeds (thin to 3–4 inches after sprouting). Rows should be 18–24 inches apart.
- ● Warm soil: Wait until soil temps reach 60°F+ (use a soil thermometer if unsure).
- ● Patience: Green pole beans mature in 55–65 days—plan ahead for a summer harvest! 🕒
- ● Mulch (straw or grass clippings) to retain moisture and suppress weeds.
- ● Row covers (for early planting in cool climates).
- ● Pruning shears (to trim overgrown vines).
- ● Harvest basket or bucket (for easy picking).
Step-by-step instructions for growing green pole beans vertically
Here's my foolproof method for growing pole beans that climb, produce, and save space—no sprawling vines in sight.
🪴 Step 1: Set Up Your Vertical Trellis System
Start by installing a sturdy trellis at least 6 feet tall—pole beans need vertical support to reach their full 10-12 foot potential. I use a simple A-frame made from 2x4 lumber with chicken wire or twine stretched between the uprights. The wider the spacing between supports, the stronger the structure needs to be—beans can get heavy once they start producing.
Position the trellis in a spot with full sun (6+ hours daily). If your garden gets afternoon shade, place the trellis where the beans will catch the morning sun first. This ensures even growth and prevents the vines from leaning toward the light. I like to install mine along a fence or patio railing for easy access during harvests.
🌱 Step 2: Plant Seeds at the Right Depth and Spacing
Sow seeds 1 inch deep and 4-6 inches apart in well-draining soil. I plant mine in late spring, after the last frost, when soil temperatures reach at least 60°F. The key here is patience—pole beans germinate best in warm soil, so don’t rush it. If your soil is cooler, consider using black plastic mulch to warm it up faster.
Water gently after planting to settle the soil around the seeds, but avoid soaking the area. Overwatering at this stage can cause the seeds to rot before they sprout. You’ll see tiny green shoots emerge in about 7-14 days, depending on your climate. Once they reach 3-4 inches tall, it’s time to guide them toward the trellis.
🌿 Step 3: Train Vines Up the Trellis and Maintain Growth
As the seedlings grow, gently weave the main stem around the trellis supports or tie them loosely with soft twine. Don’t wrap the twine too tightly—beans need room to breathe, and constricting the stem can stunt growth. I like to use a figure-eight tie method to secure the vines without damaging them.
Keep the soil consistently moist but not soggy—pole beans need about 1-1.5 inches of water per week. Let the top inch of soil dry out between waterings to prevent root rot. Once the plants start flowering, I add a balanced fertilizer (like 10-10-10) every 3-4 weeks to encourage heavy production. You’ll know you’re on track when you see white or pink blossoms followed by pod development in about 55 days.
✂️ Step 4: Harvest and Prune for Continuous Production
Harvest beans when they’re 4-6 inches long and still tender—this encourages more pods to form. I pick every 2-3 days to keep the plants productive. Use sharp scissors or pinch the pods gently to avoid damaging the vine. The more you harvest, the more your plants will produce—it’s like giving them a little nudge to keep going.
If you notice any yellowing leaves or stunted growth, check for pests like bean beetles or aphids. A strong spray of water usually knocks them off, but for severe infestations, I use neem oil as a natural remedy. Keep an eye out for powdery mildew too—if you see white fuzzy spots, improve air circulation around the plants and avoid overhead watering.
⏰ Step 5: Extend the Season with Successive Plantings
For a continuous harvest, plant new seeds every 2-3 weeks until 6-8 weeks before your first frost. This staggered approach ensures you always have fresh beans ready to pick. In warmer climates, you can even grow a fall crop by planting in late summer—just make sure to choose heat-tolerant varieties.
When the season winds down, cut the vines back to the ground and compost them. The next year, you’ll notice fewer pests and diseases because the soil is already enriched with bean residue. And if you’re feeling ambitious, save some seeds from your best-producing plants for next season!
Tips & tricks for growing green pole beans vertically
These simple strategies will help you maximize your vertical garden and avoid common growing mistakes with pole beans.
Trellis Stability: Your trellis needs to handle the weight of mature pole beans—those 10-12 foot vines can get surprisingly heavy once they're producing pods. I reinforce mine with additional cross-bracing if I notice any wobble, especially when the plants start flowering. A sturdy structure prevents snapped supports mid-season, which would be devastating after all that effort.
Soil Temperature Secret: The 60°F soil temperature requirement is non-negotiable for germination. If your spring is slow to warm, use clear plastic mulch to create a mini greenhouse effect—it raises soil temps by 5-10°F without needing extra heat. I test soil temperature with a simple thermometer before planting, and I've never had better germination than when I waited for that perfect window.
Watering Wisdom: Those 1-1.5 inches of water per week need to go directly to the roots, not the leaves. I water at the base in the morning to prevent fungal diseases that thrive in damp foliage. A drip irrigation system or soaker hose makes this effortless—just set it up and forget it until harvest time. Overhead watering can also wash away soil, exposing roots to the hot sun.
Harvest Hack: The 4-6 inch size guideline is your sweet spot for tenderness, but I've found that harvesting every 2-3 days actually encourages more pods to form. Think of it like pruning—you're telling the plant "keep producing!" rather than letting it focus all its energy on a few large pods. Use clean scissors to avoid damaging the vine, and always harvest in the morning when pods are most crisp.
Pro Tips for Grow Green Pole Beans
- These simple strategies will help you maximize your vertical garden and avoid common growing mistakes with pole beans.
- Trellis Stability: Your trellis needs to handle the weight of mature pole beans—those 10-12 foot vines can get surprisingly heavy once they're producing pods.
- Soil Temperature Secret: The 60°F soil temperature requirement is non-negotiable for germination.
Frequently asked questions
Got questions about growing green pole beans? You’re not alone! Here are some of the most common concerns—and their solutions—to help you grow a thriving vertical bean harvest with ease.
How long does it take for green pole beans to grow from seed to harvest?
Green pole beans are fast growers! With the right conditions, you can expect to harvest tender pods in just 55–65 days after planting. Start seeds indoors 2–3 weeks before the last frost or sow directly into warm soil (60°F+) for quicker results.
Can I grow green pole beans in containers or small spaces?
Pole beans are perfect for vertical gardening. Use a 5-gallon bucket, trellis, or even a sturdy wire cage to save space. Just ensure the container has drainage holes and is at least 12–18 inches deep to support their climbing habit.
Why are my pole bean leaves turning yellow, and what can I do?
Yellowing leaves often signal overwatering, nutrient deficiency, or fungal issues. Check soil moisture—beans prefer consistent but not soggy soil. Amend with compost for nutrients, and avoid overhead watering to prevent mildew. If pests (like aphids) are present, spray with neem oil or introduce ladybugs!
Do green pole beans need full sun, or can they tolerate partial shade?
While pole beans thrive in full sun (6–8 hours daily), they can tolerate partial shade (4–6 hours)—especially in hot climates. However, expect smaller yields if sunlight is limited. If growing in shade, choose a fast-maturing variety like ‘Contender’ or ‘Blue Lake.’
Are there any companion plants that help or harm green pole beans?
Pole beans are great companions with:
- Corn & cucumbers (the "Three Sisters" trio—beans fix nitrogen, corn provides shade, and squash suppresses weeds).
- Onions & garlic (repel pests like Mexican bean beetles).
- Fennel (inhibits growth).
- Potatoes (compete for nutrients).
Wrapping up and next steps
Growing green pole beans is a rewarding way to maximize your garden’s vertical space while enjoying a quick, fresh harvest in just 55 days! 🌱 With the right soil, support, and care, you’ll be savoring crisp, flavorful pods in no time.
Whether you’re a beginner or a seasoned gardener, these space-saving plants are perfect for small yards, balconies, or even containers.
Now that you’re armed with tips and tricks, roll up your sleeves and plant those seeds—your future meals (and Instagram-worthy garden) will thank you! Ready to harvest? Try experimenting with different varieties or companion plants next to take your green thumb to the next level.