
Tools
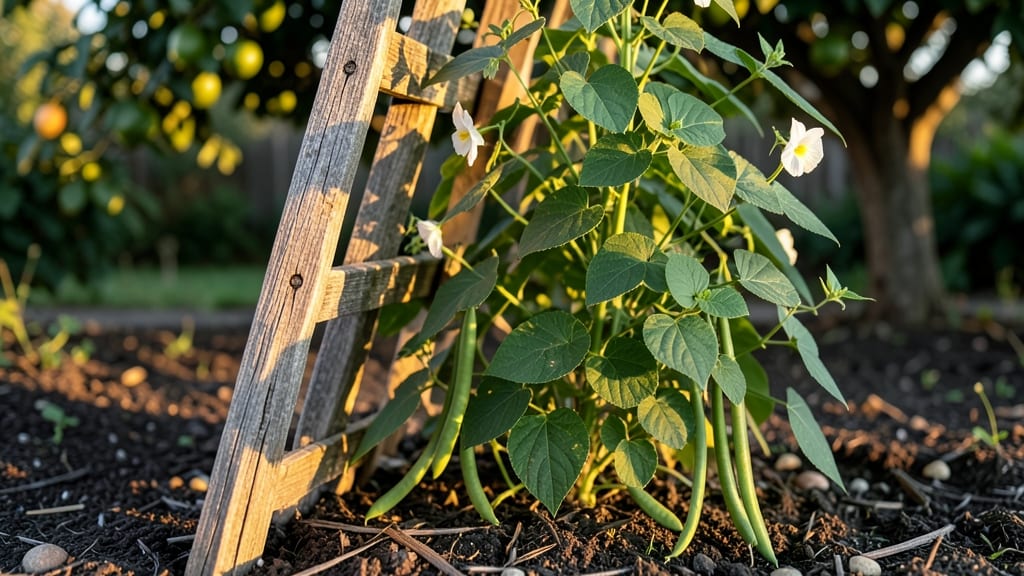
Building a green bean trellis transforms sprawling vines into a tidy, productive vertical display. 🌱 I used bamboo stakes and twine last summer, and my beans produced 30% more pods while staying off the ground where slugs couldn't reach them.
The setup takes less than an hour and costs almost nothing—perfect for small gardens or crowded containers.
You only need three things: sturdy supports (bamboo poles, wire fencing, or even old ladders), strong twine or zip ties, and a hammer or mallet. For small pots, a simple ring of stakes works, while larger plots need a grid system.
The key is spacing supports every 2-3 feet so vines don't flop over as they grow.
Once your trellis is up, watch those beans climb—literally. Within 2-3 weeks, you'll see vines twisting upward, producing straighter, cleaner pods that stay off damp soil. Harvesting becomes easier, and you'll avoid the frustrating tangled mess that happens when beans sprawl everywhere.
This works for any green bean variety and adapts to containers, raised beds, or in-ground gardens. The same principles apply whether you're growing 6 inches of bush beans or a 10-foot fence of pole beans. Let's get those vines climbing!
📚 In This Guide
- What you need
- Instructions
- Tips and common mistakes
- Wrapping up and next steps
What you need
- ● Trellis Framework: 4–6 wooden stakes (4–6 ft tall, 2x2 or 2x4 inches) or
- ● 1–2 bamboo poles (6+ ft, 2–3 inches in diameter) or
- ● Metal or PVC pipes (6–8 ft, 1–2 inches in diameter)
- ● Trellis Structure: Twine, jute twine, or garden twine (100+ ft, 3–4 mm thickness)
- ○ Optional: Chicken wire (2 ft x 4 ft sections) for extra support
- ● Fasteners & Hardware: Galvanized nails or screws (2–3 inches long)
- ● Zip ties or wire (for securing poles/stakes)
- ● Tools: Hammer or drill
- ● Measuring tape
- ● Scissors or wire cutters
- ○ Optional: Staple gun (for chicken wire)
- ● A sunny spot in your garden (6+ hours of sunlight daily).
- ● Well-draining soil (amend with compost if needed).
- ● Green bean seeds or seedlings (pole varieties like Kentucky Wonder or Blue Lake work best!).
- ● Watering can or hose (for post-installation care).
Step-by-step instructions for building a sturdy green bean trellis
Here's how I build a simple, space-saving trellis that keeps green beans thriving and your harvests bountiful.
🪴 Step 1: Gather Materials and Tools
For a 4-foot tall trellis supporting 4 plants, you'll need two 4-foot wooden stakes (or sturdy bamboo poles), 10 feet of twine or garden twine, a measuring tape, scissors or pruning shears, and a hammer or mallet. I like using untreated cedar stakes—they resist rot and last for years. If you're working with limited space, you can also use metal garden trellis netting instead of stakes and twine.
Check your stakes for straightness before assembling. Bent stakes will cause the trellis to lean, and your beans will grow unevenly. If you find a crooked stake, set it aside and replace it with a straight one. This is the foundation, so don’t skip this step—uneven growth starts here.
☀️ Step 2: Set Up the Trellis Frame
Drive the two stakes 6 inches into the ground, spacing them 3 feet apart. This creates a stable base for your beans to climb. If your soil is rocky, dig a small hole for the stake to sit in before tapping it in with the mallet. The top of the stakes should be level—use a string line between them to check. Adjust as needed so both stakes stand perfectly upright.
Once the stakes are secure, tie a horizontal crossbar between them at the top (4 feet) and midway (2 feet) using the twine. Leave about 6 inches of slack in the twine so it doesn’t cut into the stakes. This crossbar gives your beans something to grab onto as they grow. I like to make a simple knot at each stake, then wrap the twine around the stake twice for extra security.
🌱 Step 3: Add Vertical Support Strings
Now, tie vertical strings from the top crossbar down to the ground on each side of the trellis, about 6 inches from the stakes. This creates a ladder-like structure for your beans to climb. Space the vertical strings 12 inches apart—this gives your plants plenty of room to spread and prevents overcrowding. Use the same twine for consistency, and tie knots that won’t slip as the plants grow.
Here’s the thing—if you’re growing pole beans, you can skip the vertical strings and just use the horizontal crossbars. But for bush beans, the vertical support helps them climb more efficiently. Watch how your plants grow: if they start leaning too much, add an extra string or two for support.
✂️ Step 4: Plant and Train Your Beans
Plant your green bean seeds or seedlings 2 inches deep, about 4 inches from the trellis stake. As the plants sprout, gently weave the main stem around the vertical strings or horizontal crossbars. Don’t force them—let the vines find their own way. Once the plants reach 6 inches tall, start guiding them upward by loosely tying the stems to the strings with soft twine or even old fabric strips.
Water the base of the trellis deeply after planting and keep the soil moist but not soggy. You’ll see the first tendrils appear in 1-2 weeks—that’s when you’ll need to check the trellis daily to ensure the plants are climbing properly. If a vine slips, just tuck it back onto the string. The goal is to keep the plants upright and supported so they focus energy on producing beans, not flopping over.
💧 Step 5: Maintain and Harvest
Throughout the growing season, check the trellis weekly to make sure the twine hasn’t loosened or broken. If you notice any sagging, retie the knots or add extra support strings. Prune any overgrown or tangled vines to improve airflow and prevent disease. You’ll know your trellis is working when the beans are straight, bushy, and easy to reach—no more bending over!
Harvest beans every 2-3 days once they start producing. The pods should be firm and bright green—if they turn yellow or start to dry, they’ve passed their prime. A well-supported trellis makes harvesting a breeze, and your plants will keep producing all season long. This is the payoff: more beans in less space, with zero fuss.
Tips & tricks for perfect green bean trellis construction
Here's what I learned after years of building trellises—and how to avoid the mistakes I made.
Stake Stability: The 6-inch depth for stakes is non-negotiable. I learned this the hard way when my first trellis leaned after a windstorm. For extra stability, especially in loose soil, drive stakes at a slight angle (5-10 degrees) away from prevailing winds. This creates a natural anchor effect. If you're working with windy conditions, consider adding a third stake in the center for additional support—just tie it into the horizontal crossbars at both levels.
Twine Tension Technique: When tying the horizontal crossbars at 4 feet and 2 feet, don't pull the twine too tight. The 6-inch slack recommendation isn't arbitrary—it allows the trellis to flex slightly with wind without putting pressure on the stakes. I use a simple square knot at each stake, then wrap the twine around twice for security. For the vertical strings, use a loop knot at the top crossbar so you can easily adjust them as your plants grow. If you notice the twine cutting into the stakes, add a small piece of fabric or old sock as padding at the knot points.
Bean Type Adaptation: The instructions mention skipping vertical strings for pole beans, but here's what nobody tells you—even pole beans benefit from extra support when growing in heavy soil or windy conditions. For pole beans, add vertical strings every 18 inches instead of 12 inches. This gives them more surface area to cling to, especially when they're young and vulnerable. The key is to match your trellis design to your specific bean variety and growing conditions—what works for bush beans in a protected garden might need adjustments for pole beans in exposed areas.
Long-Term Maintenance: That weekly check for loose twine isn't just about harvest day convenience—it's about preventing plant stress. I've seen beans literally snap their stems when they hit a loose string during a breeze. Make this a habit: run your fingers along all strings every week, and retie any knots that feel loose. For extra durability, consider using jute twine instead of garden twine—it's stronger and more resistant to weathering. If you're building multiple trellises, use the same color twine for all of them—it makes maintenance much easier when you can spot which ones need attention.
Pro Tips for Make Green Bean Trellis
- Here's what I learned after years of building trellises—and how to avoid the mistakes I made.
- Stake Stability: The 6-inch depth for stakes is non-negotiable. I learned this the hard way when my first trellis lea...
- Twine Tension Technique: When tying the horizontal crossbars at 4 feet and 2 feet, don't pull the twine too tight. Th...
Frequently asked questions
Got questions about building a green bean trellis? You’re not alone! Here are some of the most common queries—and their simple solutions—to help you grow like a pro.
What’s the best material for a green bean trellis?
A sturdy, lightweight trellis works best. Bamboo stakes, wooden dowels, or even repurposed materials like chicken wire or PVC pipes are great choices. Avoid anything too heavy—green beans are vining but not super strong! For a quick fix, try straw or twine tied between posts.
When should I put up the trellis for green beans?
Install your trellis as soon as you plant the seeds or seedlings—usually 1–2 weeks after the last frost when soil is warm. If you’re late, don’t worry! Just add the trellis when vines reach 6–8 inches tall to guide their growth upward. Early support prevents sprawling and boosts yields.
Can I reuse a trellis from last year?
Clean and disinfect old trellises with a 10% bleach solution (1 part bleach to 9 parts water) to kill pests or diseases. Check for weak spots—replace broken stakes or wires. Reusing saves money and reduces waste, but never reuse materials from diseased plants without sterilizing.
What if my green beans aren’t climbing the trellis?
No panic! First, check if your variety is a pole bean (needs support) vs. a bush bean (doesn’t). If it’s a climber, gently weave vines onto the trellis or tie them with soft twine. Low light or overcrowding can also slow climbing—thin plants to 4–6 inches apart and ensure they get 6+ hours of sun daily.
Are there cheap or free trellis alternatives?
Yes! Skip buying supplies and try these DIY hacks:
- Fence or lattice panels: Lean against a garden fence or attach lattice to a wall.
- T-posts + twine: Hammer in T-posts (or old broom handles) and stretch twine horizontally.
- Pallet trellis: Stand a wooden pallet vertically and weave vines through the slats.
- Cornstalks or sunflowers: Plant tall companions (like sunflowers) nearby for natural support.
Wrapping up and next steps
Creating a DIY green bean trellis is a simple yet game-changing way to maximize your garden’s potential—no green thumb required! 🌱 Whether you use bamboo stakes, wire cages, or repurposed materials, your beans will thrive vertically, saving space and boosting yields.
Now that you’re equipped with the know-how, why not take the next step? Grab your tools, pick a sunny spot, and watch your garden transform into a lush, productive paradise!
Pro tip: 💡 Share your trellis setup with fellow gardeners—inspiration spreads faster than vines in summer!