
Planting
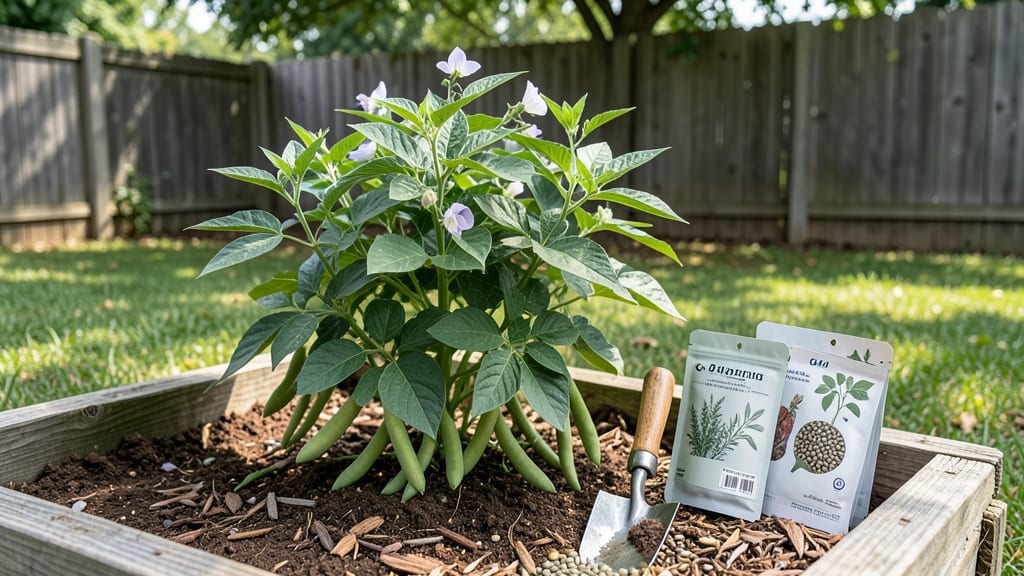
Planting bush bean seeds is the fastest way to a summer of crisp, tender pods—if you get the germination right. 🌱 I’ve lost count of the times my beans took forever to sprout (or worse, never did), until I learned these simple speed hacks that turn seeds into seedlings in 5-7 days—not weeks.
Start with warm, well-draining soil (60°F+) and plant seeds 1 inch deep, 3-4 inches apart in rows 18-24 inches apart. Bush beans love full sun (6+ hours daily) and consistent moisture—think of them as thirsty sunbathers.
The secret? A light mulch after planting keeps soil temps steady and moisture locked in.
You’ll know it’s working when those first pale green shoots punch through the soil in a week or less. Keep the area weed-free (they hate competition) and watch for pest pressure—early birds like slugs love young beans.
A quick spray of neem oil or crushed eggshells around seedlings deters them without harming your crop.
Once established, these plants grow fast—harvest begins in just 50-60 days—and they’ll keep producing until frost. The key is patience: don’t rush to thin seedlings, and resist picking pods too early (they’ll rebloom faster if you let a few mature). Now go dig in!
📚 In This Guide
- What you need
- Instructions
- Tips and common mistakes
- Wrapping up and next steps
What you need
- ● Bush bean seeds: 20–50 seeds (depending on your garden size; opt for heirloom or organic varieties like Blue Lake or Kentucky Wonder for best results).
- ● Well-draining soil: A mix of 60% topsoil, 30% compost, and 10% perlite/sand (or pre-mixed vegetable garden soil with a pH of 6.0–7.0).
- ● Planting containers or garden bed: Containers: 1–2 gallon pots (if growing indoors) with drainage holes.
- ● Garden bed: A sunny spot (6+ hours of sunlight daily) with loose, fertile soil.
- ● Watering can or hose with a gentle spray nozzle.
- ● Planting marker or stakes: To label rows and track growth.
- ● Seedling heat mat: Speeds up germination in cool climates (set to 70–80°F).
- ● Organic fertilizer: Low-nitrogen, high-phosphorus blend (e.g., 5-10-10) for root development.
- ● Row cover or cloches: Protects seedlings from pests or frost (remove once plants are 3–4 inches tall).
- ● Mulch (straw or grass clippings): Retains moisture and suppresses weeds.
Step-by-step instructions for planting bush bean seeds
Here’s my foolproof method for getting bush beans to sprout fast and strong—no more waiting weeks for stubborn seeds.
🌱 Step 1: Soak Seeds Overnight for Faster Germination
Place your bush bean seeds in a small bowl and cover them with warm water (about 80°F) for 8-12 hours. This softens the seed coat and triggers quicker germination. I use a shallow dish so the seeds don’t get buried under water—just enough to fully submerge them.
After soaking, drain the water and let the seeds sit for 30 minutes to dry slightly. This prevents them from rotting when planted. You’ll notice the seeds swell slightly—this means they’re ready. Don’t skip the drying step, or you’ll risk mold in the soil.
💧 Step 2: Prepare Warm, Well-Draining Soil
Bush beans thrive in soil that’s 60-70°F—warmer than most garden beds at planting time. If your soil is cool, mix in compost or aged manure to raise the temperature. Dig a shallow trench 1 inch deep and space seeds 3-4 inches apart in rows 18-24 inches apart.
Lightly water the trench before planting to settle the soil. Press each seed 1 inch deep—deeper planting slows germination, while shallower planting risks drying out. Cover with a thin layer of soil and pat gently. The goal is to keep the seeds moist but not waterlogged.
☀️ Step 3: Provide Consistent Moisture and Warmth
Keep the soil evenly moist (not soggy) until germination, which should happen in 5-10 days. A light misting with a spray bottle works best—it avoids disturbing the seeds. Place a clear plastic dome or row cover over the bed to trap warmth and humidity, especially if nights are cool.
Remove the cover as soon as sprouts appear to prevent rot. Watch for first true leaves (the second set after the initial seed leaves) to confirm healthy growth. If soil dries out before germination, seeds may rot—check daily and water gently.
✂️ Step 4: Thin Seedlings for Stronger Plants
Once seedlings have 2-3 sets of true leaves (about 3-4 weeks after planting), thin them to 4-6 inches apart. Use scissors to snip weak seedlings at soil level—this prevents disturbing roots of the remaining plants. The strongest, most upright seedling in each spot should win.
Thinning may seem cruel, but crowded beans compete for nutrients and light, leading to weak, spindly plants. After thinning, water deeply at the base to help roots establish. You’ll know you’ve done it right when plants stand tall with deep green leaves and no yellowing.
🌿 Step 5: Support Growth with Mulch and Staking (Optional)
Spread 2-3 inches of organic mulch around plants to retain moisture and suppress weeds. Straw or grass clippings work well. Bush beans don’t need staking, but if you’re growing in windy areas, a low cage or hoop can prevent plants from flopping over as they mature.
Keep soil moist but not waterlogged—beans are drought-tolerant once established, but consistent watering during flowering ensures good pod production. You’ll know your beans are happy when they start producing flowers in 4-6 weeks—soon after, you’ll harvest your first pods!
Tips & tricks for planting reliable bush bean sprouts
Real talk: Even the best-laid garden plans can go sideways with beans. These tricks help you avoid the most common pitfalls—and get those sprouts popping like clockwork.
Soak Like a Pro: That 8-12 hour soak in warm water (about 80°F) is your secret weapon, but here's the thing: Use a shallow dish—just enough water to fully cover the seeds. Too much water creates a swampy environment that can drown them before they even sprout. After draining, the 30-minute drying step is non-negotiable. I've seen seeds mold overnight when people skip this, and nobody wants a rotten seed surprise in their garden.
Soil Temperature is Everything: Bush beans are finicky about soil warmth—they need that 60-70°F range to germinate properly. If your garden soil feels cool to the touch, don't just plant and hope. Mix in compost or aged manure a week before planting to raise the temperature. Pro tip: Use a soil thermometer to check—if it's below 60°F, wait a few days or plant in a raised bed where soil warms faster.
Germination Checklist: When tracking those 5-10 days until sprouts appear, watch for two key signs: first, the soil surface will develop tiny cracks as moisture evaporates, and second, you'll see the first seed leaves (those initial skinny leaves) push through. If you're using a row cover, remove it immediately when you see these—don't wait for "true leaves" (the second set) to appear, or you risk overheating the delicate sprouts.
Thinning Without Guilt: I know thinning feels brutal, but here's what nobody tells you: The plants you remove actually feed the ones you keep. When you're thinning to 4-6 inches apart after 3-4 weeks, focus on keeping the most upright, darkest green seedlings. Use clean scissors to snip at soil level—this prevents disturbing the roots of your keepers. The plants you remove will decompose and return nutrients to the soil for your winners.
Pro Tips for Plant Bush Bean Seeds
- Real talk: Even the best-laid garden plans can go sideways with beans.
- Soak Like a Pro: That 8-12 hour soak in warm water (about 80°F) is your secret weapon, but here's the thing: Use a shallow dish—just enough water to fully cover the seeds.
- Soil Temperature is Everything: Bush beans are finicky about soil warmth—they need that 60-70°F range to germinate properly.
Frequently asked questions
Got questions about planting bush bean seeds? You’re not alone! Here are some of the most common concerns—and straightforward answers to help you grow like a pro.
How deep should I plant bush bean seeds?
Plant bush bean seeds about 1 to 1.5 inches deep in well-draining soil. They need warmth to germinate, so avoid burying them too shallowly—this can dry them out. A good rule of thumb: twice the width of the seed is ideal for most varieties.
How long does it take for bush bean seeds to sprout?
Under ideal conditions (warm soil, consistent moisture, and temperatures above 60°F), bush bean seeds typically sprout in 7 to 14 days. If your soil is cooler, germination may take up to 3 weeks. Patience is key—don’t overwater or disturb the soil while waiting!
Can I plant bush beans too early in the season?
Yes, but only if your soil is warm (at least 60°F). Cold soil slows germination and can lead to rot. Use a soil thermometer to check, or wait until after the last frost when nighttime temps stay above 50°F. For cooler climates, try starter kits or plant in containers near a sunny window.
What should I do if my bush bean seeds aren’t sprouting?
First, check for moisture—seeds need consistent dampness (not soggy) to germinate. If they’re still dry, gently water and cover with a thin layer of mulch to retain warmth. If mold appears, reduce watering and improve airflow. After 3 weeks, if nothing emerges, try replanting—seeds can lose viability over time.
Can I plant bush beans in containers instead of a garden?
Bush beans thrive in containers at least 12 inches deep with drainage holes. Use a lightweight potting mix and place them in a spot with 6+ hours of sunlight daily. Just ensure the container stays warm—black or dark-colored pots absorb heat better. Perfect for balconies or small spaces!
Wrapping up and next steps
Growing bush beans from seed is a rewarding and easy way to enjoy a bountiful harvest—especially when you use the right germination hacks! 🌱 By choosing the best seeds, pre-soaking, maintaining ideal moisture and warmth, and providing proper spacing, you’ll set your plants up for success.
With patience and care, you’ll soon be feasting on fresh, homegrown beans straight from your garden.
Now that you’re ready to plant, why not take the next step? Try experimenting with different varieties or even succession planting to keep your garden productive all season. Happy growing! 🌿