
Container Gardens
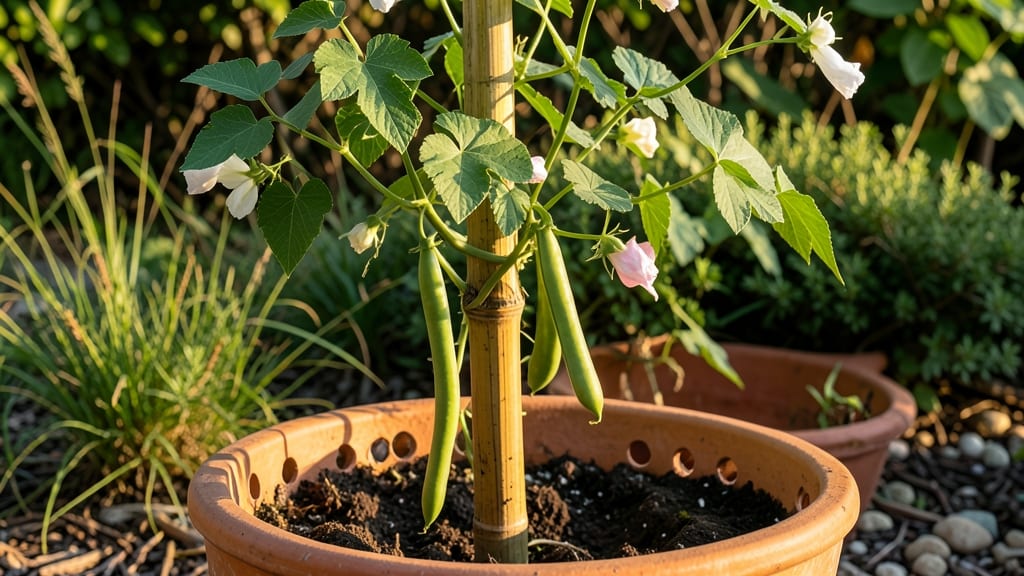
Growing pole beans in containers turns a tiny balcony into a vibrant green harvest factory. 🌱 I’ve grown them in 5-gallon buckets, repurposed rain gutters, and even old wooden crates—proof that you don’t need a backyard for bushels of beans.
The key? A sturdy trellis, loose soil, and consistent watering that keeps roots happy without drowning them.
Start with a 5-gallon container (minimum) and fill it with a mix of potting soil and compost—pole beans need room to stretch their roots deep. Plant seeds 1 inch deep, 4-6 inches apart, and give them a 4-6 foot tall trellis (bamboo stakes or netting work great).
Within 2-3 weeks, you’ll see those first tendrils climbing, and by midsummer, you’ll be snapping beans fresh from the vine.
The payoff is worth the effort: heavy harvests with minimal space. A single 5-gallon container can yield 1-2 pounds of beans per season, and the vertical growth keeps pests off the ground. Just watch for overwatering (containers dry out fast) and root binding (repot if growth slows after 6 weeks).
Perfect for urban gardens, patios, or even windowsills with enough light. With the right setup, you’ll be the neighbor everyone envies—no yard required. Let’s get those beans growing!
📚 In This Guide
- What you need
- Instructions
- Tips and common mistakes
- Wrapping up and next steps
What you need
- ● Container: A 5-gallon bucket (minimum) or large fabric grow bag (10+ gallons for better drainage). Ensure it has drainage holes at the bottom.
- ● Pole bean seeds: Choose heirloom or dwarf varieties like ‘Kentucky Wonder’ or ‘Blue Lake’ (3–5 seeds per container).
- ● Potting mix: A well-draining, nutrient-rich blend (e.g., 60% potting soil + 30% compost + 10% perlite or coco coir).
- ● Trellis or support: Bamboo stakes (3–4 ft tall, 2–3 per container) OR
- ● Wire mesh trellis (attached to container sides) OR
- ● Freestanding A-frame trellis (for multiple containers).
- ● Watering can or hose: With a gentle spray nozzle to avoid disturbing soil.
- ● Fertilizer: Balanced organic fertilizer (e.g., 10-10-10) or compost tea for a slow-release boost.
- ● Garden trowel – For planting and soil adjustments.
- ● Pruning shears – To trim leggy vines or dead foliage.
- ● pH testing kit – To ensure soil is slightly acidic (6.0–7.0).
- ● Mulch (straw or shredded leaves) – To retain moisture and suppress weeds.
- ● Garden gloves – For comfortable handling.
Step-by-Step instructions for growing pole beans in containers
Here's how to coax bountiful harvests from compact spaces using the right container setup.
🪴 Step 1: Select the Right Container and Trellis System
Choose a container that's at least 12 inches deep and 12 inches wide—pole beans need room for roots to spread and climb. I prefer fabric grow bags because their breathable walls prevent waterlogging while still supporting sturdy trellises. For four plants, a 5-gallon container works perfectly, but larger is always better.
Install a freestanding trellis or cattle panel arch inside the container before planting. The trellis should be at least 6 feet tall to support the full height of mature pole beans. Secure it with sturdy stakes or attach it to the container's sides if using a built-in trellis system. This vertical support prevents the plants from toppling and keeps pods off the ground, reducing disease risk.
🌱 Step 2: Prepare Soil and Plant Seeds at the Right Depth
Fill the container with a well-draining potting mix enriched with compost or aged manure. Pole beans are heavy feeders, so mix in a slow-release fertilizer (like 5-10-10) at planting time. Avoid garden soil—it compacts in containers and suffocates roots. Moisten the soil until it's damp but not soggy, like a wrung-out sponge.
Plant 4-5 seeds per container, burying them 1 inch deep in a small trench. Space seeds 2 inches apart to allow for thinning later. I like to plant seeds in a slight curve along the base of the trellis so the vines naturally climb upward. After planting, cover the seeds lightly with soil and water gently to settle everything in place. Keep the soil consistently moist until germination, which typically takes 7-10 days in warm soil.
☀️ Step 3: Provide Support and Optimal Growing Conditions
Once seedlings emerge, thin to the strongest 3-4 plants per container. Use scissors to snip weak seedlings at soil level—don't pull them, or you'll disturb the roots of the remaining plants. As the vines grow, gently weave them around the trellis in a spiral pattern. This encourages upward growth and prevents tangled messes later.
Pole beans thrive in full sun (6-8 hours daily) and warm soil temperatures (60-85°F). If your container garden gets afternoon shade, supplement with a reflective surface (like white plastic) on the north side to bounce extra light onto the plants. Water deeply 1-2 times per week, aiming for 1 inch of water per week. Let the top inch of soil dry out between waterings—consistent moisture prevents blossom-end rot and keeps pods tender.
💧 Step 4: Fertilize and Prune for Continuous Harvests
When plants reach 12 inches tall, apply a balanced liquid fertilizer (like 10-10-10) every 2-3 weeks to support flowering and pod production. I also side-dress with compost tea mid-season for a gentle nutrient boost. Stop fertilizing once pods start forming—too much nitrogen leads to leafy growth at the expense of beans.
Pinch off any flowers that appear in the first 4-6 weeks—this redirects energy to root and vine development. Once the main stem reaches the top of the trellis, prune the tip to encourage bushier growth. Harvest pods when they're 4-6 inches long and firm, picking every 2-3 days to keep production steady. Regular harvesting prevents overcrowding and encourages more flowers to form.
⏰ Step 5: Extend the Season and Prepare for Next Year
To prolong harvests, cover plants with frost cloth when nighttime temperatures dip below 50°F. Pole beans are sensitive to cold, so protect them until the first hard frost. If your growing season is short, opt for early-maturing varieties (like 'Blue Lake' or 'Kentucky Wonder') to maximize yields before fall.
After harvest, compost plant debris and clean the container thoroughly to prevent soil-borne diseases. Store trellises in a dry place for next year, and refresh the potting mix with new compost before replanting. With the right setup, your container-grown pole beans will produce heavy harvests for weeks, proving that even small spaces can deliver big rewards.
Tips & tricks for heavy pole bean harvests in containers
Here's what nobody tells you about maximizing your container-grown pole beans—these are the details that separate good harvests from truly abundant ones.
Container Size Matters: While the instructions recommend a 5-gallon container for four plants, I've found that adding an extra 2-3 gallons of capacity (up to an 8-gallon container) makes a noticeable difference in plant vigor and pod production. Larger containers hold more soil moisture and nutrients, which is especially important during hot summer days when containers dry out faster. If space is limited, opt for deeper containers—root depth is more critical than surface area for pole beans.
Trellis Stability is Non-Negotiable: The 6-foot trellis height in Step 1 is perfect, but stability is what separates thriving plants from toppling disasters. I've seen freestanding trellises tip over during windstorms or when vines become heavy with pods. For extra security, anchor your trellis with two sturdy stakes on opposite sides or use a cattle panel arch that's at least 3 feet wide at the base. This creates a wind-resistant structure that won't collapse when your plants reach their prime.
Soil Temperature Secret: Those warm soil temperatures (60-85°F) in Step 3 are crucial, but here's the part they don't mention: container soil cools down much faster than in-ground soil. If your mornings dip below 50°F, consider using a black plastic mulch around the container edges to absorb sunlight and warm the soil. You can also bury a black plastic bottle filled with warm water near the roots—this radiates heat slowly and helps maintain optimal temperatures for germination and growth.
Watering Wisdom: The 1-2 times per week guideline works for most climates, but container-grown pole beans actually benefit from more frequent, lighter waterings. I water mine every other day during hot weather, using about ½ inch of water each time. The key is keeping the top inch of soil consistently moist without waterlogging—containers drain quickly, but they also dry out just as fast. Mulching with straw helps retain moisture while preventing soil compaction from frequent watering.
Pro Tips for Pole Beans Grown In Containers
- Here's what nobody tells you about maximizing your container-grown pole beans—these are the details that separate good harvests from truly abundant ones.
- Larger containers hold more soil moisture and nutrients, which is especially important during hot summer days when containers dry out faster.
- Trellis Stability is Non-Negotiable: The 6-foot trellis height in Step 1 is perfect, but stability is what separates thriving plants from toppling disasters.
Frequently asked questions
Got questions about growing pole beans in containers? You’re not alone! Here are answers to the most common queries to help you grow like a pro.
How deep should my container be for pole beans?
Pole beans need at least 12–18 inches of soil depth to support their roots and vines. Deeper containers (20+ inches) allow for better stability and moisture retention, especially in hot climates. If using shallow pots, opt for bushier varieties like 'Kentucky Wonder' or 'Scarlet Runner' for smaller spaces.
When is the best time to plant pole beans in containers?
Plant pole beans after the last frost when soil temps reach 60°F+. In warm climates, start in early spring; cooler zones may wait until late May or June. Containers warm up faster than ground soil, so monitor moisture closely—beans hate soggy roots!
Can I grow pole beans in hanging baskets?
Yes! Use large, sturdy hanging baskets (12"+ diameter) with a trellis or netting inside. Choose compact varieties like 'Blue Lake Bush' or 'Rattlesnake' to prevent overcrowding. Ensure baskets have drainage holes and are placed where vines can climb freely—no sprawling allowed!
How do I keep pests away from my container-grown pole beans?
Prevent pests with neem oil sprays, row covers, or companion planting (try marigolds or basil). Watch for aphids or spider mites—hose off leaves gently to deter them. Elevate containers to reduce slug/snail access, and rotate pots occasionally to improve airflow.
How often should I harvest pole beans from containers?
Harvest every 2–3 days once pods form to encourage more production. Use sharp scissors to snip stems without damaging vines. Overripe beans toughen—pick when pods are 4–6 inches long and crisp. Pro tip: Harvest in the morning for the freshest flavor!
Wrapping up and next steps
Growing pole beans in containers is a game-changer for small spaces—packing big flavor and productivity into a tiny footprint! 🌱 With the right trellis, soil, and care, you’ll enjoy a bountiful harvest without sacrificing your garden’s real estate.
Whether you’re a balcony warrior or a patio pro, this method proves that big yields don’t need big plots.
Ready to level up your container garden? Start small—try a single container this season, experiment with varieties, and watch your confidence (and harvest!) grow. Next up? Share your progress or dive deeper into advanced trellis designs for even taller climbs!