
Planting
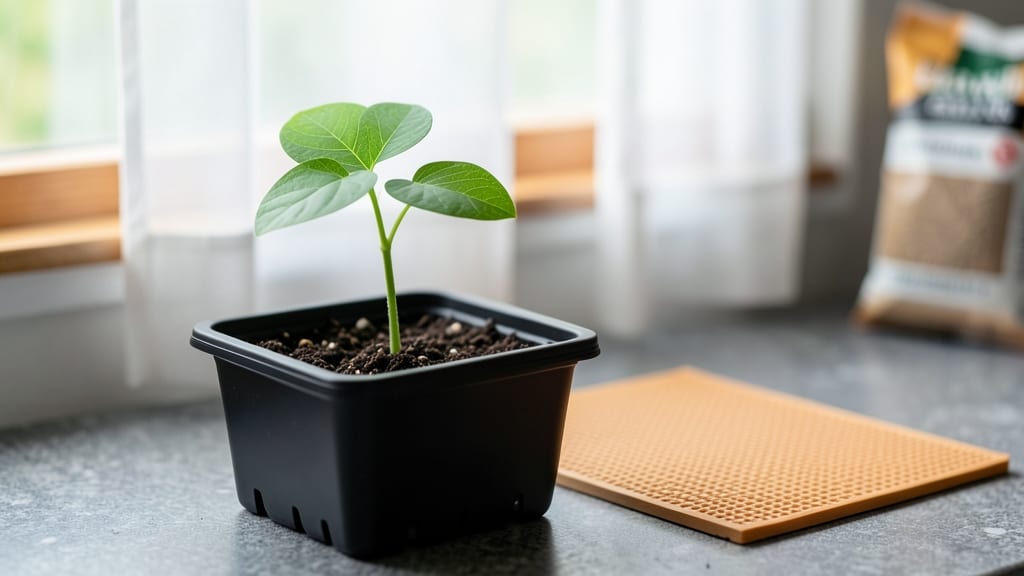
Sowing beans indoors with speed-soaking slashes germination time—my 48-hour sprouts outpace store-bought seedlings every time. 🌱 The trick isn't just patience; it's prep. Most gardeners overlook the soaking step, but those few hours make all the difference between weak, leggy starts and stocky, eager seedlings ready to transplant.
You'll need just three simple supplies: a shallow container (like a plastic takeout tray), damp paper towels, and a warm spot near a sunny window. No fancy grow lights or climate-controlled setups—just what's already in your kitchen.
The soil mix? Straightforward: 50% potting soil, 50% perlite for drainage that prevents those dreaded moldy seeds.
Within a week, you'll have seedlings with true leaves—not the tiny first leaves that fool beginners. The secret? Keep soil consistently moist (not soggy) and move containers to brightest light daily. I've had seedlings ready for transplant in just 10 days using this method, beating the 3-week average.
This works for bush beans, pole beans, and even heirloom varieties that nurseries won't carry. The same technique scales from a single pot to a seed-starting tray. Let's get those beans growing—your garden's summer harvest starts now.
📚 In This Guide
- What you need
- Instructions
- Tips and common mistakes
- Wrapping up and next steps
What you need
- ● Bean seeds: Choose fast-growing varieties like Bush Bean or Pole Bean (5–10 seeds per container). Opt for organic or heirloom seeds for best results.
- ● Seed-starting trays or small pots: 2–4" deep with drainage holes (1–2 trays or 6–12 small pots). Clear plastic or biodegradable options work well.
- ● Seed-starting mix: Lightweight, sterile mix (avoid garden soil—it’s too dense!). A 50/50 blend of peat moss and perlite or vermiculite is ideal (1–2 bags, depending on quantity).
- ● Watering can or spray bottle: With a fine mist nozzle to keep soil moist without oversaturating.
- ● Plastic wrap or humidity dome: To retain moisture and warmth during germination (or a clear plastic bag with holes poked in).
- ● Grow lights or sunny windowsill: Beans need 6–8 hours of light daily. A LED grow light (12–16 inches above seedlings) is perfect if natural light is limited.
- ● Heating mat: Speeds up germination (70–75°F is ideal). A small, adjustable mat fits most trays.
- ● Fertilizer: A balanced, water-soluble fertilizer (5-10-5 ratio) to boost early growth. Dilute to half-strength for seedlings.
- ● Plant labels: To track varieties and planting dates (toothpicks + masking tape work in a pinch!).
- ● Tweezers or small spoon: For gently placing seeds without crushing them.
- ○ Fan (optional): A small, low-speed fan to encourage sturdy seedlings by simulating wind.
Step-by-step instructions for sowing beans indoors
Here's my foolproof method for getting bush beans or pole beans sprouting strong in just days—not weeks.
🌱 Step 1: Speed-Soak Seeds for Faster Germination
Place 4-6 bean seeds in a small bowl and cover them with lukewarm water (about 85°F). Let them soak for 8-12 hours—you'll see the outer skins plump up noticeably. This pre-treatment breaks dormancy and triggers faster germination. I like to soak overnight so the seeds are ready first thing in the morning.
After soaking, drain the water and give the seeds a quick rinse. They should feel slightly heavier and more pliable. This is your signal they're primed for planting. If the water turns cloudy, rinse again—this prevents fungal issues down the line.
🪴 Step 2: Prepare Containers and Planting Mix
Fill small containers (like 3-inch pots or a seed tray with cells) with a lightweight seed-starting mix. I prefer a blend that's 70% peat or coco coir and 30% perlite for drainage. Moisten the mix until it's damp but not soggy—squeeze a handful gently; water should bead on the surface but not drip.
Make a small hole with your finger, about 1 inch deep. Drop 1-2 pre-soaked seeds into each hole—planting two ensures you have a backup if one fails to sprout. Cover lightly with more mix, just enough to hide the seeds but not bury them too deep. Pat the soil surface gently to settle everything.
💧 Step 3: Provide Warmth and Consistent Moisture
Place the containers in a warm spot, ideally near a seedling heat mat set to 75-80°F. Beans germinate fastest in warmth, and this ensures sprouts appear in 3-5 days instead of the usual week or more. Keep the soil consistently moist—water gently from below using a tray to avoid disturbing the seeds.
Once sprouts emerge, remove the heat mat but keep them in bright, indirect light. You'll notice the first tiny hooks (radicles) pushing through the soil within 24-48 hours of planting. This is your cue to reduce watering slightly—overwatering now can cause the delicate stems to rot before they strengthen.
☀️ Step 4: Transition to Strong Light for Healthy Growth
When the first true leaves (not the initial seed leaves) appear, move the seedlings to a south-facing window or under grow lights for 12-14 hours daily. Beans need plenty of light to prevent leggy growth. If using a grow light, position it 6 inches above the plants and raise it as they grow.
Watch for signs of light stress—if leaves turn pale or stems stretch excessively, your light source isn't strong enough. Strong seedlings will have deep green leaves and sturdy stems. Rotate the containers weekly so all sides get even exposure, preventing them from leaning toward the light.
⏰ Step 5: Harden Off and Transplant Outdoors
About 2 weeks before the last frost date, start hardening off your seedlings. Place them outside in a sheltered spot for 1-2 hours the first day, gradually increasing exposure over 7-10 days. Beans are sensitive to cold, so avoid transplanting until soil temperatures reach 60°F.
When transplanting, dig holes slightly deeper than the seedling's root ball to encourage strong root growth. Space bush beans 4-6 inches apart and pole beans 6-8 inches apart in rows 18-24 inches apart. Water deeply after planting to settle the soil and reduce transplant shock.
Tips & tricks for speed-soaking bean seeds indoors
Here's what nobody tells you about getting those stubborn bean seeds to sprout faster—and how to keep them thriving once they do.
Soak Temperature Precision: That 85°F lukewarm water is non-negotiable—too hot and you'll cook the seeds, too cold and germination slows dramatically. I use a kitchen thermometer to verify, especially when using tap water that might be cooler. The goal is to mimic the warmth of spring soil where beans naturally sprout. If you don't have a thermometer, let tap water sit for 10 minutes to reach room temp before using.
Seed Selection Strategy: Choose seeds that are uniformly plump and free of cracks or soft spots—these are your best bets for consistent germination. I've found that older seeds (over 2 years) often need an extra 24-48 hours of soaking to compensate for reduced vigor. Save your best seeds for indoor starts and use slightly fresher ones for direct outdoor planting where conditions are more forgiving.
Container Material Matters: The containers you choose affect drainage and root development. While 3-inch pots work well, I've had great success with biodegradable peat pots that can be planted directly in the garden later. Just ensure whatever you use has drainage holes—beans hate soggy roots. For seed trays, consider using clear plastic domes to create a mini greenhouse effect during the first 3-5 days of germination while maintaining that 75-80°F warmth.
Light Transition Hack: When moving seedlings to stronger light after the first true leaves appear, do it gradually over 3-4 days rather than all at once. I place my seedlings near an east-facing window first, then move them to a south-facing window by day 4. This prevents the shock of sudden bright light that can cause leaves to bleach. For indoor grow lights, use a timer to ensure that 12-14 hour cycle—beans are sensitive to inconsistent light exposure.
Pro Tips for Sowing Beans Indoors
- Here's what nobody tells you about getting those stubborn bean seeds to sprout faster—and how to keep them thriving o...
- Soak Temperature Precision: That 85°F lukewarm water is non-negotiable—too hot and you'll cook the seeds, too cold an...
- Seed Selection Strategy: Choose seeds that are uniformly plump and free of cracks or soft spots—these are your best b...
Frequently asked questions
Got questions about sowing beans indoors? You’re not alone—germinating beans can feel tricky, but with the right know-how, you’ll be well on your way to fast, healthy sprouts! Here are answers to the most common queries:
How long does it take for beans to sprout indoors?
With the speed-soak method, expect sprouts to crack through soil in 3–7 days—much faster than traditional methods! Keep seeds warm (70–80°F) and moist, and you’ll see tiny leaves (cotyledons) in about a week. Patience pays off, but don’t worry if some lag behind!
Can I sow beans indoors too early in the season?
Beans thrive indoors 4–6 weeks before your last frost date, giving them a head start. Just ensure they get 6–8 hours of bright light daily (a grow light helps). Harden them off outdoors 10–14 days before transplanting to avoid shock.
What if my beans sprout but look weak or leggy?
Leggy sprouts often mean too little light or overcrowding. Thin seedlings to 1–2 inches apart and move them closer to a sunny window or grow light. If stems are stretched, bury them deeper (up to the first leaves) to encourage stronger roots.
Are there alternatives to speed-soaking beans?
Yes! Try these shortcuts:
- Paper towel method: Place damp paper towels in a sealed bag with beans for 24–48 hours before planting.
- Pre-sprouting in water: Soak beans in warm water for 8–12 hours, then drain and plant in moist soil.
- Heat mat: Use a seedling heat mat (75–80°F) to speed up germination by 2–3 days.
Why did some of my beans rot or mold?
Overwatering or poor drainage is usually the culprit. Use sterilized soil (or a mix of potting soil + perlite), and water only when the top inch feels dry. Avoid cold, damp conditions—beans hate soggy roots! If mold appears, toss the batch and start fresh with fresh, dry soil.
Wrapping up and next steps
Sowing beans indoors with a speed-soak trick is your ticket to fast, sturdy sprouts—no green thumb required! 🌱 Whether you’re prepping for transplanting or just love the satisfaction of watching life grow, this method cuts weeks off the wait while giving your beans a head start.
Now that you’re armed with the right tools, timing, and techniques, it’s time to roll up your sleeves and get planting!
Ready to take the next step? Experiment with varieties—try heirloom beans, dwarf types, or even colorful varieties like purple beans for a fun twist. Once your sprouts are thriving, move them outdoors (or keep them as microgreens!) and watch your garden—or kitchen—thrive. Happy growing! 🌟