
Advice
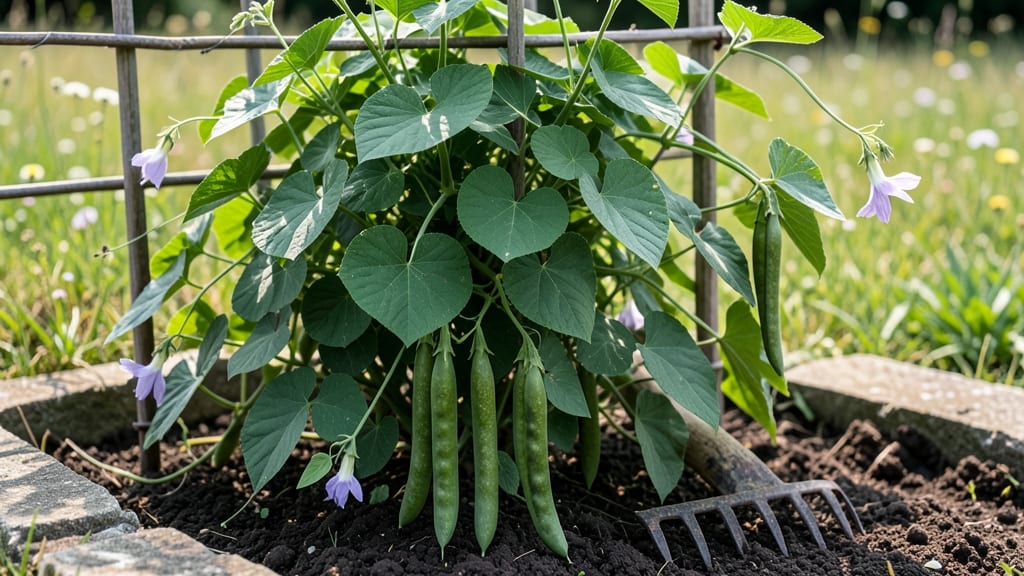
My Trail of Tears beans climb like vines in a fairy tale—producing sweet, tender pods perfect for compact gardens. 🌱 This heirloom variety thrives on trellises or poles, saving space while delivering a steady harvest of flavorful beans all summer long.
Start seeds indoors 6-8 weeks before last frost, or sow directly after soil warms to 60°F. Plant near a sturdy trellis or tall stake, spacing seeds 4-6 inches apart in rows 18 inches apart.
These beans love full sun (6-8 hours daily) and well-draining soil rich in organic matter—think compost or aged manure.
📚 In This Guide
- What you need
- Instructions
- Tips and common mistakes
- Wrapping up and next steps
What you need
- ● Seeds: 20–30 Trail of Tears bean seeds (non-GMO, heirloom preferred).
- ● Growing Containers or Garden Bed: For containers: 5-gallon pots or larger (at least 12" deep) with drainage holes.
- ● For in-ground planting: A sunny spot (6+ hours of light) with loose, well-draining soil.
- ● Support Structure: 6–8 ft tall trellis, stakes, or tomato cages (1 per 3–4 plants).
- ● Potting Mix or Soil Amendment: 1 part compost per 2 parts garden soil (or high-quality potting mix for containers).
- ● Watering Can or Hose: With a gentle spray nozzle for consistent moisture.
- ● Fertilizer: Balanced organic fertilizer (e.g., 10-10-10) or compost tea (apply at planting and mid-season).
- ● Pruners (for trimming excess growth).
- ● Hand trowel (for transplanting or soil prep).
- ● Mulch (straw or shredded leaves to retain moisture).
- ● Plant markers (to track varieties if growing multiple types).
- ● Last frost date in your area (plant after soil warms to 60°F+).
- ● Patience! Trail of Tears beans take 60–70 days to maturity.
- ● Consistent watering (1–1.5 inches per week, especially during flowering).
Step-by-Step instructions for growing Trail of Tears beans
This heirloom variety thrives on poles while saving space—here's how to coax those iconic speckled pods from seed to harvest.
🌱 Step 1: Start Seeds Indoors 6-8 Weeks Before Last Frost
Fill 2-inch deep seed-starting trays with moistened seed-starting mix (not garden soil) and press it down lightly. Trail of Tears beans germinate best at 70-80°F, so place the tray on a seedling heat mat if your home runs cooler. Plant seeds 1 inch deep—deeper planting delays germination because the seedling must push through more soil.
Cover the tray with a humidity dome or plastic wrap to retain warmth and moisture. Keep the soil consistently damp (not soggy) by misting lightly every 2-3 days until sprouts appear. You'll see the first true leaves emerge in 7-14 days, signaling it's time to transition to natural light.
☀️ Step 2: Harden Off Seedlings and Transplant After Frost
Two weeks before your last frost date, begin hardening off seedlings by placing them outside in a sheltered spot for 1 hour daily. Gradually increase exposure over 7-10 days, ending with full sun. Trail of Tears beans tolerate cooler soil temperatures better than many varieties, but avoid transplanting until soil reaches 60°F—cold roots slow growth.
Install your trellis or pole system before transplanting. Space plants 4-6 inches apart along the trellis, using a gentle twist to secure vines as they climb. Water deeply at the base immediately after planting to settle roots. Here's the thing—these beans grow fast once established, so mulch with 2-3 inches of straw to retain moisture and suppress weeds.
💧 Step 3: Maintain Consistent Water and Support Through Growth
Trail of Tears beans need 1-1.5 inches of water weekly, delivered at the soil level to avoid wetting leaves (which invites fungal diseases). You'll know your watering is right when the top 1-2 inches of soil feel dry to touch—don't let the soil dry completely between waterings, but avoid soggy conditions.
As vines climb, gently weave them around the trellis every 3-5 days to prevent tangling. This variety produces both bushy foliage and long vines, so prune back any side shoots that grow away from the pole to concentrate energy on pod production. Watch for the first flowers in 45-55 days—they'll be white with purple streaks, a signature of this heirloom.
✂️ Step 4: Harvest and Encourage Continuous Production
Pick pods when they're 4-6 inches long and still firm to the touch—waiting longer reduces flavor and causes the plant to focus on seed production instead of new pods. Harvest every 2-3 days during peak production to encourage more flowers. Trail of Tears beans have a unique speckled pattern that darkens as they mature, so timing matters for both taste and appearance.
Don't remove all pods at once. Leave 3-5 mature pods per plant to allow the plant to replenish its energy for next season's growth. If you notice leaves yellowing or curling, it's often a sign of overwatering or nutrient deficiency—reduce water slightly and side-dress with compost to revive the plant.
Tips & tricks for perfect Trail of Tears bean growth
Between us, these beans reward patience but demand precision—here's how to maximize your harvest without the common pitfalls.
Germination Environment: The 70-80°F range for germination is non-negotiable, but I've found that placing your seed trays near a sunny window with a heat mat actually creates a microclimate that can push germination to the lower end of that 7-14 day window. If your home runs cooler than 70°F, consider using a small greenhouse or cloche to maintain warmth—those first few days are critical for consistent sprouting.
Transplant Timing Secret: Don't rush the hardening off process in Step 2. I've seen gardeners skip the gradual 7-10 day transition and end up with shocked plants that struggle to recover. Start with just that 1 hour daily in sheltered conditions, then increase by 30 minutes every other day. The key is watching for the seedlings to handle longer periods without wilting—this tells you they're truly ready for full sun exposure.
Watering Precision: That 1-1.5 inches weekly guideline is perfect, but here's what nobody tells you: use a rain gauge or tuna can to measure your water output. I've seen gardeners eyeball watering and end up either drowning their plants or leaving them thirsty. Water at the soil base using a soaker hose or drip irrigation—this keeps leaves dry and prevents those dreaded fungal issues that can wipe out your entire crop.
Harvesting Visual Cues: When picking those 4-6 inch pods, look for the telltale firmness that gives slightly when pressed. The speckled pattern should still be vibrant, not darkening to brown. I harvest mine when they're about 5 inches long—this gives me that perfect balance of tenderness and flavor. And here's a pro move: pick in the morning when pods are at their crispest, and store them in the fridge for up to 5 days to maintain freshness.
Pro Tips for Trail Of Tears Bean
- Between us, these beans reward patience but demand precision—here's how to maximize your harvest without the common pitfalls.
- If your home runs cooler than 70°F, consider using a small greenhouse or cloche to maintain warmth—those first few days are critical for consistent sprouting.
- Transplant Timing Secret: Don't rush the hardening off process in Step 2.
Frequently asked questions
Got questions about growing Trail of Tears beans? You’re not alone! Here are answers to the most common queries from gardeners just like you.
What makes Trail of Tears beans different from other pole beans?
Trail of Tears beans stand out for their compact, twining vines that grow up to 8–10 feet—perfect for small spaces or trellises. Unlike bush beans, they climb efficiently without sprawling, saving garden real estate. Plus, their dark purple-black pods add a striking visual to your harvest!
How long does it take for Trail of Tears beans to mature?
These beans typically mature in 55–65 days from planting, depending on your climate. In warmer regions, you might see pods ready to harvest as early as 8–10 weeks. Keep an eye out for swollen pods (about 4–5 inches long) for the best flavor and texture.
Can I grow Trail of Tears beans in containers or small gardens?
Their pole-friendly vines make them ideal for containers (use a 5-gallon pot with a trellis) or small gardens. Just ensure they get 6+ hours of sunlight daily and a sturdy support structure. For urban gardeners, this variety is a game-changer—no sprawling mess!
What should I do if my Trail of Tears beans stop producing pods?
Common culprits include overcrowding, lack of water, or pests. Try these fixes:
Both! While their immature pods are tender and great for snacking or stir-fries, they’re also fantastic when dried for long-term storage. For fresh eating, harvest when pods are firm but slightly plump—they’ll turn tough if left too long. Pro tip: Blanch and freeze extras for later!
If the issue persists, fertilize lightly with compost or a balanced 10-10-10 mix.
Are Trail of Tears beans good for fresh eating, or are they better dried?
Wrapping up and next steps
Growing Trail of Tears beans is a rewarding way to bring beauty and productivity to even the smallest garden spaces! These pole-friendly varieties thrive with minimal room, offering both stunning foliage and delicious harvests.
Whether you're a beginner or a seasoned gardener, their resilience and adaptability make them a fantastic choice for compact areas.
Ready to get started? Sketch your garden layout today, mark your planting spots, and prepare to enjoy a lush, low-maintenance harvest. Happy gardening! 🌱✨