
Planting
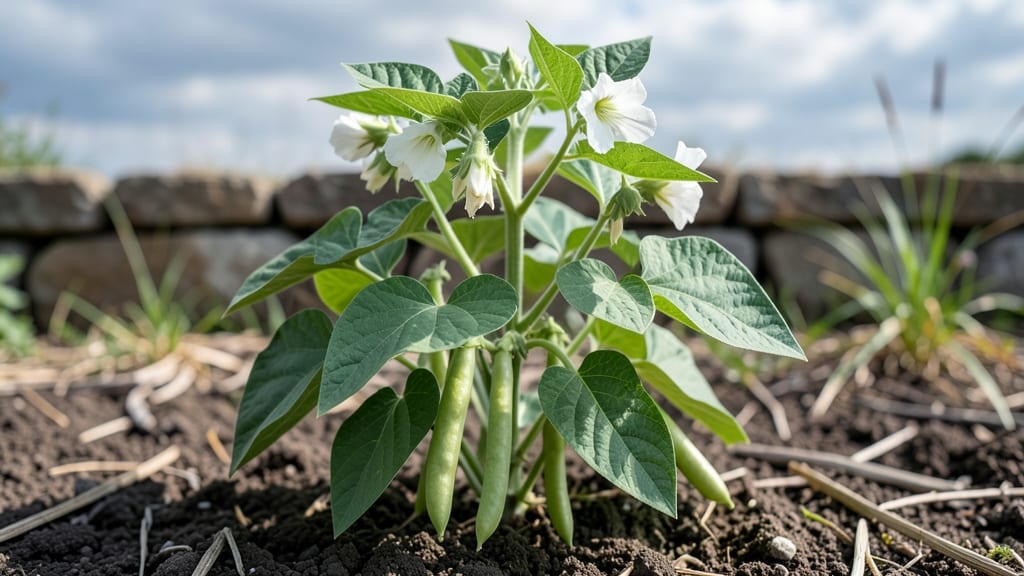
Growing white bean plants in your garden means homegrown harvests that taste better than anything from a can. 🌱 These cold-hardy varieties—like lima beans and cannellini—thrive in Zones 4-9, making them perfect for gardeners who want reliable, nutrient-packed crops without fuss.
I’ve grown them for years, and once you try them, you’ll never buy store-bought beans again.
Start with well-draining soil rich in organic matter, and plant seeds about 1 inch deep after the last frost when soil reaches 60°F. White beans love full sun—6-8 hours daily—and consistent moisture, but avoid soggy soil to prevent rot.
Varieties like ‘Fordhook’ lima beans or ‘Great Northern’ white beans are foolproof choices for beginners and experienced growers alike.
By midsummer, you’ll see sturdy vines climbing or bushy plants producing pods packed with tender beans. Harvest when pods firm up but before they toughen, and store dried beans in a cool, dark place for months.
The best part? These plants fix nitrogen in the soil, improving your garden’s health year after year.
Pair them with corn and squash for a classic “Three Sisters” trio, or add herbs like basil to repel pests naturally. With minimal effort, you’ll have a thriving bean patch that feeds your family and your soil—no green thumb required.
📚 In This Guide
- What you need
- Instructions
- Tips and common mistakes
- Wrapping up and next steps
What you need
- ● White bean seeds: Choose cold-tolerant varieties like Great Northern, Pinto, or Jacob’s Cattle (1–2 lbs for a small garden, 3–5 lbs for larger plots).
- ● Well-draining soil: Mix in compost or aged manure (1–2 gallons per 10 sq ft) for nutrient-rich soil.
- ● Fertilizer: A balanced 10-10-10 or organic options like bone meal (1 tbsp per plant) to boost growth.
- ● Mulch: Straw or shredded leaves (2–3 inches thick) to retain moisture and regulate soil temperature.
- ● Garden trowel or transplanting tool (for digging holes or rows).
- ● Watering can or hose with a gentle spray nozzle (beans need consistent moisture!).
- ○ Trellis or stakes (optional but helpful): 5–6 ft tall for climbing varieties like Pinto beans (4–6 stakes per 10 ft row).
- ● Row cover or frost cloth (for early planting): Protects seedlings from late frosts in Zones 4–5.
- ● Sunlight: Full sun (6–8+ hours daily) for optimal growth.
- ● Spacing: 3–4 inches apart in rows 18–24 inches apart (or wider for bush varieties).
- ● Soil pH: Slightly acidic to neutral (6.0–7.0). Test your soil if unsure!
- ● Patience: White beans take 80–120 days to mature—plan accordingly!
Step-by-step guide to growing cold-hardy white beans in Zones 4-9
Here's how I grow these resilient plants—no fuss, just reliable harvests even in cooler climates.
🌱 Step 1: Choose the Right Variety and Planting Time
Pick a cold-tolerant white bean variety like 'Great Northern' or 'Navy Bean'—they handle frost better than most. Plant seeds 2-3 weeks after your last frost date when soil reaches 50-55°F. I test soil temperature with a thermometer because cooler soil delays germination.
For early starts, I sow seeds directly in the garden 1 inch deep and 4 inches apart in rows 18-24 inches apart. If nights dip below 40°F, cover seedlings with lightweight row fabric until they establish roots. You'll see first sprouts in 7-14 days—watch for tiny green hooks breaking the soil.
💧 Step 2: Water Deeply and Maintain Consistent Moisture
Water immediately after planting to settle the soil around seeds. Keep the soil evenly moist but not soggy—white beans hate wet feet. I water 1-2 inches per week, aiming for deep, infrequent soakings rather than daily sprinkles. You'll know moisture is right when the top 1-2 inches of soil feel damp.
Mulch with 2-3 inches of straw or grass clippings after seedlings emerge to lock in moisture and keep roots cool. This prevents the soil from crusting over, which can suffocate young plants. Avoid overhead watering once beans appear—wet leaves invite fungal diseases like rust.
☀️ Step 3: Provide Support and Full Sun Exposure
White beans need 6-8 hours of direct sun daily for best pod production. If your garden gets afternoon shade, choose a spot with morning sun instead—beans tolerate partial shade better than full shade. You'll see leggy growth if light is insufficient, with stems stretching toward any available light.
Install 5-6 foot tall trellises or stakes at planting time. Bush varieties like 'Jacob's Cattle' don't need support, but pole beans will climb aggressively. Train vines with soft twine or garden twine—never pull them upward, just guide them gently. You'll notice pods forming 60-70 days after planting, so keep an eye out for that first harvest signal.
✂️ Step 4: Harvest and Maintain Through the Season
Pick beans when pods are firm but tender, usually 1-2 inches long. I harvest every 2-3 days to encourage more production—waiting too long makes them tough and stringy. Cut pods with scissors or pinch them off at the stem to avoid damaging the plant.
Fertilize lightly after the first harvest with 1 tablespoon of 5-10-10 fertilizer per plant to replenish nutrients. Remove any yellowed or diseased leaves immediately to prevent spread. If beans stop producing by late summer, let a few pods mature on the plant for drying—this ensures seed for next year's crop.
🌿 Step 5: Prepare for Winter and Next Year's Planting
After the first frost blackens the foliage, cut plants back to 2 inches above ground level and remove all debris. I leave the roots in the ground over winter—they'll decompose and improve soil fertility naturally. Mark the spot with a stake so you remember where to plant next spring.
For continuous harvests, I plant a second crop 6-8 weeks after the first harvest. Succession planting keeps beans coming all season long. Save seeds from your best pods by drying them completely in a warm, dry place before storing in airtight containers.
Tips & tricks for perfect white bean plant cultivation
Took me years of trial and error to figure out these simple tricks that make all the difference in growing cold-hardy white beans.
Soil Temperature Secret: That 50-55°F soil temperature range is non-negotiable for reliable germination. I've found that planting too early when soil is still cool can delay sprouts by up to a week. If your soil runs cooler, consider using black plastic mulch a few days before planting to warm it up naturally. This small step can mean the difference between success and failure in colder climates.
Harvest Timing: The 2-3 day harvest window is crucial for tender beans. I've learned to set a phone reminder every other day during peak production. When pods reach 1-2 inches but are still firm, that's your sweet spot. Beans left on the vine too long become tough and mealy—something I discovered the hard way after one particularly hot summer.
Sunlight Strategy: While 6-8 hours of direct sun is ideal, I've found that morning sun works better than afternoon in hotter zones. The intense afternoon sun can actually stress the plants, leading to fewer pods. If your garden has limited sun, prioritize morning exposure and consider using reflective mulch to maximize light penetration to the roots.
Winter Prep: Leaving roots in the ground over winter is a game-changer for soil fertility. The decomposing roots naturally enrich the soil with nitrogen, which is exactly what white beans need for next year's crop. I mark planting spots with small stakes so I don't accidentally till them under in spring. This simple practice has cut my fertilizer needs in half over the years.
Pro Tips for White Bean Plant
- Took me years of trial and error to figure out these simple tricks that make all the difference in growing cold-hardy...
- Soil Temperature Secret: That 50-55°F soil temperature range is non-negotiable for reliable germination. I've found t...
- Harvest Timing: The 2-3 day harvest window is crucial for tender beans. I've learned to set a phone reminder every ot...
Frequently asked questions
What’s the best time to plant white beans in Zones 4-9?
For cold-hardy varieties like Great Northern or Pinto, plant seeds 1 to 2 weeks after your last frost date (when soil reaches at least 50°F). In cooler zones (4-6), opt for early spring or late summer plantings to avoid heat stress. Pro tip: Use black plastic mulch to warm soil faster!
Can white beans survive a light frost?
Most cold-hardy white beans tolerate light frosts (down to 25°F) if planted early, but heavy frost will kill the plants. Focus on varieties labeled "cold-tolerant" (e.g., Oregon Sugar Pod) and protect young seedlings with row covers. Harvest before the first hard freeze for best results!
How do I tell if my white bean plant is healthy or struggling?
Healthy plants have deep green leaves, sturdy vines, and 3-4 inches of growth per week. Watch for these red flags:
- Yellowing leaves: Overwatering or nutrient deficiency (add compost!)
- Wilting: Underwatering or root rot (check soil moisture)
- Holes in leaves: Pests like bean beetles (use neem oil)
How long does it take for white beans to mature?
Most cold-hardy white beans mature in 80–100 days from planting. Track your variety’s days-to-maturity (DTM) label—earlier varieties (e.g., Dawson) are ideal for short growing seasons. Harvest when pods are firm but slightly soft (before seeds bulge too much).
Are there white bean alternatives for Zone 4’s short season?
Yes! Try these fast-growing, cold-tolerant options:
- Blue Lake Bush Beans (50–60 DTM)
- Contender Bush Bean (50 DTM)
- Tendercrop (60 DTM, disease-resistant)
For extra security, start seeds indoors 4–6 weeks before transplanting outdoors.
Wrapping up and next steps
Growing a white bean plant in Zones 4-9 is a rewarding journey—whether you're a seasoned gardener or just starting out! 🌱 From selecting cold-hardy varieties like Great Northern or Pinto to nurturing them with patience and care, these resilient plants offer delicious rewards and easy maintenance.
With the right soil, sunlight, and a little know-how, you’ll soon be harvesting fresh, homegrown beans to enjoy in soups, salads, or stews.
Ready to take the next step? Start small—plant a few seeds or seedlings this season and watch your garden flourish! For even more success, experiment with companion planting or try preserving your harvest for year-round enjoyment. Happy gardening! 🌿