
How To
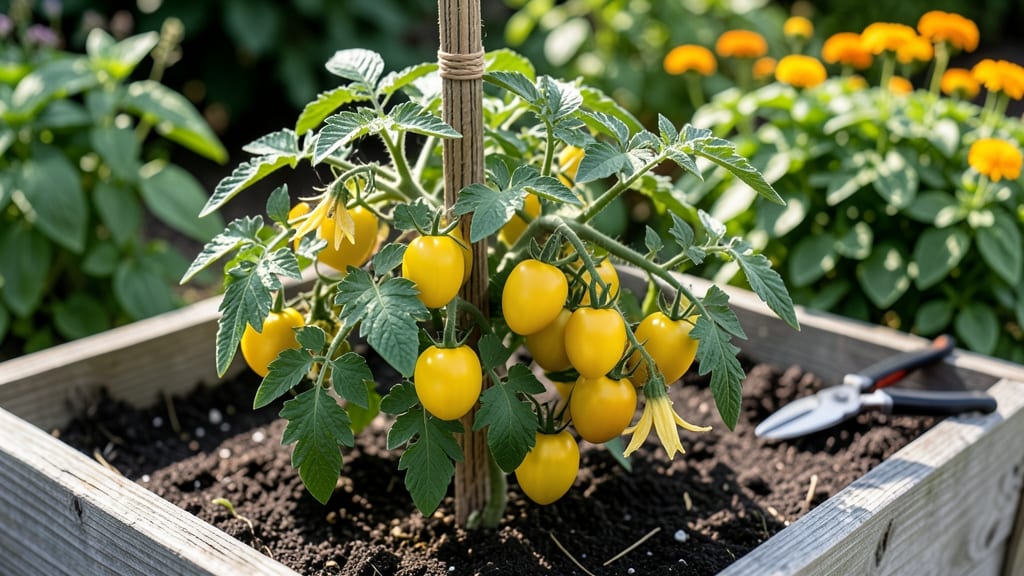
Growing yellow jelly bean tomatoes means sunshine in every bite—these tiny, tangy-sweet hybrids explode with flavor while handling heat better than most cherry tomatoes. 🌞 I fell for them after my regular cherry tomatoes turned mealy in July heat, but these stayed crisp and juicy until first frost.
The secret lies in their thick skins and balanced sweet-spice profile that keeps them vibrant even when temps hit 90°F.
Start with well-draining soil mixed with compost, and plant after your last frost when soil reaches 60°F. Space them 18-24 inches apart—they love climbing cages or stakes—and pair them with basil or marigolds to repel pests.
Water deeply at the base (never overhead) to prevent cracking, and pinch off suckers regularly to focus energy on fruit production. You'll harvest golden 1-inch beans in just 60-70 days, and each plant yields enough for salads, snacking, or sun-dried tomatoes.
📚 In This Guide
- What you need
- Instructions
- Tips and common mistakes
- Wrapping up and next steps
What you need
- ● Yellow Jelly Bean Tomato Seeds – 3–5 seeds per plant (or 1–2 plants per 2–3 ft of space). Choose heirloom or hybrid varieties labeled for heat tolerance.
- ● Seed Starting Mix – 1–2 cups of lightweight, sterile potting soil (e.g., Miracle-Gro Seed Starting Potting Mix).
- ● Biodegradable Seedling Pots or Peat Pellets – 4–6 pots (2–3 inches deep) to prevent root disturbance during transplanting.
- ● Grow Lights or Sunny Window – A full-spectrum LED grow light (12–16 hrs/day) or a south-facing window with 6+ hours of sunlight.
- ● Tomato Cages or Stakes – 3–4 ft tall cages or bamboo stakes (1–2 per plant) for support as vines grow.
- ● Balanced Fertilizer – 5–10–10 or 10–10–10 (organic or synthetic) for seedlings, plus tomato-specific fertilizer (e.g., Espoma Tomato-Tone) once transplanted.
- ● Mulch – 2–3 inches of straw, grass clippings, or wood chips to retain moisture and suppress weeds.
- ● Spray Bottle – For gentle watering of seedlings.
- ● Garden Gloves – To protect hands from thorns and soil.
- ● Pruning Shears – For trimming suckers and dead leaves.
- ● pH Test Kit – To ensure soil pH is between 6.0–6.8 (ideal for tomatoes).
- ○ Compost or Worm Castings – Optional boost for nutrient-rich soil.
- ● Shade Cloth (30–50%) – For hot climates to protect young plants from scorching.
Step-by-step instructions for growing yellow jelly bean tomatoes
Here’s how to cultivate this heat-loving hybrid from seed to harvest—with tricks to maximize those sweet, spicy flavors.
🌱 Step 1: Start Seeds Indoors 6-8 Weeks Before Last Frost
Fill small seedling trays with sterile seed-starting mix and plant 2 seeds per cell at a depth of ¼ inch. Press gently but don’t compact the soil—you want roots to push through easily. Keep the mix moist but not soggy, and cover with a humidity dome or plastic wrap to retain warmth. Yellow Jelly Beans germinate best at 75-85°F, so a seedling heat mat speeds things up dramatically.
Once sprouts appear in 5-10 days, remove the cover immediately to prevent damping-off. Place seedlings under grow lights (14-16 hours daily) within 2-4 inches of the foliage. Without enough light, they’ll stretch leggy and never recover. You’ll know they’re strong when stems are thick and dark green, not spindly.
☀️ Step 2: Harden Off and Transplant After All Frost Risk Passes
Two weeks before your last frost date, begin hardening off by moving seedlings outside for 1-2 hours the first day, gradually increasing to full sun exposure over 10-14 days. This toughens their skin and prevents shock. Choose a sunny spot with 6-8 hours of direct sun—Yellow Jelly Beans thrive in heat but need consistent warmth to set fruit.
Transplant after soil reaches 60°F or warmer. Bury stems deeper than usual (up to the first true leaves) to encourage strong root systems. Space plants 18-24 inches apart in rows 3 feet apart—crowding leads to disease and poor air circulation. Water deeply at transplanting to settle the soil around roots.
💧 Step 3: Water Deeply and Feed for Maximum Sweetness
Water 1 inch per week, letting soil dry slightly between sessions to prevent blossom-end rot. Use drip irrigation or soaker hoses to keep foliage dry—wet leaves invite fungal diseases. Mulch with 2-3 inches of straw or grass clippings to retain moisture and regulate soil temperature, which is critical for these heat-loving tomatoes.
Fertilize every 2-3 weeks with a balanced 10-10-10 or 5-5-5 formula once flowers appear. Yellow Jelly Beans respond well to a high-potassium supplement (like tomato-specific fertilizer) to boost sweetness. You’ll notice richer flavor when fruits develop deep yellow color and firm, glossy skins—a sign of proper ripening.
✂️ Step 4: Prune and Support for Bountiful Harvests
Install cages or stakes at transplanting to support the vines as they grow. Prune suckers (the shoots in the leaf axils) regularly to direct energy into fruit production. Remove any leaves touching the ground to improve airflow. Pinch off the first flower cluster if seedlings are small—this encourages bushier growth before fruiting.
Harvest when tomatoes are fully yellow and slightly soft to the touch, typically 60-70 days after transplanting. Twist gently to avoid damaging stems. Store at room temperature for 1-2 weeks or refrigerate for longer shelf life. The longer they ripen on the vine, the sweeter and more complex their flavor becomes—wait for that perfect balance of heat and sweetness.
⏰ Step 5: Extend the Season with Simple Tricks
To prolong harvests, cover plants with floating row covers when night temperatures drop below 55°F. Remove covers during the day to maintain pollination. If frost threatens, harvest all remaining fruit—even unripe tomatoes will ripen indoors with ethylene exposure (place them in a paper bag with a banana for 3-5 days).
Save seeds from your best-tasting fruits for next year: scoop out the jelly-like gel, rinse seeds, and dry on a paper towel for 1-2 weeks. These tomatoes are prolific, so expect 4-6 pounds per plant under ideal conditions. The more you prune and protect, the sweeter the payoff.
Tips & tricks for perfect yellow jelly bean tomatoes
Here's what nobody tells you about growing these vibrant, heat-loving tomatoes—tricks that'll make all the difference between a decent harvest and a spectacular one.
Germination Temperature: Those 75-85°F germination temps aren't just numbers—they're the sweet spot for consistent sprouting. I learned this the hard way after watching seeds take 3 weeks to sprout in my cool basement. If your home stays below 70°F, invest in a seedling heat mat. You'll notice sprouts appearing in just 5-10 days instead of waiting weeks.
Lighting Strategy: The 14-16 hours of daily grow light isn't arbitrary—it mimics summer daylight and prevents leggy seedlings. I position my lights just 2-4 inches above the plants and adjust as they grow. Watch for stems that are thick and dark green rather than spindly. If you see them stretching toward the light, they're begging for more intensity.
Transplanting Depth: Burying stems up to the first true leaves might seem counterintuitive, but it works wonders. This buried stem becomes a powerhouse of new roots, creating a stronger plant foundation. The key is to do this at transplanting when soil reaches 60°F or warmer—cooler soil can shock the roots and set back growth.
Pruning Precision: When pruning suckers in Step 4, aim for clean cuts just above the leaf axils. I use sharp scissors to avoid tearing the plant. The goal is to redirect energy to fruit production while maintaining good airflow. And remember—pinch off that first flower cluster if your seedlings are small. This might seem cruel, but it encourages bushier growth that'll support more fruit later.
Pro Tips for Yellow Jelly Bean Tomato
- Here's what nobody tells you about growing these vibrant, heat-loving tomatoes—tricks that'll make all the difference between a decent harvest and a spectacular one.
- Germination Temperature: Those 75-85°F germination temps aren't just numbers—they're the sweet spot for consistent sprouting.
- Lighting Strategy: The 14-16 hours of daily grow light isn't arbitrary—it mimics summer daylight and prevents leggy seedlings.
Frequently asked questions
When is the best time to plant yellow jelly bean tomatoes?
Plant after the last frost when soil temps hit 60°F+ (15°C+). For warm climates, start seeds indoors 6-8 weeks before the last frost or direct-sow in spring. In hot zones, opt for fall planting to avoid summer heat stress. Pro tip: Use black plastic mulch to warm soil faster!
How long does it take for yellow jelly bean tomatoes to produce fruit?
Expect 60-70 days from transplant to first ripe tomato, depending on conditions. Early blooms may drop if nights are chilly (<50°F/10°C), but consistent warmth speeds up fruit set. Patience pays off—these gems are worth the wait!
Why are my yellow jelly bean tomatoes cracking?
Cracking usually means uneven watering—soak soil deeply 1-2x/week (avoid wetting leaves) and mulch heavily. Overwatering or drought stress can also cause splits. Fix it: Prune lower leaves for airflow and harvest early if cracks appear!
Are yellow jelly bean tomatoes spicier than red ones?
Not necessarily! While they’re bred for sweet-spicy flavor, heat levels depend on growing conditions (sun, soil pH). Taste test: Compare to red varieties—some growers say yellows have a tropical citrus note.
Can I grow yellow jelly bean tomatoes in containers?
Use a 5-gallon+ pot with drainage, fill with lightweight potting mix, and stake for support. Place in full sun (6+ hours/day) and fertilize weekly with tomato-specific feed. Bonus: Containers warm up faster—great for short seasons!
What can I do with yellow jelly bean tomatoes if I have too many?
Preserve the harvest! Try sun-dried slices, spicy salsa, or yellow tomato jam. Freeze whole for sauces or blend into gazpacho. Don’t waste them—these tomatoes are bursting with flavor!
Wrapping up and next steps
Growing yellow jelly bean tomatoes is a rewarding journey that brings vibrant color and sweet-spicy flavor to your garden—even in hot climates! 🌞 Whether you’re a beginner or a seasoned gardener, their compact size and disease resistance make them a fantastic choice.
With the right soil, sunlight, and care, you’ll soon be harvesting these cheerful little gems to enjoy fresh, in salads, or preserved for later.
Ready to take the next step? Start small—plant a few seeds or seedlings this season and watch your confidence (and harvest!) grow. And if you’re feeling adventurous, try experimenting with pruning techniques or companion planting to boost yields. Happy growing! 🌱