
Planting
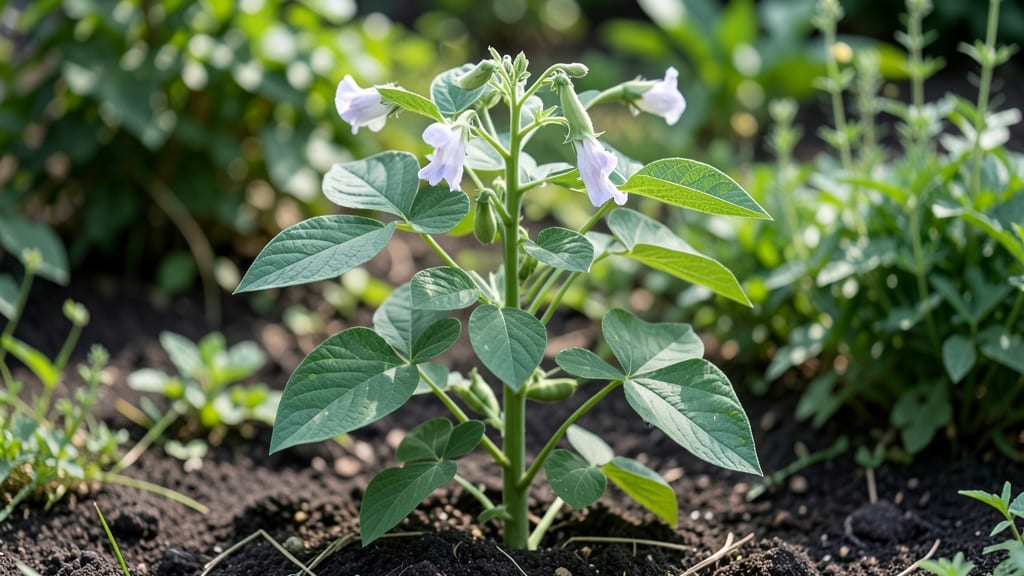
My bean plant experiment started with a 3-foot trellis and a bag of seeds—turning a balcony into a jungle of green. Vertical gardening with beans isn’t just clever; it’s a game-changer for small spaces where every inch counts.
The right varieties (like pole beans or scarlet runners) climb like pros, saving you from sprawling vines and wasted ground space.
You’ll need a sturdy trellis or string setup, well-draining soil, and a sunny spot with at least 6 hours of light daily. Plant seeds 1 inch deep, spacing them 4-6 inches apart, and keep the soil consistently moist but not soggy.
Within 2 weeks, you’ll spot those first green shoots reaching for the sky—proof the experiment is working.
Watch as tendrils latch onto the trellis and vines thicken with each passing week. By mid-summer, you’ll harvest pounds of beans from a footprint smaller than a kitchen counter. The real magic? You’ll troubleshoot along the way—adjusting water when leaves wilt or shielding plants from pests with row covers.
Document your progress with photos or a growth journal. Compare varieties, note harvest dates, and share your results—this isn’t just gardening, it’s a science experiment with edible payoffs. Ready to turn your tiny space into a vertical harvest? Let’s grow something unexpected.
📚 In This Guide
- What you need
- Instructions
- Tips and common mistakes
- Wrapping up and next steps
What you need
- ● Bean Seeds: 10–15 pole beans (e.g., Kentucky Wonder or Scarlet Runner) or bush beans (if space is extra tight).
- ● Growing Containers: 1–2 vertical planters (5–10 gallons each, with drainage holes) or
- ● 1 5-gallon bucket with a trellis or mesh sides or
- ● 1 hanging pocket planter (for balcony setups).
- ● Potting Mix: 2–3 bags of lightweight, well-draining soil (e.g., 50% potting mix + 50% compost).
- ● Trellis/Support: 1 bamboo trellis (4–6 ft tall) or
- ● 1 DIY wire mesh (galvanized chicken wire) or
- ● 1 coconut coir vertical garden kit (if using pockets).
- ● Watering Can: 1 gallon with a spray nozzle (to avoid soil erosion).
- ● Fertilizer: 1 bottle of balanced liquid fertilizer (5-5-5 or organic fish emulsion).
- ● Spray Bottle: 1 (for misting seeds during germination).
- ○ Optional but Helpful: 1 pH test kit (to check soil acidity, ideal: 6.0–7.0).
- ● 1 small hand trowel (for seed planting).
- ● 1 measuring cup (for precise watering/fertilizer doses).
- ● 1 pruning shears (to trim excess growth).
- ● Prerequisites: Sunny spot: 6+ hours of direct sunlight daily (south-facing window or balcony).
- ● Patience: Germination takes 7–14 days!
Step-by-step instructions for creating a vertical bean plant experiment
Here's how to transform limited space into a thriving vertical garden using beans—fast-growing, space-efficient, and endlessly fascinating.
Select and Prepare Your Vertical Support Structure
Choose a sturdy vertical framework like a trellis, bamboo stakes, or repurposed ladder. For this experiment, I recommend a 5-foot tall A-frame trellis made from wooden dowels or metal mesh—it provides ample support for climbing varieties like Kentucky Wonder or Scarlet Runner beans. Ensure your structure is at least 4 feet tall to maximize vertical growth and allow for easy harvesting.
Position the trellis in a location that receives at least 6 hours of direct sunlight daily. Beans are phototropic, meaning they'll grow toward the light source, so a south-facing window or balcony works perfectly. If you're using a balcony planter, secure the trellis to the railing with zip ties or heavy-duty clips to prevent tipping as the plants mature.
Plant Seeds at the Correct Depth and Spacing
Plant 4-5 bean seeds per trellis, spacing them 4-6 inches apart along the base. Beans have a taproot system, so avoid disturbing the roots once planted. Use your finger to create a 1-inch deep hole—this depth ensures the seed won’t dry out too quickly while allowing the taproot to establish firmly. Place 1-2 seeds per hole (just in case one fails to germinate) and cover lightly with soil.
Water gently but thoroughly after planting, ensuring the soil is moist but not waterlogged. A spray bottle works well for even moisture distribution without displacing seeds. Keep the soil consistently moist until germination, which typically occurs in 7-10 days at 70-80°F. You’ll know it’s time to water again when the top inch of soil feels dry to the touch.
Train Vines to Climb and Provide Support
Once seedlings reach 4-6 inches tall and have 2-3 true leaves, it’s time to guide them onto the trellis. Use soft garden twine or untreated jute twine to gently tie the main stem to the trellis at a 45-degree angle. Avoid wrapping the twine tightly around the stem—this can restrict growth. Instead, create a loose loop and secure it to the trellis with a knot.
As the vines grow, they’ll naturally wrap around the trellis, but you may need to tie them every 6-12 inches to encourage upward growth. Beans are vigorous climbers, so they’ll quickly fill the vertical space. If you notice any side shoots growing horizontally, you can prune them back to redirect energy toward the main vine and upward growth. This step ensures your plants grow straight and strong, maximizing your small-space garden’s efficiency.
Maintain Moisture, Fertility, and Pest Control
Beans are relatively low-maintenance, but consistent moisture is key. Water at the base of the plant in the morning to reduce evaporation and fungal risks. Aim for 1 inch of water per week, adjusting for rainfall. You’ll know your watering is on track when the soil remains evenly moist but not soggy—beans hate waterlogged roots.
Fertilize lightly with a balanced, water-soluble fertilizer (10-10-10) every 3-4 weeks once the plants start flowering. Too much nitrogen can lead to lush foliage but fewer beans, so avoid over-fertilizing. Keep an eye out for pests like bean beetles or aphids, and address them early with neem oil or insecticidal soap to prevent infestations. Regularly inspect the undersides of leaves and the trellis structure for signs of trouble.
Harvest and Encourage Continuous Growth
Start harvesting green beans when they reach 4-6 inches long and are still tender. Regular harvesting encourages the plant to produce more beans—think of it as pruning to stimulate growth. Use clean, sharp scissors to snip the beans just above the pod, and avoid pulling them to prevent damaging the vine. For dry beans, wait until the pods turn brown and papery before harvesting.
If your variety is a pole bean, it will continue producing beans as long as it has sun, water, and support. To extend the harvest, prune back any dead or yellowing leaves and remove spent flowers to redirect the plant’s energy. With proper care, a single trellis can yield pounds of beans over the growing season, making this experiment both rewarding and productive.
Tips & tricks for perfect vertical bean growth
Transforming your small space into a thriving vertical garden starts with understanding these key growth principles—each one makes the difference between a struggling vine and a lush, productive plant.
Light Optimization: While the instructions recommend at least 6 hours of sunlight, I've found that positioning your trellis to capture morning sun (when it's less intense) and afternoon shade (especially in hot climates) can actually improve yields. The goal is consistent light exposure—if your space gets strong afternoon sun, consider using sheer white fabric to diffuse the intensity during peak hours. This prevents leaf scorch while still providing the essential energy for growth.
Support System Stability: The 5-foot trellis height is ideal, but stability becomes critical as vines mature. I recommend burying the base of your trellis at least 6 inches deep or securing it to a heavy object like a cinder block to prevent tipping. For balcony setups, use multiple zip ties along the railing—one at the top and one at the bottom—to distribute weight evenly. This simple precaution prevents what could become a disastrous collapse mid-season when vines are heavy with beans.
Germination Timing: The 7-10 day germination window at 70-80°F can feel like an eternity, but there are ways to speed things up. Soak your seeds in warm water for 8-12 hours before planting—this jumpstarts the process. Also, place a clear plastic dome or even a plastic bag over the planted seeds to create a mini greenhouse effect. Remove it once sprouts appear to prevent mold. This technique often cuts germination time by 2-3 days, giving you an earlier start to your vertical harvest.
Pruning Strategy: When training your vines in Step 3, focus on creating a single strong main stem rather than letting multiple shoots compete. Use your fingers to gently pinch off any side shoots that appear below the first few leaves—this redirects the plant's energy upward. For the main vine, only tie every 6-12 inches as needed, never wrapping tightly. I've seen vines grow 2-3 feet in a single week when given this proper support and pruning attention, making the vertical space truly productive.
Pro Tips for Bean Plant Experiment
- Transforming your small space into a thriving vertical garden starts with understanding these key growth principles—each one makes the difference between a struggling vine and a lush, productive plant.
- The goal is consistent light exposure—if your space gets strong afternoon sun, consider using sheer white fabric to diffuse the intensity during peak hours.
- Support System Stability: The 5-foot trellis height is ideal, but stability becomes critical as vines mature.
Frequently asked questions
Got questions about growing beans vertically? You’re not alone! Here are answers to the most common queries to help your bean plant experiment thrive—even in tight spaces.
How long does it take for beans to grow vertically?
Most bean varieties climb quickly! With proper support (like trellises or stakes), you’ll see vines reaching 3–6 feet in 4–6 weeks after planting. Pole beans grow faster than bush varieties, so choose wisely if you’re short on time.
Can I plant beans too late in the season?
Beans are sensitive to frost—plant them after the last frost date (usually 2–3 weeks post-spring frost). For warm climates, opt for shorter-season varieties (like ‘Blue Lake’) to harvest before summer heat sets in. Late plantings may yield smaller pods or fewer flowers.
What if my beans aren’t climbing? How can I fix it?
Check for three common issues:
- Weak support: Ensure trellises/stakes are sturdy and positioned near the plant.
- Overcrowding: Thin seedlings to 3–4 inches apart for better airflow.
- Nutrient deficiency: Add compost or a balanced fertilizer (like 10-10-10) if leaves look pale.
Are there low-maintenance bean varieties for beginners?
Try these easy-care picks:
Yellow leaves usually signal overwatering, underwatering, or pests. Check soil moisture (keep it consistently damp but not soggy) and inspect for aphids or spider mites. If the yellowing starts at the bottom leaves, it’s often natural aging—but if it spreads, adjust care or treat pests with neem oil. Yes! Clean trellises with a 10% vinegar solution to kill fungal spores or pests. Store them in a dry place to prevent warping. Wooden stakes may need replacing after 2–3 years, but metal or plastic trellises last longer with proper care.
All three tolerate partial shade and need less pruning than fussy hybrids.
Why are my bean leaves turning yellow?
Can I reuse the same trellis for next year’s beans?
Wrapping up and next steps
Your bean plant experiment is more than just a fun project—it’s a green-thumb masterpiece in the making! 🌱 Whether you’re a beginner or a seasoned gardener, you’ve just unlocked the secrets to thriving vertical growth, even in tiny spaces. Celebrate your progress and the fresh, homegrown harvest on the horizon!
Ready to take it further? Expand your experiment by trying different bean varieties, experimenting with companion plants (like herbs or flowers), or even documenting growth trends for a full year. Every seed you plant today could inspire your next big gardening adventure!