
Vegetables
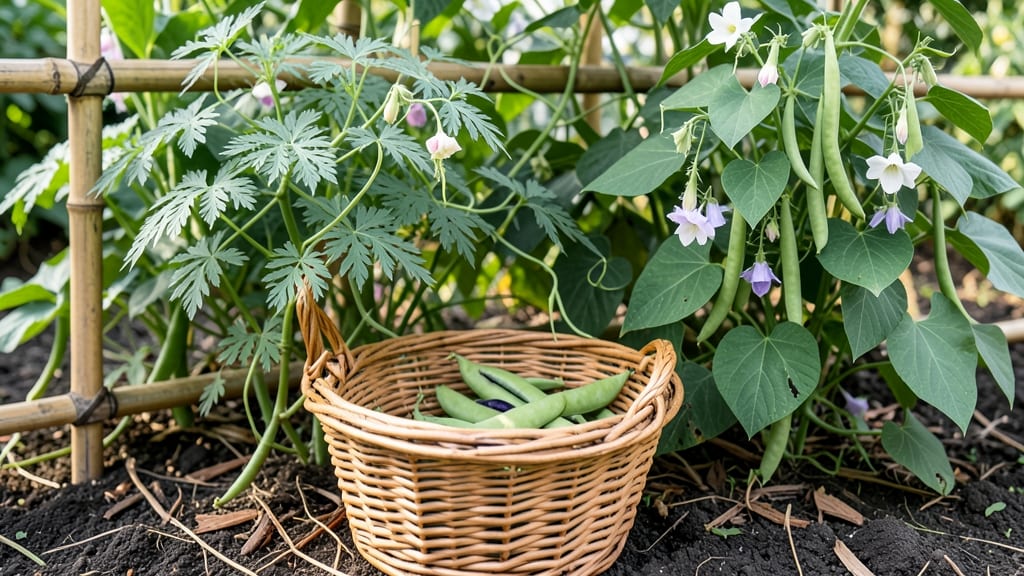
Growing black-eyed peas and green beans together in small spaces is the ultimate two-in-one harvest. 🌱 These warm-weather legumes thrive side-by-side, saving you room while doubling your yield—my compact raised bed produces enough for summer meals and winter freezer stashes within just 60 days of planting.
Black-eyed peas (like the classic 'Purple Hull') and green beans (try 'Blue Lake' for bush types) love the same conditions: full sun, well-draining soil, and consistent moisture.
The key is starting seeds indoors 4-6 weeks before your last frost date, then transplanting when soil warms to 65°F—both plants bolt if shocked by cold. Pole beans climb, while bush varieties stay compact, making them perfect for containers or small plots.
What you'll get is a lush, nitrogen-rich garden that feeds you all season. The beans produce tender pods for fresh eating, while the peas deliver protein-packed harvests perfect for soups and salads. Plus, their shallow roots improve soil structure for next year's crops—no extra work required.
This combo works in containers, raised beds, or even vertical trellises, making it ideal for balconies, patios, or backyard corners. Let's get those seeds going—they're easier to grow than you think!
📚 In This Guide
- What you need
- Instructions
- Tips and common mistakes
- Wrapping up and next steps
What you need
- ● Seeds: Black-eyed peas (cowpeas): 2–3 lbs (or ~100–150 seeds per 10 sq ft)
- ● Green beans (bush or pole variety): 1–2 lbs (or ~50–100 seeds per 10 sq ft)
- ● Growing Medium: Well-draining potting mix (50 lbs for containers or raised beds)
- ● OR Loamy garden soil (test pH: 6.0–6.8)
- ● Containers (if applicable): 5–10 gallon pots (for black-eyed peas) or 12+ inch deep containers (for green beans)
- ● Trellis or stakes (6–8 ft tall) for pole beans
- ● Hand trowel or small shovel
- ○ Garden gloves (optional but recommended!)
- ● Watering can or hose with gentle spray nozzle
- ○ Compost or balanced fertilizer (5-10-10 ratio, optional)
- ● Mulch (straw or shredded leaves, 1–2 inches) to retain moisture
- ● Sunlight: 6+ hours of direct sun daily (black-eyed peas tolerate partial shade)
- ● Warmth: Soil temp 60–90°F (ideal for germination)
- ● Seedling heat mat (for early starts in cool climates)
- ● Row covers (to protect from pests or frost)
- ● Organic pest control (neem oil or insecticidal soap)
- ● Grow lights (if starting indoors before last frost)
Step-by-step instructions for growing black eyed peas and green beans in small spaces
Here’s how to maximize your harvest in tight spaces—these two plants thrive together and produce continuously.
🌱 Step 1: Prepare Containers and Soil for Dual Planting
Use 5-gallon fabric grow bags or 12-inch deep containers with drainage holes for both plants. Black eyed peas and green beans grow well together—the peas fix nitrogen in the soil, while the beans benefit from their deep roots. Fill containers with a lightweight potting mix (avoid garden soil—it compacts and suffocates roots). I mix in compost for extra nutrients, but keep it loose so water drains freely.
Press the soil down gently to remove air pockets, then water until moisture reaches 2 inches deep. Let it drain completely before planting. The key here is well-aerated soil—both plants hate soggy conditions. If your mix feels dense, add perlite to improve drainage.
🌱 Step 2: Plant Seeds at the Right Depth and Spacing
Sow black eyed pea seeds first, placing 2-3 seeds per container about 1 inch deep. Space them 4 inches apart—they’ll need room to climb or sprawl. After they sprout (in 7-10 days), thin to the strongest seedling. For green beans, plant 3-4 seeds per container at the same depth, spacing them 6 inches apart—they grow taller and need more room.
I like to plant them in rows within the container: black eyed peas on one side, green beans on the other. This keeps their growth habits separate but still allows them to share nutrients. Water gently after planting to settle the soil around the seeds—don’t drown them.
☀️ Step 3: Provide Support and Optimal Light
Both plants are heavy feeders and need full sun (6+ hours daily). If your space is shady, supplement with a grow light kept 12 inches above the plants. Install 5-foot bamboo stakes or a small trellis in each container to support the beans—they’ll climb aggressively. Black eyed peas can sprawl or climb too, but they’re more compact.
Watch for yellowing leaves—this means they’re not getting enough light. If you see leggy growth (long, thin stems), move the container closer to the sun or raise the grow light. Once both plants reach 6 inches tall, start fertilizing weekly with a balanced liquid fertilizer (10-10-10).
💧 Step 4: Water and Maintain for Continuous Harvest
Keep soil consistently moist but never soggy—water when the top inch feels dry. I use a drip irrigation system for containers to avoid overwatering. Black eyed peas and green beans both hate wet feet, so ensure drainage holes are clear. Mulch the soil surface with straw to retain moisture and suppress weeds.
Harvest green beans when pods are 4-5 inches long and still crisp. Pick black eyed peas when pods are plump but before they harden—this encourages more production. I harvest every 2-3 days to keep the plants busy. If flowers appear but no pods form, the plant may need more phosphorus—switch to a 5-10-10 fertilizer for a few weeks.
✂️ Step 5: Prune and Extend the Season
After the first harvest, prune back any leggy or overgrown vines to encourage bushier growth. Black eyed peas benefit from deadheading (removing spent flowers) to redirect energy into new pods. For green beans, pinch back the tips of young plants to promote side shoots—this gives you more harvests.
To extend the season, cover containers with row fabric when nighttime temps drop below 50°F. Both plants are warm-season crops, but they’ll produce longer if protected from cold snaps. In late summer, reduce watering slightly to prep them for dormancy if you’re in a cooler climate.
Tips & tricks for growing black eyed peas and green beans in small spaces
Here's what nobody tells you about maximizing your harvest in limited space—these tricks will transform your containers into a year-round vegetable powerhouse.
Container Selection: Don't just grab any pot! The 5-gallon fabric grow bags or 12-inch deep containers mentioned are perfect because they provide enough depth for green beans' long roots while allowing black eyed peas to sprawl. I've found that containers with 12+ inches of depth prevent root binding, which is crucial for both plants. If you're using decorative pots, make sure they have drainage holes—this isn't optional! I once ruined a batch by ignoring this and ended up with root rot.
Soil Preparation: The lightweight potting mix is non-negotiable, but here's the secret: mix in 20% compost by volume and 10% perlite for that perfect air-to-moisture balance. I like to add a handful of worm castings too—they're packed with beneficial microbes that help both plants thrive. When you water to 2 inches deep as instructed, let it drain completely before planting. The soil should feel like a damp sponge, not a wet rag.
Light Optimization: Those 6+ hours of full sun are essential, but here's how to maximize it: rotate your containers every 3-4 days to ensure even light exposure. If you're using grow lights, position them 12 inches above the plants and keep them on for 14-16 hours daily. I've seen dramatic improvements in plant health when I add a small oscillating fan nearby—it strengthens stems and prevents leggy growth from poor air circulation.
Harvest Timing: The 4-5 inch length for green beans and plump-but-not-hard pods for black eyed peas are spot-on, but here's the pro tip: harvest in the morning when pods are at their crispest. I like to use clean, sharp scissors to snip stems—this prevents damaging the plant. For black eyed peas, pick pods when they're about 70% full size—this encourages continuous production. I harvest every 2-3 days without fail, and my plants keep producing for weeks longer than neighbors who harvest less frequently.
Pro Tips for Black Eyed Peas And Green Beans
- Here's what nobody tells you about maximizing your harvest in limited space—these tricks will transform your containers into a year-round vegetable powerhouse.
- Container Selection: Don't just grab any pot!
- Soil Preparation: The lightweight potting mix is non-negotiable, but here's the secret: mix in 20% compost by volume and 10% perlite for that perfect air-to-moisture balance.
Frequently asked questions
Got questions about growing black-eyed peas and green beans together? You’re not alone!
Here are some common queries—and expert answers—to help you cultivate a thriving, dual-harvest garden.
Can black-eyed peas and green beans grow well together in the same container or garden bed?
Both thrive in similar conditions—warm soil, full sun (6+ hours/day), and well-draining soil. Plant them 3–4 inches apart in rows 18–24 inches apart to avoid competition. Black-eyed peas (a type of cowpea) even fix nitrogen in the soil, benefiting green beans!
How long does it take for black-eyed peas and green beans to mature and produce?
Timing varies by variety, but here’s a general rule:
- Black-eyed peas: Ready in 55–65 days (harvest pods when firm but tender).
- Green beans (bush types): Harvest in 50–60 days (pick when 4–6 inches long).
- Pole beans: Take 60–70 days but produce longer (up to 2 months!).
What’s the best way to stagger planting for a continuous harvest?
For a year-round supply, plant successive batches every 2–3 weeks (until 8–10 weeks before your first frost). Start with black-eyed peas first—they tolerate heat better. Green beans prefer cooler soil, so plant them 1–2 weeks after the peas go in. Pole beans are great for extending harvests!
Why are my black-eyed peas or green beans turning yellow or wilting?
Common culprits:
- Underwatering: Soil should stay consistently moist (1 inch of water per week).
- Overwatering: Roots need oxygen—water deeply but avoid soggy soil.
- Pests: Look for aphids or bean beetles (spray with neem oil or introduce ladybugs).
- Nutrient deficiency: Yellow leaves? Add compost or a balanced fertilizer (low in nitrogen).
Are there any low-maintenance alternatives to black-eyed peas or green beans?
If you want easy, space-saving swaps:
- Instead of black-eyed peas: Try yard-long beans (drought-tolerant) or lima beans (hearty and productive).
- Instead of green beans: Bush snap peas (ready in 50 days) or scarlet runner beans (ornamental + edible!).
Wrapping up and next steps
Growing black-eyed peas and green beans in small spaces isn’t just possible—it’s rewarding! 🌱 With the right containers, sunlight, and care, you’ll enjoy a bountiful harvest year-round. Whether you’re a beginner or a seasoned gardener, these versatile plants bring flavor, nutrition, and satisfaction to your table.
Ready to take the next step? Start with a few seeds or seedlings today, and soon you’ll be savoring homegrown goodness. Happy planting! 🌿