
Vegetables
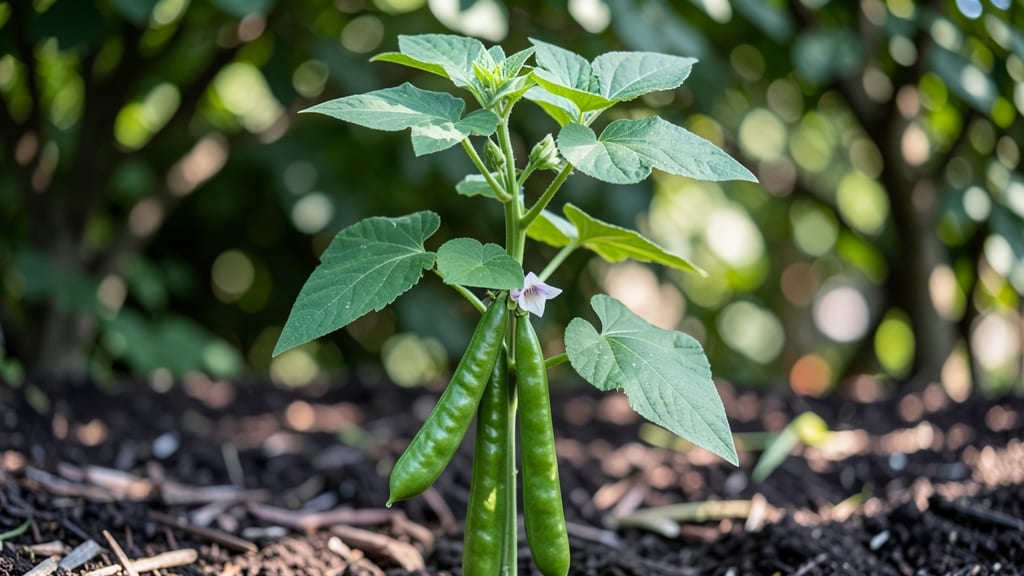
Growing Burpee green beans from seed gives you crisp-tender pods that taste fresher than anything from the store. 🌱 I planted my first batch last spring and was amazed how quickly those slender, sweet beans appeared—ready to harvest in just 55 days.
The secret lies in warm soil, consistent moisture, and a little patience as those vines race toward the sky. You’ll need a sunny spot with at least 6-8 hours of direct light, well-draining soil, and a trellis or stakes for climbing varieties.
Burpee’s bush types stay compact but still produce heavily. The key is planting seeds 1 inch deep and spacing them 4-6 inches apart—crowding leads to tangled vines and poor yields.
Water gently at the base to avoid fungal issues, and watch for those first true leaves to break through the soil. Once established, these beans grow fast—expect 3-4 weeks of heavy production if you keep them well-fed with compost.
The pods stay tender for just 3-5 days after flowering, so check your plants daily. Yellowing leaves? Usually a sign of overwatering or nitrogen deficiency—cut back slightly and feed with a balanced fertilizer. Perfect for beginners but rewarding for experienced gardeners too.
Whether you’re growing in rows or containers, Burpee’s varieties deliver consistent results with minimal fuss. Let’s get those seeds in the ground!
📚 In This Guide
- What you need
- Instructions
- Tips and common mistakes
- Wrapping up and next steps
What you need
- ● Burpee Green Bean Seeds – 1 packet (typically yields ~25 plants; adjust for larger gardens). Choose Burpee’s Blue Lake Bush or Burpee’s Stringless varieties for reliability.
- ● Well-draining soil – A mix of garden soil + compost (or potting soil for containers). Aim for a pH of 6.0–7.0.
- ● Sunlight access – 6–8 hours of full sun daily. Partial shade may reduce yield.
- ● Watering can or hose with a gentle nozzle – Keep soil consistently moist (not soggy).
- ○ Trellis or stakes (optional but helpful) – For pole varieties, use 5–6 ft tall stakes or a trellis to save space and improve airflow.
- ● Fertilizer (low-nitrogen) – A balanced 5-10-10 or organic fertilizer (like compost tea) at planting and mid-season.
- ● Row covers or netting – Protects against pests like bean beetles or rabbits.
- ● Mulch (straw or grass clippings) – Retains moisture and suppresses weeds.
- ● Seed-starting trays (if sowing indoors) – For a head start, use biodegradable pots.
- ● Pruners or scissors – For harvesting and trimming excess growth.
- ● Garden journal – Track planting dates, watering, and growth milestones!
Step-by-step instructions for growing Burpee green beans to perfection
Here’s how I grow Burpee green beans for that signature crisp-tender texture—no guesswork, just reliable results.
🌱 Step 1: Prepare the Soil and Planting Site
Green beans thrive in loose, well-draining soil with a pH between 6.0 and 7.0. Work in 2-3 inches of compost or aged manure into the top 12 inches of soil to improve fertility and drainage. I avoid fresh manure—it can burn young roots and delay harvests. If your soil is heavy clay, mix in 1-2 inches of coarse sand to prevent compaction.
Choose a location with full sun (6-8 hours daily) and shelter from strong winds, which can snap tender vines. Burpee beans grow best in soil temperatures above 60°F, so wait until after the last frost date in your area. A soil thermometer helps—plant only when readings consistently hit 65°F or warmer for at least a week.
🌱 Step 2: Sow Seeds at the Right Depth and Spacing
Plant 4-5 seeds per hill, spacing hills 4-6 inches apart in rows 18-24 inches apart. Press seeds 1 inch deep—any deeper and they’ll struggle to emerge. I use a small stick to mark planting spots to avoid overcrowding, which leads to weak, disease-prone plants. If sowing in containers, use 1-gallon pots per plant with drainage holes.
Thin seedlings to 3-4 plants per hill once they reach 2 inches tall, using scissors to snip excess rather than pulling to avoid disturbing roots. Watch for first true leaves (the second set after the initial seed leaves) before thinning—this ensures you’re not removing future producers.
☀️ Step 3: Provide Support and Consistent Moisture
Burpee green beans are bush-type varieties, so they don’t need trellises—but if you’re growing pole beans, install 5-foot-tall stakes or a trellis at planting time. Water deeply at the base every 2-3 days, aiming for 1 inch of water per week. Let the top 1-2 inches of soil dry between waterings to prevent fungal diseases like rust.
Mulch with 2-3 inches of straw or grass clippings to retain moisture and suppress weeds. Avoid overhead watering after planting—it can spread soil-borne diseases. You’ll know moisture is right when the soil feels damp but not soggy—like a wrung-out sponge.
✂️ Step 4: Harvest at Peak Tenderness for Crisp Pods
Harvest begins 55-60 days after sowing, when pods are 4-5 inches long and still glossy. I check plants every 2-3 days—waiting even a day past peak tenderness turns crisp beans to stringy, mealy pods. Use sharp scissors or pruning shears to cut stems ¼ inch above the pod to encourage more production.
Pick in the morning after dew dries for the freshest flavor. Harvesting stimulates more flowers and pods, extending the season by 2-3 weeks. If beans swell on the vine, they’ve passed their prime—remove them to redirect energy to new growth. Store harvested pods in the fridge for 5-7 days or blanch and freeze for long-term use.
🌿 Step 5: Maintain Soil and Prevent Common Pests
Side-dress plants with ½ cup of 5-10-10 fertilizer per hill when flowers appear, but avoid high-nitrogen feeds—it promotes leafy growth over pods. I also rotate crops annually to prevent soil-borne diseases like anthracnose, which causes dark spots on leaves and pods.
Watch for bean beetles (yellow with black spots) and Mexican bean beetles (orange with black stripes). Handpick adults and drop them in soapy water. For severe infestations, use neem oil spray at dusk when bees are inactive. Healthy plants resist pests better, so keep soil moist and avoid overcrowding.
Tips & tricks for perfect Burpee green beans
These game-changing insights will help you grow Burpee green beans that burst with crisp-tender perfection every time.
Soil Temperature Matters: The 65°F soil temperature threshold is non-negotiable for germination. I've learned this the hard way—planting too early in cool soil results in seeds that rot in the ground. Use a soil thermometer for accuracy, especially in spring when mornings can be deceptive. If your soil is below 65°F, wait until nighttime temperatures consistently stay above 55°F for at least a week.
Thinning Technique: When thinning to 3-4 plants per hill, use clean scissors to snip at soil level rather than pulling. This prevents disturbing the roots of your remaining plants, which can stress them and reduce yield. I've found that thinning at the first true leaves stage (not the initial seed leaves) gives me the best results—this ensures I'm not accidentally removing future producers.
Harvest Timing Secret: The 55-60 day window is your golden opportunity for peak tenderness. I've developed a simple test: gently press a pod with your thumbnail. If it springs back immediately, it's ready to harvest. Waiting just one more day can turn that crisp snap into a mealy texture. Harvesting in the morning also makes a noticeable difference in flavor and texture—pods picked then stay fresher longer.
Pest Prevention: The key to avoiding bean beetles is early intervention. I've had success with a preventive spray of neem oil mixed with water (1 tablespoon per quart) applied at planting and again when flowers appear. This creates a protective barrier without harming beneficial insects. For existing infestations, I've found that handpicking adults in the early morning when they're sluggish works better than chemical treatments—just drop them in soapy water immediately.
Pro Tips for Burpee Green Beans
- These game-changing insights will help you grow Burpee green beans that burst with crisp-tender perfection every time.
- Soil Temperature Matters: The 65°F soil temperature threshold is non-negotiable for germination.
- Thinning Technique: When thinning to 3-4 plants per hill, use clean scissors to snip at soil level rather than pulling.
Frequently asked questions
Got questions about growing Burpee Green Beans? You’re not alone! Here are answers to the most common queries to help you cultivate crisp, flavorful pods like a pro.
How long do Burpee Green Beans take to mature from seed?
Burpee Green Beans typically reach maturity in 55–60 days from seed, depending on your climate. Plant them after the last frost when soil is at least 60°F (15°C). For faster results, opt for transplants (available at nurseries) and enjoy harvests in about 45–50 days.
How much water do Burpee Green Beans need daily?
Keep soil consistently moist but not soggy—about 1–1.5 inches of water per week. Young plants need frequent watering (every 2–3 days), while mature plants thrive with deep watering 2–3 times weekly. Drip irrigation or soaker hoses prevent wilting and blossom-end rot.
Can I harvest Burpee Green Beans when they’re still small?
For tender, crisp pods, harvest when beans are 4–6 inches long and snap easily. Pick every 2–3 days to encourage continuous production. Overripe beans toughen—so stay on top of harvests! Pro tip: Use sharp scissors or pinch pods at the stem to avoid damaging vines.
What pests or diseases should I watch for with Burpee Green Beans?
Common threats include:
- Mexican bean beetles: Yellow-orange pests that skeletonize leaves. Handpick or use neem oil.
- Japanese beetles: Skewer adults with toothpicks or apply kaolin clay.
- Powdery mildew: White fungal spots? Improve airflow and spray baking soda solution (1 tsp per quart of water).
- Root rot: Avoid overwatering and plant in well-draining soil.
Can I grow Burpee Green Beans in containers or small spaces?
Yes! These beans are bush varieties, perfect for containers. Use a 5-gallon pot or deeper with drainage holes. Train vines on a trellis to save space and improve airflow. For small gardens, plant seeds 1–2 inches apart in rows 18–24 inches apart.
What’s the best soil temperature for planting Burpee Green Beans?
Wait until soil reaches at least 60°F (15°C)—cold soil delays germination. Test with a soil thermometer or plant when nighttime temps stay above 50°F (10°C). If your spring is chilly, use black plastic mulch to warm the soil faster.
Wrapping up and next steps
Growing Burpee green beans is a rewarding journey that delivers crisp-tender pods in just 55 days—perfect for gardeners eager for quick, flavorful harvests! 🌱 With the right soil, spacing, and care, you’ll enjoy a bountiful yield while boosting your garden’s productivity.
Whether you’re a beginner or a seasoned pro, these beans are a game-changer for small spaces and container gardens.
Ready to plant your seeds? Start by gathering your supplies, then follow the simple steps to sow and nurture your green beans. Before you know it, you’ll be savoring homegrown goodness straight from your garden. Happy growing! 🌿