
Planting
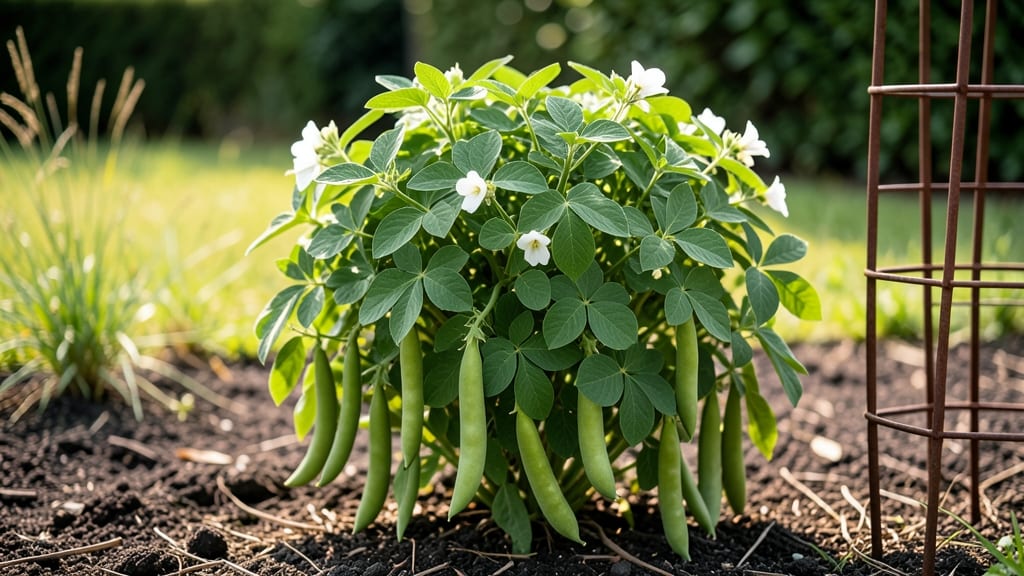
Transform your sunny balcony into a thriving Chinese beans plant factory in just 50 days—fast germination, warmth, and a trellis are all you need. 🌱 I’ve grown yard-long beans and mung beans for years, and the secret is simple: climbing.
These beans thrive where other varieties struggle, producing tender pods in record time. You’ll need well-draining soil, a sunny spot (6+ hours of light), and sturdy stakes or a trellis—beans grow fast and need support. Plant seeds 1 inch deep, 4 inches apart, and keep soil moist but not soggy.
Within 2 weeks, you’ll see sprouts, and by day 50, you’ll have a steady harvest of crisp, flavorful pods. The payoff is real: 1-2 pounds of beans per plant in a single season, with minimal effort.
They’re also pest-resistant compared to other beans, so you’ll spend less time fighting bugs and more time enjoying the harvest. Plus, the vines add lush green beauty to any space. Works in containers, raised beds, or directly in garden soil. Here’s how to make it happen—no green thumb required!
📚 In This Guide
- What you need
- Instructions
- Tips and common mistakes
- Wrapping up and next steps
What you need
- ● Seeds: 10–20 Phaseolus vulgaris (Chinese green bean variety) seeds (non-GMO, heirloom preferred).
- ● Containers: 2–4 medium-sized pots (10–12 inches deep) with drainage holes or a balcony planter box (at least 12 inches deep).
- ● Potting Mix: 3–5 gallons of well-draining, organic potting soil (avoid garden soil—it compacts too much!).
- ● Fertilizer: Balanced organic fertilizer (5-5-5 NPK ratio) or compost tea for a nutrient boost.
- ● Watering Can: 1–2 gallon capacity with a gentle spray nozzle.
- ○ Trellis or Support: 3–4 feet tall bamboo stakes, wire mesh, or a small A-frame trellis (optional but highly recommended for vertical growth!).
- ● Garden Gloves: A pair to protect your hands from soil and thorns.
- ● Pruning Shears: Small, sharp scissors for trimming vines (if needed).
- ● pH Test Kit: To check soil acidity (ideal range: 6.0–7.0 for beans).
- ● Mulch: Straw or shredded leaves to retain moisture and suppress weeds.
- ○ Grow Lights (Optional): LED clip lights for balconies with <6 hours of sunlight/day.
- ○ Seedling Heat Mat (Optional): If starting indoors before last frost.
Step-by-step instructions for growing Chinese green beans on a balcony
Here’s how to turn your sunny balcony into a productive bean patch—no garden required.
🌱 Step 1: Choose the Right Containers and Soil
Start with 5-gallon grow bags or 12-inch deep containers for each plant—Chinese green beans need room to sprawl. I like fabric grow bags because they’re lightweight and allow roots to breathe. Fill each container with a mix of 50% potting soil and 50% compost for nutrients and drainage. Avoid garden soil; it’s too heavy and can compact in containers.
Before planting, moisten the soil until it feels like a damp sponge—squeeze a handful, and if it holds together but doesn’t drip, you’re good. This prevents waterlogged roots, which can rot stems before your beans even sprout. I also add a handful of granular fertilizer (10-10-10) to the bottom of each container to give the plants a slow-release boost.
🌱 Step 2: Plant Seeds at the Right Depth and Spacing
Chinese green beans grow best when planted 1 inch deep and 4-6 inches apart. I use a small stick to poke holes in the soil, then drop 3-4 seeds per container—this gives you backup plants if some fail to germinate. Cover the seeds lightly with soil and pat down gently to ensure good seed-to-soil contact.
Water the soil until it’s evenly moist, but avoid soaking it. Overwatering at this stage can cause seeds to rot before they sprout. Place the containers in a warm spot (70-80°F) with indirect light until germination, which usually takes 7-10 days. You’ll know it’s working when tiny green shoots push through the soil—don’t be tempted to water again until the soil feels dry to the touch.
☀️ Step 3: Provide Sun and Support for Bushy Growth
Once seedlings emerge, move the containers to your sunniest balcony spot where they’ll get 6-8 hours of direct sunlight daily. Chinese green beans are vigorous climbers, so install 4-5 foot tall trellises or stakes near each container. I use bamboo stakes tied with twine—it’s sturdy and lets vines twine naturally.
Water deeply every 2-3 days, letting the top 1-2 inches of soil dry out between waterings. This encourages strong root growth and prevents mildew. When plants reach 6 inches tall, start fertilizing weekly with a balanced liquid fertilizer (diluted to half strength). You’ll see bushier growth and more pods within a couple of weeks.
✂️ Step 4: Harvest and Encourage Continuous Production
Harvest begins 50-60 days after planting when pods are 4-5 inches long and still crisp. I pick every 2-3 days to keep the plant producing—beans left too long on the vine turn woody and tough. Use sharp scissors to snip stems just above the pod to avoid damaging the plant.
After each harvest, give the plant a light pruning by pinching off any yellowing leaves or spent flowers. This redirects energy to new growth. If your balcony gets hot, provide afternoon shade during peak summer months to prevent stress. With consistent care, one plant can yield 2-3 pounds of beans over its growing season.
🪴 Step 5: Extend the Season with Simple Tricks
To keep producing beans past the first frost, cover containers with frost cloth on cool nights. I also add a thin layer of mulch around the base to retain soil warmth. If your balcony gets chilly, move containers closer to walls or under eaves for extra protection.
When the season ends, let one or two plants mature fully to collect seeds for next year. Dry pods on a screen in a warm, dry place, then store seeds in a cool, dark spot. With this method, you’ll have a fresh supply of beans—and the satisfaction of a homegrown harvest—year after year.
Tips & tricks for growing Chinese green beans on your balcony
Turn your balcony into a thriving bean garden with these essential tips that'll help you avoid common pitfalls and maximize your harvest.
Container Selection: While 5-gallon grow bags work perfectly, you can also use large plastic pots with drainage holes. The key is depth—12 inches is minimum for those sprawling roots. I've had great success with recycled wooden crates lined with landscape fabric, which adds a rustic charm while providing excellent drainage. Just ensure whatever you choose has drainage holes to prevent soggy roots that invite rot.
Germination Conditions: Those 7-10 days until germination can feel like forever! Create an ideal environment by placing a plastic bag loosely over each container to trap moisture and warmth. Remove it daily for 10 minutes to prevent mold. I've found that using a heat mat set to 75°F (just below the ideal 70-80°F range) actually speeds up germination by 2-3 days. The tiny shoots will surprise you sooner than you expect.
Fertilizer Strategy: The 10-10-10 granular fertilizer you add at planting will get your beans off to a great start, but don't stop there. After the first harvest, switch to a liquid fertilizer with higher phosphorus (like 5-10-5) to encourage more blooms and pods. I mix mine at half strength weekly—too much fertilizer can burn tender roots. A simple foliar spray of diluted fish emulsion every 4 weeks gives an extra nutrient boost without the risk of over-fertilizing.
Harvesting Technique: When harvesting those 4-5 inch pods every 2-3 days, use clean, sharp scissors to avoid damaging the plant. I've learned that harvesting in the morning gives you the freshest beans and allows the plant to recover during the day. Pro tip: If you notice some pods starting to yellow or turn brown, leave them on the vine—they'll develop seeds that you can save for next year's planting. This two-for-one approach means you're always getting something from your plants!
Pro Tips for Chinese Beans Plant
- Turn your balcony into a thriving bean garden with these essential tips that'll help you avoid common pitfalls and ma...
- Container Selection: While 5-gallon grow bags work perfectly, you can also use large plastic pots with drainage holes...
- Germination Conditions: Those 7-10 days until germination can feel like forever! Create an ideal environment by placi...
Frequently asked questions
How long does it take for Chinese green beans to mature?
Chinese green beans are fast growers—typically ready for harvest in just 50–60 days from planting! With warm soil (60°F+) and consistent moisture, you can enjoy fresh pods within two months. Pro tip: Pick beans frequently to encourage more production!
Can I grow Chinese green beans in cold climates?
Chinese green beans love warmth but can tolerate light frost if planted after the last frost date. For colder regions, start seeds indoors 4–6 weeks before the last frost or use row covers. If nights dip below 50°F, consider a greenhouse or container garden near a sunny wall.
What can I plant with Chinese green beans to improve growth?
Chinese green beans thrive with companion plants like:
- Marigolds (repel pests)
- Bush beans (share nutrients)
- Radishes (break up soil)
Why are my Chinese green bean leaves turning yellow?
Yellow leaves usually signal overwatering, nutrient deficiency, or pests. Check for:
- Root rot (water less, improve drainage)
- Nitrogen deficiency (add compost or balanced fertilizer)
- Bean beetles (handpick or use neem oil)
Can I save seeds from Chinese green beans?
Yes! Let a few pods mature fully on the plant (they’ll turn dry and papery). Extract seeds, dry them in a cool, dark place for 2 weeks, and store in an airtight container. Note: Hybrid varieties may not produce true-to-type seeds. Tip: Label seeds with the variety and date!
Wrapping up and next steps
Growing your own Chinese green beans is a rewarding journey that brings fresh, crisp produce straight to your kitchen in just 50 days—perfect for balconies or small gardens! 🌱 With the right soil, sunlight, and care, you’ll enjoy a bountiful harvest that’s both nutritious and delicious.
Whether you’re a beginner or a seasoned gardener, this fast-growing plant proves that homegrown goodness is always within reach.
Ready to dig in? Start by planting your first seeds this week—your future meals (and bragging rights) will thank you! For extra tips, check out our FAQs section or explore more balcony gardening guides.