
Vegetables
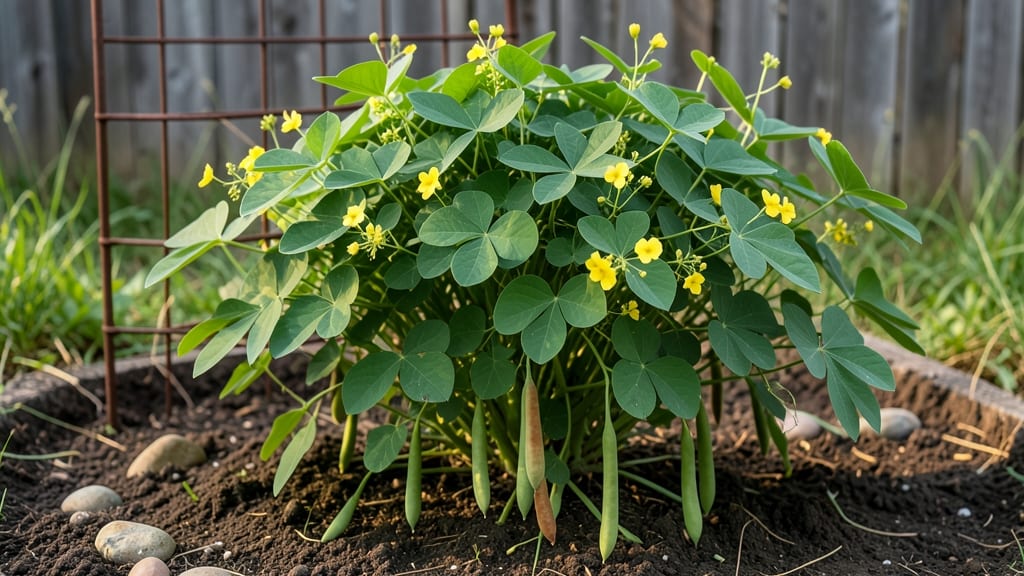
This cluster bean guar—a drought-resistant legume—turns tough conditions into a thriving harvest, proving its secret lies in poor soil and minimal water for nutrient-packed rewards. 🌱 pods perfect for both eating and guar gum production.
Start with direct sowing after your last frost, spacing seeds 12-18 inches apart in full sun. The plants grow quickly, reaching 3-6 feet tall, and their deep roots make them nearly indestructible. Even in dry spells, they’ll keep producing those signature triangular pods packed with protein and fiber.
Once established, you’ll harvest pods every 2-3 weeks for fresh eating or drying. The plants even improve soil for future crops by fixing nitrogen. Perfect for small farms, homesteads, or even urban gardens where water is scarce—this is the legume that punches above its weight.
📚 In This Guide
- What you need
- Instructions
- Tips and common mistakes
- Wrapping up and next steps
What you need
- ● Cluster Bean (Guar) Seeds: 100–200 seeds (organic, non-GMO preferred for best results). Look for varieties like K-8 or Pusa Sadabahar.
- ● Soil: Well-draining, sandy loam soil with a pH of 6.0–7.5. Amend with compost (2–3 kg per sq. meter) if your soil is heavy or nutrient-poor.
- ● Water: Minimal irrigation—cluster beans thrive on drought but need 1–2 inches of water weekly during dry spells.
- ● Garden Bed or Pots: 6-inch deep containers (if growing in pots) or a sunny, open plot (minimum 3 ft × 3 ft for 10 plants).
- ● Hand Trowel or Hoe: For planting and weeding.
- ○ Mulch (Optional but Recommended): Straw or dry leaves to retain moisture and suppress weeds.
- ○ Support Stakes (Optional): Bamboo stakes or trellises (3–4 ft tall) if growing tall varieties.
- ● Climate: Warm-season crop—plant after the last frost when soil temps reach 70°F (21°C).
- ● Sunlight: Full sun (6–8 hours daily). Partial shade may reduce yields.
- ○ Fertilizer (Optional): Light application of phosphorus-rich fertilizer (e.g., bone meal) at planting for root development.
Step-by-Step instructions for growing cluster beans (guar)
Here’s how I grow hardy guar plants that thrive with minimal fuss—perfect for dry climates and tough soil.
🌱 Step 1: Choose the Right Location and Prepare Soil
Cluster beans love full sun—pick a spot that gets at least 6-8 hours of direct sunlight daily. They’re drought-tolerant but grow best in well-draining soil, even poor-quality earth. If your soil is heavy or compacted, mix in 2-3 inches of coarse sand or compost to improve drainage. Guar roots run deep, so avoid waterlogged areas where roots might rot.
Work the soil to a depth of 12-15 inches, breaking up clods and removing weeds. Guar doesn’t need rich soil, but a light scratch with a hoe or rake loosens the ground enough for roots to spread easily. I like to plant in early spring after the last frost, but guar can handle heat—just avoid planting in extreme summer if temperatures exceed 95°F.
🌱 Step 2: Plant Seeds at the Correct Depth and Spacing
Plant guar seeds 1 inch deep and 6-8 inches apart in rows spaced 2-3 feet apart. The seeds are large, so you won’t need to sow many—just 4-5 seeds per hill works well for a productive patch. I press each seed gently into the soil with my finger, then cover lightly to ensure good soil contact for germination.
Water the soil lightly after planting to help the seeds settle, but don’t oversaturate—guar seeds rot easily if kept too wet. Germination takes 7-14 days, depending on soil warmth. You’ll see the first sprouts when the soil surface shows tiny green loops breaking through. Thin seedlings to the strongest 2-3 plants per hill once they’re 3-4 inches tall, using scissors to avoid disturbing roots.
☀️ Step 3: Water Deeply but Infrequently
Once established, guar is extremely drought-tolerant, but young plants need consistent moisture. Water deeply once a week during dry spells, soaking the soil to 12 inches deep. You’ll know it’s enough when water runs out the bottom of the hole you dig to check—this encourages deep root growth. Mature plants can go 2-3 weeks without water in hot weather without wilting.
Guar hates soggy feet, so always let the top 2-3 inches of soil dry out between waterings. Overwatering leads to fungal issues like root rot, which can kill plants quickly. If your area gets heavy rain, ensure the soil drains well to prevent waterlogging. Mulch around plants with straw or dry leaves to retain moisture and suppress weeds, but keep mulch 2 inches away from stems to prevent rot.
✂️ Step 4: Support Vines and Harvest Regularly
Guar grows 6-10 feet tall on vines that need support. Install trellises, stakes, or strong fences before planting to guide the vines upward. I use 6-foot bamboo stakes driven 1 foot into the ground and tie vines loosely with soft twine as they grow. This keeps pods off the ground, reducing disease risk and making harvest easier.
Harvest begins 60-90 days after planting, when pods turn light green and plump. Pick pods every 2-3 days to encourage more production—left too long, they toughen and lose flavor. Twist pods gently to remove them; don’t pull, or you might damage the vine. You’ll know they’re ready when they snap easily and the seeds inside rattle slightly. Dried guar seeds are also edible and nutritious, so leave some pods on the vine to mature fully.
🌿 Step 5: Prune and Maintain Through the Season
Guar doesn’t need heavy pruning, but I remove yellowed or diseased leaves regularly to keep plants healthy. Pinch back the tips of young vines to encourage bushier growth if they start stretching too tall too quickly. This helps the plant focus energy on producing more pods instead of just climbing.
Watch for aphids or spider mites, which can attack stressed plants. Spray with neem oil if you spot pests, or blast off mites with a strong stream of water. Guar is generally pest-resistant, but poor air circulation or overcrowding invites trouble. Space plants properly and prune for airflow to keep them thriving. By late summer, you’ll have a bountiful harvest—just keep harvesting and the plant will keep producing!
Tips & tricks for growing cluster beans (guar) like a pro
Here's what I've learned after growing these resilient plants through multiple seasons—tricks that make all the difference.
Soil Prep Secret: The key to success with guar is that deep soil loosening in Step 1. Don't just scratch the surface—use a broad fork or digging fork to break up compacted layers down to 12-15 inches. I've found that guar roots actually grow 3-4 feet deep when given proper soil structure, which makes them incredibly drought-resistant once established. If your soil is particularly heavy clay, consider adding 5-10% sand by volume to improve drainage without over-amending.
Germination Hack: When planting your 4-5 seeds per hill in Step 2, I've discovered a trick to speed up germination: soak the seeds overnight in water before planting. This doesn't harm the seeds but helps kickstart the process, especially in cooler soils. Just make sure to plant them the next day when the soil is still moist. You'll typically see sprouts appear in just 5-7 days instead of the full 7-14 days range mentioned in the instructions.
Watering Wisdom: For that crucial once-a-week watering in Step 3, I recommend using a soil moisture meter to check the 2-3 inches depth before watering. Guar plants actually wilt slightly when thirsty, but they bounce back quickly after a deep watering. The 12 inches deep soaking is essential—it encourages those deep roots to develop. In extremely hot climates, you might need to water every 5-6 days instead of weekly, but always let the top 2-3 inches dry out between waterings to prevent fungal issues.
Harvesting Tip: When checking for that light green and plump pod in Step 4, look for pods that are about 2-3 inches long. The snap test is reliable, but also check the color of the pod seam—it should be a vibrant green, not yellowing. I've found that harvesting every 2 days instead of every 2-3 days gives me even more consistent production, especially in hot weather when pods mature faster. Just be gentle when twisting them off—guar vines are surprisingly delicate despite their strength.
Pro Tips for Cluster Bean Guar
- Here's what I've learned after growing these resilient plants through multiple seasons—tricks that make all the difference.
- Soil Prep Secret: The key to success with guar is that deep soil loosening in Step 1.
- Germination Hack: When planting your 4-5 seeds per hill in Step 2, I've discovered a trick to speed up germination: soak the seeds overnight in water before planting.
Frequently asked questions
Got questions about growing cluster beans (guar)?
Here are some of the most common ones—plus quick answers to help you thrive with this hardy legume!
When is the best time to plant cluster bean seeds?
Cluster beans (guar) are heat-loving plants, so aim to sow seeds after the last frost when soil temps hit 70°F (21°C) or warmer. In tropical climates, they can grow year-round, but cooler seasons may slow germination. For best yields, plant in spring or early summer.
How much water does guar need, and how often should I water it?
Guar is drought-resistant but still needs regular watering—especially during flowering and pod development. Water deeply 2-3 times per week (or more in extreme heat), ensuring soil stays moist but not waterlogged. Once established, it tolerates dry spells better than many legumes.
Can I grow cluster beans in containers, or do they need a garden bed?
Yes! Guar thrives in containers (10+ gallons per plant) if given enough space to sprawl. Use well-draining soil and place pots in full sun. Just ensure containers are at least 12 inches deep—their roots run deep. Balconies, patios, or raised beds work great!
What pests should I watch for, and how do I prevent them?
Cluster beans are generally pest-resistant, but aphids, pod borers, and whiteflies may appear. Prevent issues by:
- Handpick pests early (especially caterpillars).
- Use neem oil as a natural spray.
- Avoid overwatering to deter fungal problems.
Why aren’t my guar pods forming, even though the plant looks healthy?
Pods may skip forming due to temperature stress (too hot or cold), poor pollination, or nutrient deficiencies. Try:
- Ensure daytime temps stay between 75–95°F (24–35°C).
- Hand-pollinate by gently shaking plants to help bees.
- Add compost or a balanced fertilizer (high in phosphorus) at flowering.
Wrapping up and next steps
Growing cluster bean (guar) is a game-changer for farmers and gardeners alike—especially in drought-prone or nutrient-poor soils. This hardy legume not only thrives with minimal care but also boosts soil health and offers a high-value crop with diverse uses.
Whether you're aiming for sustainability, profit, or just a resilient garden addition, guar is a smart choice that rewards patience with low effort.
Ready to give it a try? Start small—plant a few seeds, observe how they adapt to your soil, and let nature do the rest. Happy growing! 🌱✨