
Advice
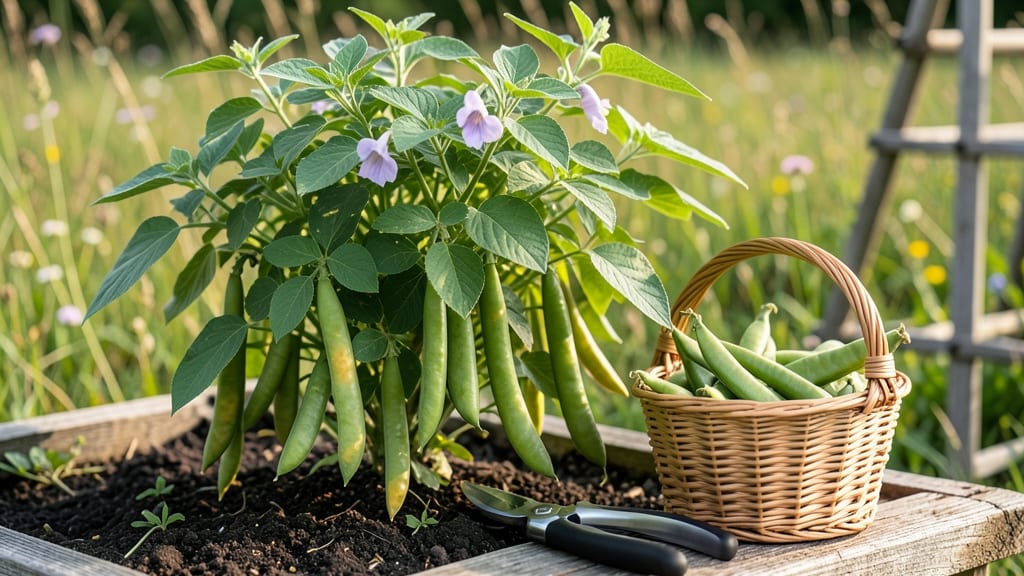
Growing fresh yellow beans on a pole trellis cuts harvest time by half and saves space. 🌱 The secret lies in choosing the right variety—wax beans or yellow string beans—then training them vertically to maximize yield in small gardens.
My first attempt with bush beans took up too much space, but pole varieties transformed my backyard into a compact, high-producing system.
Start with well-draining soil rich in compost, and plant seeds 1 inch deep after the last frost when soil reaches 60°F. Pole beans need 6-8 hours of sunlight daily and consistent moisture—about 1 inch per week—but never let them sit in soggy soil.
A sturdy 6-foot trellis supports vines, keeping pods off the ground and reducing disease risk. With proper care, you’ll harvest tender beans in just 50-60 days, far earlier than bush varieties.
📚 In This Guide
- What you need
- Instructions
- Tips and common mistakes
- Wrapping up and next steps
What you need
- ● Seeds: 1–2 lbs of Phaseolus vulgaris (yellow wax or yellow bush bean varieties). Look for heirloom or organic seeds for best results!
- ● Growing Medium: Well-draining potting mix (10–15 lbs) or garden soil amended with compost (for in-ground planting).
- ○ Perlite or vermiculite (1–2 cups) to improve aeration (optional but helpful for containers).
- ● Containers or Garden Space: For containers: 5–7 gallon pots (at least 12" deep) with drainage holes, or a raised bed (minimum 12" deep x 24" wide).
- ● For trellis/garden: 3–4 ft tall pole trellis or sturdy stakes (1–2 per plant).
- ● Fertilizer: Balanced organic fertilizer (5-5-5 or 10-10-10) or compost tea (follow package instructions).
- ● Watering Supplies: Watering can with a rose nozzle or a drip irrigation kit (to keep soil consistently moist).
- ● Hand Trowel (for transplanting or planting seeds).
- ● Garden Gloves (to protect your hands from soil and thorns).
- ● Pruners or Scissors (for trimming vines or harvesting).
- ● Sunlight: Full sun (6–8 hours daily) is a must—yellow beans are sun-worshippers! 🌞
- ○ pH Test Kit (Optional): Aim for soil pH 6.0–7.0 (slightly acidic to neutral).
- ○ Mulch (Optional): Straw or shredded leaves (2–3 inches) to retain moisture and suppress weeds.
How to grow compact pole yellow beans with a trellis system
Here's how to coax those sweet, compact yellow beans up a trellis—without the sprawl.
🌱 Step 1: Choose the Right Trellis and Planting Site
Start with a 5-6 foot tall trellis (I like sturdy metal or wooden lattice) placed where it gets full sun (6+ hours daily). Yellow beans need warmth to thrive, so avoid shady spots. Dig a 1-inch deep trench along the trellis line—this will hold the plants upright as they climb.
If your soil drains poorly, mix in 2-3 inches of compost into the planting hole. Yellow beans hate soggy roots, so amending the soil prevents rot. I always test drainage by squeezing a handful of soil—if it holds water like a sponge, add more compost or sand.
🌿 Step 2: Plant Seeds at the Correct Depth and Spacing
Plant 4-5 seeds per hill, about 1 inch deep and 3-4 inches apart. Yellow beans grow best in warm soil, so wait until after the last frost when nighttime temps stay above 50°F. If planting early, use black plastic mulch to warm the soil.
I like to plant seeds in a small circle around the trellis base—this creates a natural anchor for the vines. Water gently after planting, keeping the soil moist but not soggy. You'll see sprouts in 7-10 days, but don't rush to thin them yet.
☀️ Step 3: Train Vines Up the Trellis as They Grow
Once seedlings reach 4-6 inches tall, gently tie the strongest stems to the trellis with soft twine or old fabric strips (never wire—it can damage tender vines). I loop the tie around the trellis and the stem, leaving room to grow.
Watch for new tendrils—these little curly growths grab the trellis naturally. Guide them upward as they appear, but don’t force them. If a vine strays, tuck it back gently. Compact growth happens when you prune side shoots that grow horizontally, encouraging energy into upward vines.
💧 Step 4: Water and Fertilize for Continuous Harvest
Yellow beans need 1-1.5 inches of water per week, delivered at the base (not overhead). I water deeply every 3-4 days in hot weather, checking soil moisture by sticking my finger 1 inch down—if it’s dry, water again.
Side-dress with compost or a balanced fertilizer (10-10-10) when flowers appear. Too much nitrogen makes leaves grow fast but beans stay small. I scatter a handful of fertilizer around the base, then water it in. Harvest begins in 50-60 days—pick beans when they’re 4-5 inches long for best flavor.
✂️ Step 5: Prune and Harvest for Compact, Productive Plants
Pinch off the topmost buds when vines reach the trellis top. This redirects energy to lower pods, giving you a longer harvest window. I also snip any yellowing or diseased leaves immediately to keep the plant healthy.
Harvest beans every 2-3 days—they grow fast, and overripe beans toughen up. Cut the pod with scissors or fingers, leaving the stem intact. With proper care, a single trellis can produce 2-3 pounds of beans over the season. Save a few seeds from your best pods for next year!
Tips & tricks for perfect pole-trellis yellow beans
These simple strategies will help you grow sweet, compact yellow beans that climb neatly—no sprawling messes here.
Trellis Stability: Bury your trellis at least 6 inches deep or use heavy stakes to anchor it. I learned this the hard way when a gust of wind toppled my first trellis mid-season! A sturdy base prevents leaning and keeps vines growing straight up. For extra security, tie the trellis to a nearby post with soft twine.
Soil Prep Secret: Before planting, mix in 1 cup of bone meal (optional) into the planting hole to boost phosphorus for root development. This isn't required, but I've noticed faster germination and stronger early growth when I add it. The key is ensuring your soil drains well—yellow beans despise soggy roots, so test drainage before planting.
Thinning Timing: Wait until seedlings are 2-3 inches tall before thinning to avoid disturbing the roots of weaker plants. I use a small pair of scissors to snip unwanted seedlings at soil level rather than pulling them—this prevents uprooting your desired plants. Leave the strongest seedling per hill to grow vigorously.
Watering Wisdom: Mulch around the base of your plants with 2-3 inches of straw or grass clippings to retain moisture and prevent soil splashing on leaves. This keeps the roots consistently moist while reducing the risk of fungal diseases. Remember, yellow beans need 1-1.5 inches of water weekly, but never let them sit in standing water.
Pro Tips for Fresh Yellow Beans
- These simple strategies will help you grow sweet, compact yellow beans that climb neatly—no sprawling messes here.
- Trellis Stability: Bury your trellis at least 6 inches deep or use heavy stakes to anchor it.
- Soil Prep Secret: Before planting, mix in 1 cup of bone meal (optional) into the planting hole to boost phosphorus for root development.
Frequently asked questions
Got questions about growing and enjoying fresh yellow beans? You’re in the right place! Here are some common queries—and their answers—to help you cultivate and savor these vibrant, flavorful pods like a pro.
How long does it take for fresh yellow beans to grow from seed?
Fresh yellow beans typically sprout in 7–14 days after planting, depending on soil warmth and moisture. Once established, expect 50–60 days to harvest for pole varieties and 45–55 days for bush types. Patience pays off—early blooms mean early harvests!
What’s the best temperature for growing fresh yellow beans?
Yellow beans thrive in warm soil (60–85°F), with ideal air temperatures between 70–85°F. They’re sensitive to frost—plant after the last frost date in spring or wait until late summer for fall harvests. If nights dip below 50°F, use row covers to protect tender plants.
Can I eat fresh yellow beans straight from the pod?
Unlike some beans, yellow wax beans are delicious raw, with a crisp texture and sweet, buttery flavor. For extra tenderness, lightly steam or sauté for 2–3 minutes. Pro tip: Pick pods when they’re 3–4 inches long for the best balance of crunch and flavor.
What can I do if my yellow beans taste bitter?
Bitter flavor often signals overmaturity or stress. Harvest more frequently to keep pods young and tender. If plants are struggling, check for underwatering, poor soil drainage, or pests (like bean beetles). A balanced fertilizer with low nitrogen can also improve sweetness.
Are there alternatives to pole beans for small spaces?
Yes! Try bush varieties like ‘Golden Wax’ or ‘Contender,’ which grow 2–3 feet tall and don’t need trellises. For vertical gardening, use compact pole beans (like ‘Blue Lake’) with a 5-foot trellis—they’re space-efficient and high-yielding. Container gardening works too!
Wrapping up and next steps
Growing your own fresh yellow beans on a pole-trellis system isn’t just rewarding—it’s a game-changer for small spaces! With the right materials, a little patience, and these pole-trellis secrets, you’ll harvest crisp, flavorful beans that outshine store-bought any day. 🌱✨
Ready to take the next step? Start by planting your seeds this week—whether in your backyard, balcony, or even a sunny windowsill. Watch your vertical garden thrive, and soon you’ll be enjoying homegrown goodness with pride! 🍽️💚