
Size
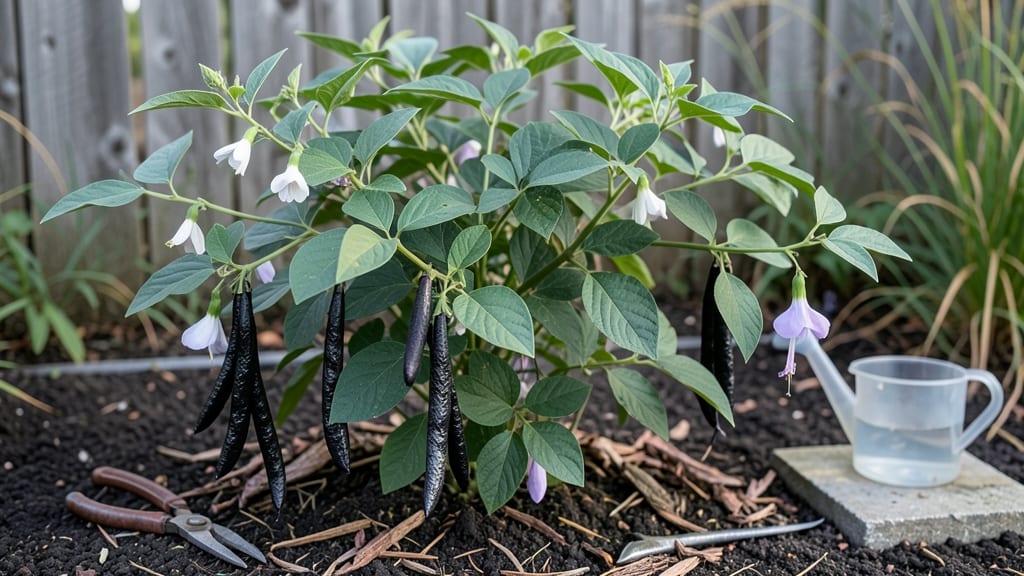
Growing black turtle beans from seed is easier than you think—and your small garden will thank you. 🌱 These rich, earthy beans thrive in warm weather but can stretch your harvest season with a few clever tricks, like succession planting and shade cloth in hot climates.
I’ve grown them in containers, raised beds, and even along fences, and they always deliver that deep, nutty flavor you can’t find in stores.
Start with a 5-6 week warm season (after your last frost when soil hits 60°F), and you’ll be harvesting in 60-70 days. Black turtle beans love full sun (6+ hours daily) and well-draining soil—mix in compost for extra nitrogen, since these hungry plants gobble up nutrients.
Plant seeds 1 inch deep, 4-6 inches apart, and watch for those first leaves in 7-10 days. Trellising saves space and keeps pods clean, but they’ll bush out nicely without one too.
Water consistently—1-2 inches per week—but avoid soggy soil, which invites fungal diseases like rust or blight. Mulch with straw to retain moisture and deter weeds. When pods turn glossy black (usually 70-80 days after planting), pick them regularly to encourage more production.
A single plant can yield 1-2 pounds of beans, so even a small garden becomes a protein powerhouse.
For year-round harvests, try succession planting every 2 weeks in warm zones (8-10), or use row covers to extend the season in cooler areas. Pair them with corn and squash for a classic Three Sisters combo, and avoid planting near onions or garlic—they stunt growth.
With these tips, you’ll enjoy fresh, homegrown beans from late summer through fall, and maybe even into winter with a greenhouse or cold frame.
📚 In This Guide
- What you need
- Instructions
- Tips and common mistakes
- Wrapping up and next steps
What you need
- ● Seeds: 1–2 lbs of Phaseolus vulgaris (black turtle bean variety). Look for heirloom or organic seeds for best results.
- ● Soil: Well-draining, nutrient-rich soil (pH 6.0–7.0). Mix in 2–3 inches of compost or aged manure before planting.
- ● Fertilizer: Balanced organic fertilizer (10-10-10) or compost tea at planting.
- ● Low-nitrogen fertilizer (like 5-10-10) when flowers appear.
- ● Water: Consistent access to 1–2 inches of water per week (drip irrigation or soaker hoses work best).
- ● Garden bed or containers: At least 18–24 inches deep (beans need room to sprawl!). For containers, use 5-gallon pots or larger.
- ● Trellis or stakes: 5–6 ft tall (black turtle beans are climbers! Use bamboo stakes or wire trellises).
- ● Hand trowel or transplanter: For digging holes (2–3 inches deep, 4–6 inches apart).
- ● Pruning shears: To trim excess foliage or dead vines.
- ○ Mulch (optional): Straw or shredded leaves to retain moisture and suppress weeds.
- ● Sunlight: Full sun (6–8 hours daily). Partial shade may reduce yield.
- ● Warmth: Soil temperature of 60°F+ (wait until after the last frost in cooler climates).
- ● Patience: Black turtle beans take 80–100 days to mature—plan ahead for a year-round harvest!
Step-by-Step guide to growing black turtle beans in small gardens
Here's how I grow these flavorful beans reliably in tight spaces using simple techniques anyone can master.
🌱 Step 1: Choose the Right Location and Prepare Soil
Black turtle beans thrive in full sun—at least 6-8 hours daily—so pick a spot that gets morning sunlight and afternoon shade if your climate runs hot. I always test soil pH first; these beans prefer 6.0-6.8. Amend heavy clay with 2-3 inches of compost and work it into the top 6 inches of soil.
Loosen the soil to a depth of 12 inches to encourage deep root growth. The key here is drainage—beans hate soggy feet. If your soil stays wet for more than a day after rain, raise beds or mix in sand or perlite to improve aeration. I like to add a handful of bone meal at planting time for extra phosphorus, which boosts root development.
☀️ Step 2: Plant Seeds at Proper Depth and Spacing
Sow seeds 1 inch deep and 3-4 inches apart in rows spaced 18-24 inches apart. This spacing gives plants room to develop their sprawling vines without competing for sunlight. I plant in early spring after the last frost or late summer for a fall crop—just make sure soil stays above 60°F for good germination.
For small gardens, consider trellising. Plant seeds near a sturdy support structure and train vines upward as they grow. This saves space and makes harvesting easier. Water gently after planting to settle soil around seeds, but avoid soaking—excess moisture can cause rot before germination.
💧 Step 3: Water Consistently and Monitor for Pests
Keep soil evenly moist but never soggy. Water 1-2 inches per week, increasing slightly during flowering and pod development. I water at the base in the morning to prevent fungal diseases. Black turtle beans are drought-tolerant once established, but consistent moisture during early growth prevents blossom drop.
Watch for common pests like Mexican bean beetles and aphids. I handpick beetles in the morning when they're sluggish and spray aphid-infested plants with soapy water. For larger gardens, row covers work well until plants flower. The first true leaves should appear in 7-14 days—this is when you'll notice any pest activity starting.
✂️ Step 4: Prune and Harvest for Continuous Production
Pinch back the main stem when plants reach 18 inches tall to encourage bushier growth. This produces more side branches where pods develop. Harvest pods when they're 4-6 inches long and firm—this ensures tender beans. I pick every 2-3 days to encourage continuous flowering and pod production.
Leave a few pods on the plant to mature fully for seed saving. The beans will turn dark and hard inside the pod when ready. For fall plantings, expect a harvest 60-80 days after sowing, depending on your climate. Regular harvesting prevents the plant from putting all its energy into seed production, which can reduce yield.
🌿 Step 5: Extend the Season with Simple Hacks
To grow black turtle beans year-round, start seeds indoors 4-6 weeks before your last frost date and transplant seedlings after temperatures stabilize. For late fall harvests, use row covers to extend the season by 2-3 weeks. I've grown them successfully in containers using 5-gallon buckets with good drainage.
Mulch heavily with straw to retain soil moisture and regulate temperature. This keeps roots cool in summer and warm in winter. In warmer climates, succession plant every 2-3 weeks for a continuous supply. The key is consistent care—once established, these beans reward you with prolific harvests in even the smallest spaces.
Tips & tricks for perfect black turtle bean harvests
These pro strategies will help you maximize your yield in limited space while avoiding common gardening pitfalls.
Sunlight Optimization: While black turtle beans need that full sun (6-8 hours daily), I've found that morning sunlight is most critical. If your garden gets intense afternoon heat, consider using shade cloth (30-50%) during peak hours—this prevents leaf scorch while still providing enough light. I've grown them successfully in partial shade with just 5-6 hours of morning sun, though yields will be lower. The key is consistent light exposure without stressing the plants.
Soil Preparation Pro Tip: That 12-inch deep soil loosening in Step 1 is non-negotiable for these beans. I've seen dramatic yield improvements when I add a handful of biochar along with the bone meal—this improves water retention and microbial activity in the soil. For containers, use a mix of 60% potting soil, 20% compost, and 20% perlite to mimic that loose, well-draining texture we're aiming for. The roots will thank you with better nutrient uptake.
Pest Prevention Strategy: The first 14 days after planting are your best window for early pest intervention. I swear by neem oil spray (1 tsp per quart of water) applied in the evening—it disrupts the life cycle of Mexican bean beetles and aphids without harming beneficial insects. For organic gardens, plant a border of marigolds around your beans; their strong scent repels many common pests. And here's a trick I learned: sprinkle diatomaceous earth lightly around the base of plants after watering—it creates a natural barrier without affecting the soil chemistry.
Harvest Timing Secret: Those 4-6 inch pods are the sweet spot for tender beans, but here's what nobody tells you—harvest in the morning after the dew has dried. The pods contain the most moisture at this time, making them juicier and more flavorful. I also recommend using pruning shears rather than pulling pods by hand; this prevents damaging the plant's delicate stems. For continuous production, always harvest from the bottom up—this encourages new growth from lower branches where sunlight isn't as intense.
Pro Tips for Grow Black Turtle Beans
- These pro strategies will help you maximize your yield in limited space while avoiding common gardening pitfalls.
- Sunlight Optimization: While black turtle beans need that full sun (6-8 hours daily), I've found that morning sunlight is most critical.
- Soil Preparation Pro Tip: That 12-inch deep soil loosening in Step 1 is non-negotiable for these beans.
Frequently asked questions
Got questions about growing black turtle beans? You’re not alone!
Here are answers to the most common queries to help you cultivate a thriving harvest, even in small spaces.
How long does it take for black turtle beans to grow from seed to harvest?
Black turtle beans typically take 80 to 100 days to mature from seed to harvest, depending on your climate and variety. Start seeds indoors 4-6 weeks before the last frost or sow directly after soil warms to 60°F (15°C) for faster germination. Patience pays off—these beans are worth the wait!
Can I grow black turtle beans in containers or small gardens?
These beans thrive in containers as small as 12 inches deep or raised beds, as long as they have 6+ inches of soil and room to climb (use a trellis or stakes). Choose bush varieties if space is ultra-limited—they grow in compact mounds. Just ensure they get 6-8 hours of sunlight daily.
Why are my black turtle bean plants wilting or turning yellow?
Wilting or yellowing leaves often signal underwatering, overwatering, or nutrient deficiencies. Check soil moisture—beans need 1-2 inches of water weekly but hate soggy roots. Yellow leaves may also mean nitrogen deficiency; fertilize with compost or a balanced organic fertilizer. Pests like aphids can also stress plants—inspect leaves and treat with neem oil if needed.
Do black turtle beans need a trellis, or can they grow without support?
While black turtle beans can grow without support, using a trellis or stakes saves space and improves airflow, reducing disease risk. Vining varieties sprawl widely, but climbing them vertically increases yield and makes harvesting easier. If you skip support, plant seeds 12-18 inches apart in rows 2-3 feet apart to avoid overcrowding.
Can I grow black turtle beans year-round, or are they seasonal?
Black turtle beans prefer warm weather (70-85°F / 21-29°C) and struggle in frost, but with the right strategies, you can extend your growing season. In cooler climates, start seeds indoors early or use row covers to protect young plants. In hot zones, plant in fall or winter for a second harvest. Succession planting every 2-3 weeks ensures a steady supply!
Wrapping up and next steps
Growing black turtle beans is a rewarding journey that brings flavor, nutrition, and sustainability to your small garden! 🌱 With the right soil, spacing, and care—plus a few clever hacks—you can enjoy a bountiful harvest year-round.
Whether you're a beginner or a seasoned gardener, these beans thrive even in tight spaces, making them perfect for urban or balcony gardens.
Ready to take the next step? Start by planting your first seeds this season, and soon you’ll be savoring homegrown beans in your favorite dishes. Happy growing—your taste buds (and the planet) will thank you! 🌟