
Size
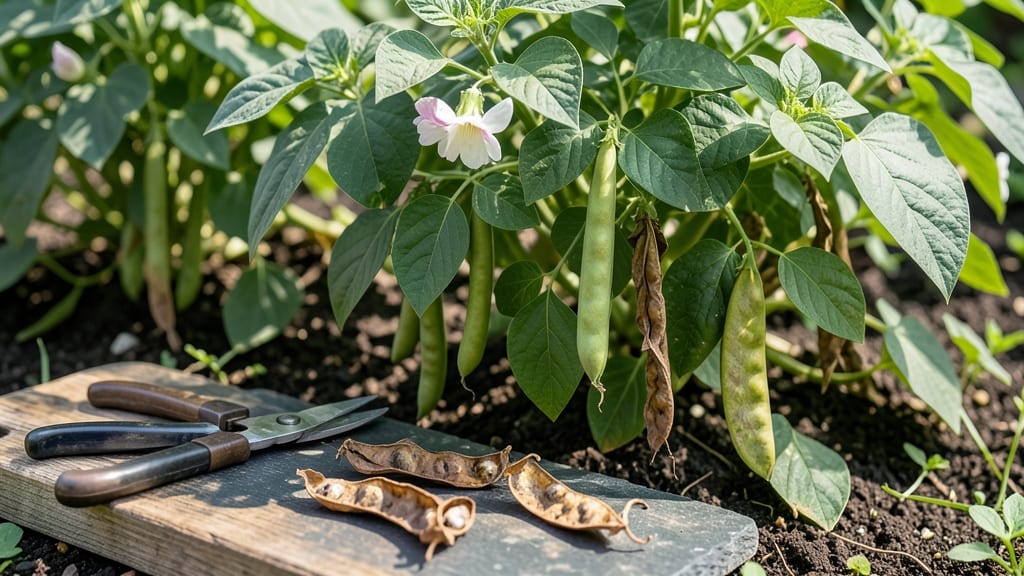
Growing dried beans from seed means your pantry will never be empty again. 🌱 The secret to success is patience—these legumes take time, but the reward is a shelf-stable staple that outlasts any store-bought can.
My first batch of black beans lasted through two winters, and I’ve since expanded to kidney and pinto varieties for variety. Start with a 6-inch-deep bed in full sun, where beans can spread their roots deep. Plant seeds 1-2 inches apart after soaking overnight to speed germination.
Water consistently but avoid soggy soil—the roots need air as much as moisture. Within 8-10 weeks, you’ll harvest pods that dry into the beans you’ll store for months. The real magic happens when you cure the beans properly.
Hang dried pods in a warm, dry spot for 2-3 weeks, then shell and store in airtight containers. The texture stays firm, the flavor deepens, and you’ll never buy canned beans again. Even my black-thumb attempts yielded usable beans—this crop is forgiving once you get the basics right.
Works for any garden size, from raised beds to containers. Here’s how to troubleshoot stunted growth or poor yields before they happen—because even legumes need a little help sometimes.
📚 In This Guide
- What you need
- Instructions
- Tips and common mistakes
- Wrapping up and next steps
What you need
- ● Dried bean seeds: Choose heirloom or non-GMO varieties like pinto, black, kidney, or navy beans (1–2 lbs for planting).
- ● Growing containers: 5-gallon buckets or fabric grow bags (with drainage holes)
- ● OR a raised garden bed (12" deep, well-draining soil)
- ● Potting mix: High-quality, organic, and well-draining (avoid garden soil—it compacts too much!).
- ● Watering can or hose with a gentle spray nozzle (to avoid disturbing seeds).
- ● Soaking container: Large bowl or jar (for pre-sprouting seeds).
- ● Mesh or cheesecloth (to strain seeds after soaking).
- ● Fertilizer: Balanced organic fertilizer (e.g., 10-10-10) or compost tea (follow package instructions).
- ● Harvesting tools: Pruning shears or sharp scissors (for cutting pods).
- ● Drying racks or screens (for air-drying harvested beans).
- ● Food-grade storage containers: Mylar bags, glass jars, or vacuum-sealed bags (with oxygen absorbers for long-term storage).
- ● A seedling heat mat (if starting indoors in cool climates).
- ● Trellis or stakes (for bush beans that need support).
- ● pH testing kit (to ensure soil pH is 6.0–7.0, ideal for beans).
- ● Humidity dome or plastic wrap (to retain moisture during germination).
- ● Labeling tags (to track varieties and planting dates).
- ● Dehydrator (for speeding up the drying process if needed).
Step-by-step guide to growing and storing dried beans
Here's how I turn a simple dried bean into a thriving plant and a pantry staple—no shortcuts, just reliable results.
🌱 Step 1: Soak the Seeds Overnight for Faster Germination
Place 4 cups of dried beans in a large bowl and cover them with 8 cups of lukewarm water. I like to use a wide, shallow container so the beans don’t clump together. Let them soak for 8-12 hours—this softens the outer shell and speeds up sprouting. You’ll know they’re ready when they’ve swollen to nearly double their original size.
Drain the water completely before planting. If you leave them soaking too long, they’ll start to sprout in the bowl instead of in the soil. Trust me, you don’t want mushy beans clinging to your fingers when you’re ready to plant.
🌿 Step 2: Plant the Soaked Beans in Well-Drained Soil
Fill a 12-inch deep container or garden bed with loose, well-draining soil. Beans need room to stretch their roots, so avoid compacted or clay-heavy soil. Mix in a handful of compost to give them a nutrient boost right from the start. Plant the soaked beans 1 inch deep, spacing them 4-6 inches apart in rows.
Water gently right after planting to settle the soil around the seeds. Don’t drown them—just enough to moisten the top inch. You’ll see the first tiny sprouts push through the soil in 7-14 days, depending on your climate. If your area gets chilly, wait until after the last frost date to plant outdoors.
☀️ Step 3: Provide Consistent Moisture and Sunlight
Beans thrive in full sun, so place them where they’ll get at least 6-8 hours of sunlight daily. If you’re growing in containers, rotate them occasionally so they don’t lean toward the light. Water deeply 1-2 times per week, letting the top 2 inches of soil dry out between waterings. Overwatering leads to root rot, which is a real buzzkill for bean plants.
Watch for the first true leaves—those are the small, rounded leaves that appear after the initial seed leaves. Once they show up, you’re golden. Keep an eye out for pests like aphids or bean beetles. A quick spray of soapy water usually does the trick if you catch them early.
⏰ Step 4: Harvest and Dry the Beans Properly
When the pods turn a mature color (usually brown or tan) and the beans inside rattle when shaken, it’s time to harvest. Use a sharp knife or pruners to cut the pods from the vine, leaving a little stem attached. Spread them out on a clean, dry surface in a single layer, away from direct sunlight. Turn them every few hours to ensure even drying.
Full drying takes 1-2 weeks, depending on humidity. The beans are ready when they’re hard and dry to the touch. Store them in an airtight container in a cool, dark place. Properly dried beans can last 1-2 years—that’s a pantry staple worth its weight in gold.
🪴 Step 5: Maintain the Plants Through the Growing Season
As the plants grow, provide support if needed—beans can get tall and leggy. Use stakes, trellises, or cages to keep them upright and make harvesting easier. Pinch off any yellowing or diseased leaves immediately to keep the plant healthy. Fertilize lightly with compost tea every 4-6 weeks to encourage steady growth.
Real talk: Beans are forgiving plants, but they do need consistent care. If you notice the leaves curling or wilting, it’s usually a sign of either too much sun or not enough water. Adjust accordingly, and you’ll be rewarded with a bountiful harvest.
Tips & tricks for perfect bean cultivation
Here's what nobody tells you about growing beans from dried seeds to pantry staples.
Soak Smart: The 8-12 hour soak time is your window for success—don't cut corners here. Use a mesh bag or cheesecloth to contain the beans while soaking, making drainage effortless. I've ruined batches by leaving them too long, so set a timer! The beans should plump up noticeably but not sprout in the water.
Planting Precision: When planting those 4 cups of soaked beans, use a ruler to ensure they're exactly 1 inch deep. Too shallow and they'll dry out; too deep and they'll struggle to emerge. The 4-6 inch spacing in rows gives roots room to breathe, preventing competition for nutrients. I plant mine in a diagonal pattern to maximize space in containers.
Sunlight Strategy: Those critical 6-8 hours of sunlight must be direct—partial shade will stretch your plants and reduce yields. If you're container growing, rotate your pots weekly to prevent leaning. I use a small solar-powered light timer to ensure consistent exposure, especially during cloudy periods. Watch for leaves turning pale yellow—this is your sign to move plants to sunnier conditions immediately.
Harvesting Hack: The rattle test is foolproof for determining dryness, but I also check by gently pressing a bean between my fingernails—if it doesn't leave a mark, it's ready. For even drying, I use a window screen instead of paper towels. The beans stay elevated and air circulates on all sides, cutting drying time by nearly half. Store your dried beans in glass jars with a packet of silica gel to absorb any remaining moisture.
Pro Tips for Grow Dried Beans
- Here's what nobody tells you about growing beans from dried seeds to pantry staples.
- Soak Smart: The 8-12 hour soak time is your window for success—don't cut corners here.
- Planting Precision: When planting those 4 cups of soaked beans, use a ruler to ensure they're exactly 1 inch deep.
Frequently asked questions
Got questions about growing and storing dried beans?
You’re not alone! Here are answers to the most common queries to help you master the process from seed to pantry.
How long do I need to soak dried beans before planting?
Most dried beans benefit from a 6–12 hour soak in warm water before planting to soften the seed coat and speed up germination. For faster sprouting, try the quick-soak method: Boil water, pour over beans, cover, and let sit for 1–2 hours. Drain and plant immediately!
How long does it take for dried beans to fully mature and dry on the plant?
Dried beans typically take 80–120 days to mature, depending on the variety. Harvest when pods turn brown, crisp, and papery—not green! Leave them on the vine for 1–2 weeks to dry completely in the sun (or a well-ventilated area) before shelling and storing.
Can I grow dried beans from store-bought beans, or do I need special seeds?
Yes! You can save seeds from store-bought dried beans (like pinto, black, or kidney beans) for planting. Choose organic, non-GMO, heirloom, or untreated beans to avoid potential issues with hybridization or chemical coatings. For best results, pick seeds from fully dried pods.
What’s the best way to store dried beans long-term to prevent pests or mold?
Store dried beans in airtight containers (glass jars, Mylar bags, or food-grade buckets) in a cool, dark, and dry place (ideally 50–70°F). Add a bay leaf or silica gel packet to deter pests. For extra shelf life, freeze them for up to a year or vacuum-seal for 5+ years!
What should I do if my dried beans sprout mold or weird spots after storage?
If you spot mold, discoloration, or musty smells, discard the beans immediately—they’re unsafe to eat. To prevent this, check for moisture before storing (beans should be completely dry) and avoid plastic bags, which trap humidity. If stored properly, dried beans can last 1–3 years!
Wrapping up and next steps
Growing your own dried beans is a rewarding journey that saves money, reduces waste, and ensures a steady supply of nutritious staples. Whether you're a beginner or a seasoned gardener, soaking, sprouting, and storing beans is simpler than you think—and the payoff is delicious! 🌱
Now that you’re armed with the know-how, start small: try a single variety in a container or a small plot. Track your progress, experiment with storage methods, and soon, you’ll be enjoying homegrown beans in soups, stews, or even crispy roasted snacks.
Happy growing—your pantry (and taste buds) will thank you! 🥣✨