
Container Gardens
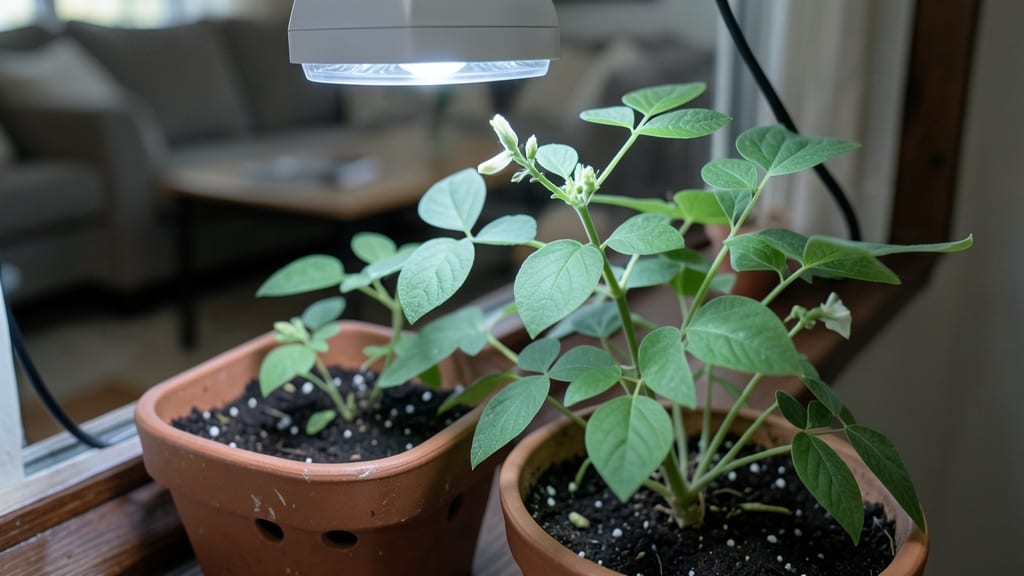
Growing beans inside is easier than you think—and it turns a tiny corner into a productive vertical garden. 🌱 I've grown dwarf beans in my sunroom for years, and they produce just as well as outdoor plants, with the bonus of no pests or weather worries.
The key is choosing the right variety and giving them the support they need to climb. You'll need a 5-gallon container or larger, lightweight potting mix, and a sturdy trellis or cage.
Dwarf varieties like 'Mascotte' or 'Blue Lake' stay compact but still produce pounds of beans in a small space. Place near a south-facing window or under a grow light for 6-8 hours daily—beans are heavy feeders and need consistent light to set pods.
Once planted, keep soil moist but not soggy and watch for the first tendrils in 5-7 days. When they reach the trellis, they'll start climbing like little green ladders. Harvest begins in 6-8 weeks, and with proper care, you'll get a steady supply all season.
The biggest challenge indoors is humidity—beans love it, but so do mold and pests. A small fan on low helps circulation, and removing yellow leaves keeps things healthy. Even in a small apartment, you can grow enough beans to freeze or share!
📚 In This Guide
- What you need
- Instructions
- Tips and common mistakes
- Wrapping up and next steps
What you need
- ● Bean Seeds: Choose fast-growing varieties like Bush Blue Lake or Scarlet Runner (5–10 seeds per container).
- ● Containers: 5–10 gallon pots (with drainage holes) or a vertical pocket planter (for space-saving).
- ● Fabric grow bags (if using a trellis system).
- ● Potting Mix: Lightweight, well-draining seed-starting mix or a blend of 50% potting soil + 50% perlite (1–2 bags, depending on container size).
- ● Trellis or Support: Bamboo stakes (for climbing beans) or a DIY wire cage (6–8 inches tall).
- ● Wall-mounted trellis (for vertical growth).
- ● Watering Can or Spray Bottle: With a fine rose nozzle to avoid disturbing soil.
- ● Fertilizer: Balanced liquid fertilizer (5-5-5 NPK) or compost tea (diluted to half-strength).
- ● Grow Lights: LED full-spectrum bulbs (12–16 hours/day) if natural light is limited.
- ● Soil Moisture Meter: To monitor hydration without overwatering.
- ● Mulch: Straw or shredded leaves to retain moisture.
- ● Pest Control: Neem oil or insecticidal soap (for aphids or spider mites).
- ● Bean Variety Pack: Mix dwarf and pole beans for diversity!
Step-by-step instructions for growing beans vertically indoors
Here's how to turn a small space into a productive bean harvest using just containers and a little creativity.
🪴 Step 1: Choose the Right Containers and Setup
Start with at least four 6-inch deep containers (one per plant) or a single hanging basket if you prefer vertical space. I use self-watering pots with drainage holes—they keep moisture consistent without drowning roots. Place a 4-6 inch trellis or stake in each container before adding soil, securing it firmly so it doesn't tip when plants climb.
Fill containers with lightweight potting mix (never garden soil—it compacts and suffocates roots). Press the soil down gently until it's firm but still loose. The goal is a fluffy texture that holds water but doesn't stay soggy. Add a slow-release fertilizer (like 1 tablespoon per container) mixed into the top inch of soil to give your beans a nutrient boost right from the start.
🌱 Step 2: Plant Seeds at the Correct Depth and Spacing
Plant 3-4 seeds per container, about 1 inch deep—just enough to cover them lightly. I use my finger to make small holes, drop in the seeds, then cover with soil. Space seeds 2 inches apart in the container so they don't compete for nutrients. If using a hanging basket, plant seeds along the edge where they'll naturally climb toward the center.
Water gently until the soil feels damp 1 inch below the surface. Avoid soaking the soil—beans hate sitting in waterlogged conditions. Place containers in a warm spot (70-80°F) like a sunny windowsill or under a grow light. Germination takes 7-14 days, depending on your variety. You'll know it's working when you see tiny green sprouts pushing through the soil.
☀️ Step 3: Provide Light and Support for Vertical Growth
Once seedlings emerge, move them to a south-facing window or under a grow light for 12-14 hours of light daily. Beans need plenty of light to grow strong and produce pods. If using a trellis, gently tie the main stem to the stake with soft plant ties as soon as it reaches 4-6 inches tall. This prevents snapping when pods get heavy later.
Rotate containers a quarter turn every few days so plants don't lean toward the light. You'll see straight, sturdy stems that climb upward instead of sprawling. Water when the top inch of soil feels dry, but don't let the soil stay bone-dry—beans wilt fast when thirsty. A spray bottle keeps leaves dust-free and encourages healthy growth.
⏰ Step 4: Fertilize and Harvest for Continuous Production
When plants reach 12 inches tall, add a balanced liquid fertilizer (like 10-10-10) every 4-6 weeks to keep them producing. I dilute it to half-strength to avoid burning tender roots. Watch for white flowers—they appear 3-4 weeks after planting. These turn into pods in 7-10 days, so check daily!
Harvest pods when they're 4-6 inches long and firm to the touch. Pick regularly to encourage more flowers and pods. If you miss a pod, it'll swell and dry out—beans taste best when harvested young. With proper care, one plant can produce pounds of beans over its 8-10 week lifespan. Save seeds from your best pods to plant next season!
Tips & tricks for perfect vertical bean growth
Real talk: Growing beans indoors takes patience, but these tricks will help you avoid the most common pitfalls and maximize your harvest.
Container Selection: If you don't have self-watering pots, use any container with drainage holes—even repurposed plastic bottles with holes poked in the bottom. The key is preventing soggy roots, which happen fast in waterlogged soil. I've had great success with fabric grow bags too—they allow better airflow around roots, which helps prevent fungal issues.
Germination Secret: Place your containers in a warm spot (70-80°F) and cover them loosely with plastic wrap during the 7-14 day germination period. This creates a mini greenhouse effect that speeds up sprouting. Just remember to remove the plastic once you see those first green sprouts—too much humidity after germination can cause mold.
Lighting Strategy: For the critical 12-14 hours of daily light, position your grow lights about 6-12 inches above the plants. If using natural light, rotate containers every few days so all sides get even exposure. I notice a huge difference in plant strength when they get consistent light from all directions—no more lopsided growth trying to reach the window.
Harvest Timing: Those 4-6 inch pods are the sweet spot for flavor and texture. I set a reminder every 2-3 days to check for new pods—missed pods quickly turn woody and tough. Pro tip: Harvest in the morning when pods are crispest. The first harvest usually comes about 6-8 weeks after planting, depending on your variety.
Pro Tips for Growing Beans Inside
- Real talk: Growing beans indoors takes patience, but these tricks will help you avoid the most common pitfalls and maximize your harvest.
- Container Selection: If you don't have self-watering pots, use any container with drainage holes—even repurposed plastic bottles with holes poked in the bottom.
- Germination Secret: Place your containers in a warm spot (70-80°F) and cover them loosely with plastic wrap during the 7-14 day germination period.
Frequently asked questions
Got questions about growing beans indoors? You’re not alone—this method is packed with potential but comes with a few quirks. Below, we tackle the most common concerns to help you grow beans like a pro, even in tight spaces!
What types of beans can I grow indoors?
Stick to bush beans (like 'Blue Lake' or 'Roma') or dwarf varieties of pole beans (e.g., 'Mascotte' or 'Blue Lake Bush'). These stay compact and thrive in containers. Avoid tall varieties—they’ll outgrow your space fast!
How long does it take for indoor beans to mature?
Indoor beans typically mature in 50–70 days from seed, depending on the variety. With proper light (12+ hours/day) and warmth (65–80°F), you’ll see pods ready for harvest in about 2 months. Patience pays off—rushing can lead to smaller yields!
Do I need special grow lights, or will sunlight work?
Sunlight is ideal, but if your space lacks windows, LED grow lights (full-spectrum, 12–16 hours/day) are a game-changer. Place lights 6–12 inches above plants and adjust as they grow. Skip cheap bulbs—they won’t replicate sunlight’s spectrum for healthy growth.
How do I keep pests away from my indoor beans?
Indoor pests (like aphids or spider mites) are rare but possible. Prevent them with:
- Regularly inspect leaves for eggs or webs.
- Use neem oil or insecticidal soap if needed.
- Avoid overwatering—damp soil attracts fungus gnats.
Can I regrow beans from store-bought ones?
Yes! Save seeds from heirloom or non-hybrid beans (check the label). Rinse, dry, and store them in a cool, dark place. Plant them like fresh seeds—just know store-bought beans may be treated to prevent sprouting. For best results, buy seeds labeled "for planting."
Wrapping up and next steps
Growing beans indoors isn’t just about saving space—it’s a rewarding way to enjoy fresh, homegrown food year-round! With the right containers, sunlight, and a little patience, you’ll harvest crisp, flavorful beans in no time.
Whether you’re a beginner or a seasoned gardener, this vertical method makes it easier than ever to grow your own.
Ready to take the next step? Start small—pick a container, plant your seeds, and watch your green thumb grow! Share your progress or ask questions in the comments below—we’d love to see (and help with) your indoor bean adventure. 🌱💚