
Container Gardens
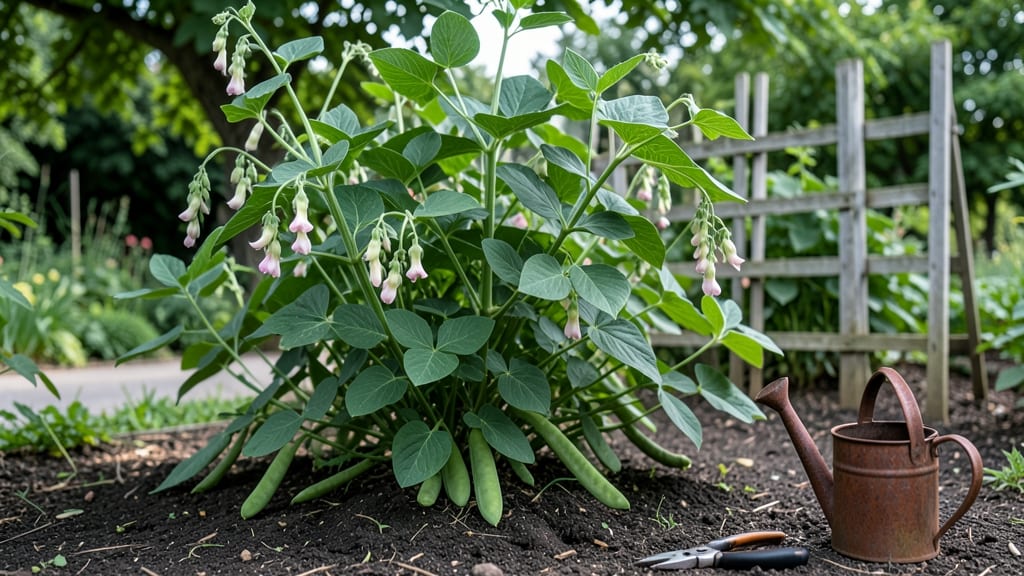
Broad beans thrive where most vegetables freeze—plant them in early spring for a harvest before summer heat arrives. 🌱 I’ve grown them for years, and they’re the unsung heroes of my garden: hardy, productive, and delicious with almost no fuss.
The secret lies in cool soil and proper spacing, which keeps them from bolting too early.
You’ll need a sunny spot with well-draining soil (even clay works if amended), seeds planted 1-2 inches deep, and 3-4 inches of space between plants. Unlike fussy veggies, broad beans tolerate light frosts and grow best when sown 4-6 weeks before your last frost date.
Water consistently but avoid soggy soil—they hate wet feet.
By late spring, you’ll see 3-4 foot tall plants with pods ready to harvest in 8-12 weeks. The flavor? Richer than store-bought, with a buttery texture that’s perfect for soups or stir-fries. And because they’re legumes, they fix nitrogen in the soil—free fertilizer for next year’s crops.
Watch for aphids early in the season (a strong spray of water usually clears them) and avoid overcrowding, which leads to weak stems. With these basics, you’ll have a steady harvest long before summer vegetables even sprout. Ready to try them?
📚 In This Guide
- What you need
- Instructions
- Tips and common mistakes
- Wrapping up and next steps
What you need
- ● Broad bean seeds: Choose certified organic or heirloom varieties (e.g., Aquadulce Claudia or The Sutton). Plant 2–3 seeds per container (or 1–2 inches apart in rows) for best results.
- ● Containers (if applicable): Use 5-gallon pots or larger (minimum 12" deep) with drainage holes. Opt for fabric grow bags or ceramic pots for better aeration.
- ● Well-draining soil: Mix 1 part compost with 2 parts potting mix or garden soil. Broad beans thrive in slightly acidic to neutral soil (pH 6.0–7.5).
- ● Fertilizer: A balanced, low-nitrogen fertilizer (5-10-10 ratio) or organic options like bone meal (1 tbsp per plant at planting time). Avoid high-nitrogen feeds.
- ● Watering can or hose with a gentle spray nozzle: Broad beans need consistent moisture but hate soggy roots.
- ● Garden trowel or transplanting tool (for digging holes or moving seedlings).
- ○ Stakes or trellis (3–4 ft tall)—optional but helpful for climbing varieties like Aquadulce Claudia.
- ● Mulch (straw or shredded leaves) to retain moisture and suppress weeds.
- ● Row covers or frost cloth (if planting in very cold climates—broad beans tolerate light frost but may need protection below 20°F/-7°C).
- ● Pest control: Neem oil or insecticidal soap (for aphids or blackfly outbreaks).
Step-by-step instructions for growing broad beans
Here's how I grow these hardy legumes—no fancy equipment, just cold soil and patience.
🌱 Step 1: Choose the Right Variety and Planting Time
Broad beans thrive in cool weather, so I plant them 6-8 weeks before your last frost date—often as early as February or March in most climates. Look for varieties like 'Aquadulce Claudia' or 'The Sutton' for reliable production. These beans handle light frosts down to 20°F, making them perfect for early spring gardens.
I always test my soil first because broad beans prefer slightly acidic to neutral pH (6.0-7.0). If your soil is heavy clay, mix in some compost to improve drainage. The key is planting when soil temperatures reach 40°F—warmer soil speeds up germination, but broad beans won't bolt like other legumes in heat.
🪴 Step 2: Prepare the Soil and Plant Seeds
Broad beans need well-draining soil rich in organic matter. I dig in 2-3 inches of compost per planting area and rake the surface smooth. These beans have large seeds, so I plant them 1-2 inches deep and 3-4 inches apart in rows spaced 18-24 inches apart. The depth matters—planting too shallow risks exposing seeds to drying winds.
I like to soak the seeds overnight before planting because it softens the tough outer shell and speeds up germination. After planting, I water gently but thoroughly to settle the soil around each seed. You'll see sprouts in 7-14 days, depending on soil warmth—cooler soils take longer, but that's normal.
☀️ Step 3: Provide Support and Maintain Moisture
Broad beans grow tall (up to 5 feet), so I install 5-6 foot tall stakes or a trellis system at planting time. As plants reach 6 inches tall, I gently tie the main stems to the supports using soft twine or old pantyhose. This prevents wind damage and keeps pods accessible for harvest.
Water consistently to keep soil evenly moist but not soggy—broad beans hate waterlogged roots. I aim for 1 inch of water per week, delivered at the base of plants. You'll know moisture is right when the soil feels damp 2 inches deep. Mulch with 2-3 inches of straw after germination to retain moisture and suppress weeds.
✂️ Step 4: Harvest and Encourage Continuous Production
Harvest begins when pods reach 3-4 inches long and feel firm to the touch. I pick every 3-5 days to encourage more production—left too long, pods become tough and fibrous. The beans inside should be plump but still tender. Use clean scissors or fingers to snap pods at the stem.
Here's the thing—broad beans produce best when you keep them picked. If you see flowers forming, check them daily because pods develop quickly. After the main harvest, I let some plants mature fully for seed saving. The dried beans make excellent winter storage crops—just dry them completely in a warm, dry place before storing.
🌿 Step 5: Rotate Crops and Prepare for Next Year
Broad beans are nitrogen-fixers, so they improve soil for subsequent plantings. I always rotate them with heavy feeders like corn or tomatoes. After harvest, cut back stems to 6 inches tall and compost the debris. This prevents disease buildup in the soil.
I mark the planting area with stakes so I remember to avoid planting beans in the same spot for 3 years. The nitrogen they leave behind benefits other crops, but overplanting can lead to soil fatigue. In fall, I add a final layer of compost to the area and let winter rains work it into the soil for next year's planting.
Tips & tricks for perfect broad bean growth
These cold-hardy legumes reward patience—here's how to maximize your harvest without the guesswork.
Variety Matters: When selecting seeds, prioritize cold-tolerant varieties like 'Aquadulce Claudia' for their frost resistance down to 20°F. I've found these varieties produce larger pods and handle early spring planting better than others. For container growing, choose dwarf varieties that stay under 3 feet tall—this saves space while still delivering abundant harvests.
Soil Prep Secret: The 2-3 inches of compost I recommend isn't just about nutrients—it's about creating the perfect crumbly texture broad beans crave. I mix in a handful of perlite or coarse sand if my soil is particularly dense. This improves drainage while maintaining moisture, which is especially critical during those cool spring germination periods when seeds need consistent dampness but not sogginess.
Germination Boost: That overnight seed soak is non-negotiable for me. I use room-temperature water and add a pinch of seaweed fertilizer to jumpstart growth. The softened shells mean faster sprouting—often within 7-10 days even in cooler soils. Pro tip: Use a mesh bag for soaking to prevent seeds from sinking and getting waterlogged, which can cause rot.
Harvest Timing: Those 3-4 inch pods are the sweet spot for tenderness. I check plants every 3-5 days starting when flowers appear—this prevents the pods from becoming fibrous. A good rule of thumb: if you can see the beans through the pod but they're still firm, they're ready. For seed saving, I let a few pods mature fully until they turn brown and papery, then dry them completely before storage.
Pro Tips for Growing Broad Beans
- These cold-hardy legumes reward patience—here's how to maximize your harvest without the guesswork.
- Variety Matters: When selecting seeds, prioritize cold-tolerant varieties like 'Aquadulce Claudia' for their frost resistance down to 20°F.
- Soil Prep Secret: The 2-3 inches of compost I recommend isn't just about nutrients—it's about creating the perfect crumbly texture broad beans crave.
Frequently asked questions
Got questions about growing broad beans?
You’re not alone! Here are answers to the most common concerns—from planting to harvest—so you can grow these hardy legumes like a pro.
When is the best time to plant broad beans?
Broad beans thrive in cool weather, so plant them 4–6 weeks before your last frost date—typically late winter to early spring. In warm climates, opt for fall planting to avoid summer heat stress. They’re one of the first veggies you can sow in containers or garden beds!
Do broad beans need special care to avoid pests?
Yes! Watch for blackfly (tiny black bugs) and aphids. Spray plants with water to dislodge pests or use neem oil if infestations occur. Grow marigolds nearby to deter pests naturally. Also, remove old pods to prevent disease spread.
How long does it take for broad beans to grow and harvest?
From seed to harvest takes 80–120 days, depending on the variety. Young pods (5–6 inches long) are tender and ready to pick. For best flavor, harvest frequently—overripe pods become tough and stringy. Pro tip: Pick in the morning for the freshest taste!
Can broad beans grow in containers, and what size pot do I need?
Use 5-gallon containers or larger (at least 12 inches deep) for 1–2 plants. Ensure pots have drainage holes and fill with well-draining soil. Dwarf varieties like ‘The Sutton’ are ideal for small spaces. Place containers in full sun (6+ hours/day) for best growth.
What can I plant with broad beans to improve growth?
Broad beans are nitrogen-fixers, so they pair well with heavy feeders like corn, potatoes, or cabbage. Avoid planting near onions or garlic, as they compete for nutrients. Interplant with radishes or lettuce to maximize space and deter pests.
Wrapping up and next steps
Growing broad beans is a rewarding and accessible way to kickstart your spring garden—even in cooler climates! 🌱 With their cold-hardy nature and nutrient-packed pods, they’re a must-try for container gardens or small plots.
Whether you’re a beginner or a seasoned gardener, these resilient legumes deliver quick harvests and minimal fuss.
Ready to plant your first row? Start by gathering your supplies, choosing the right variety, and giving them a sunny spot to thrive. Then, watch your garden transform with vibrant green pods—your fresh, homegrown harvest awaits! 🌿