
Vegetables
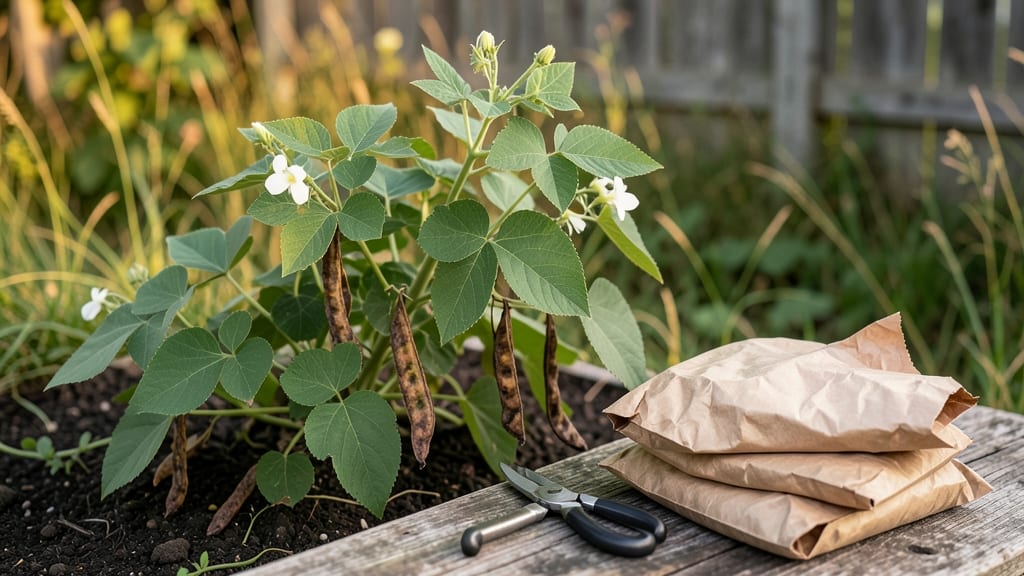
Drying green bean seeds properly means next year’s harvest starts right now. ✨ The best seeds come from pods left on the vine until fully mature—no rush, just patience. I’ve saved seeds from my favorite heirloom beans for three seasons, and the key is controlling moisture, airflow, and timing.
You’ll need dried pods, a clean workspace, and a warm, dry spot—no fancy equipment, just attention to detail. The process takes about 2-3 weeks, but the payoff is seeds that sprout faster and stronger than store-bought varieties. My saved seeds always outperform anything I buy, and they’re free!
Once dried, store them in a cool, dark place where they’ll stay viable for 3-5 years. The satisfaction of growing plants from your own seeds—especially heirlooms—is unmatched. You’ll never buy bean seeds again after this. This method works for bush beans, pole beans, and even rare varieties.
Here’s how to do it right the first time—no guesswork, just proven results.
📚 In This Guide
- What you need
- Instructions
- Tips and common mistakes
- Wrapping up and next steps
What you need
- ● Fresh green beans: Choose fully mature pods (dry, crisp, and slightly shriveled) with seeds inside. Aim for 1–2 pounds (or enough to fill a small container).
- ● Paper towels or newspaper: Enough to cover a flat surface (about 2–3 sheets).
- ● Small mesh bags or breathable paper envelopes: For storage (e.g., 4x6-inch coffee filters or quart-sized mesh bags).
- ● Pencil or marker: For labeling seeds with the variety name and year.
- ● Dry, well-ventilated space: A cool (60–70°F), low-humidity area like a pantry, closet, or basement.
- ● Seed drying tray: A wire mesh or wooden rack to elevate seeds for airflow.
- ● Dehumidifier: If your space tends to be damp.
- ○ Food dehydrator: Set to 95–105°F for faster drying (optional for speed).
- ● Humidity monitor: To track moisture levels (ideal: 30–50%).
Step-by-Step instructions for harvesting and drying green bean seeds
Preserving your own seeds saves money and ensures heirloom quality—here’s how to do it right.
🌱 Step 1: Select and Harvest Ripe Pods
Choose pods that have dried completely on the vine—when they turn brown, crinkly, and split open naturally. These are the ones with mature seeds inside. I always pick them in the morning when humidity is lowest, which helps prevent mold later. Avoid pods that feel soft or still green, as their seeds won’t store well.
Use clean, sharp scissors or fingers to twist the pods off the stem. Place them in a single layer on a screen or paper towel to dry further. This prevents moisture buildup that could spoil the seeds. If you’re working with a large harvest, spread them out in a well-ventilated area where airflow circulates evenly.
🌿 Step 2: Extract Seeds and Clean Thoroughly
Once the pods are fully dry and brittle, crack them open by hand or gently crush them with a rolling pin. I like to do this over a large sheet of newspaper—it makes cleanup easier and helps me collect every seed. Remove any debris, chaff, or shriveled seeds, as these won’t germinate. Healthy seeds are plump, smooth, and uniformly colored.
For extra cleanliness, I use a fine-mesh sieve to sift through the seeds and separate them from the pod remnants. This step is crucial—any leftover plant material can harbor mold or pests during storage. If you’re dealing with a large batch, a small handheld sieve works perfectly for this task.
💧 Step 3: Dry Seeds Completely Before Storage
Spread the cleaned seeds in a single layer on a clean, dry surface like a baking sheet or mesh screen. Place them in a warm, dry spot with good airflow—like a sunny windowsill or a well-ventilated room. The goal is to reduce their moisture content to below 10%, which prevents spoilage. You’ll know they’re ready when they feel dry to the touch and rattle slightly when shaken in their container.
This drying process typically takes 7-10 days, depending on humidity levels. If your climate is damp, speed it up by placing a small fan nearby to circulate air. Avoid using heat sources like ovens or heaters, as they can damage the seeds. Patience here ensures long-term viability.
🪴 Step 4: Store Seeds Properly for Long-Term Viability
Once fully dry, transfer the seeds into an airtight container like a glass jar or sealed envelope. Label it with the bean variety and the harvest year—this helps track germination rates over time. Store the container in a cool, dark place, such as a pantry or refrigerator. Seeds kept in these conditions can remain viable for 3-5 years, though germination rates drop gradually after the first year.
I like to add a small packet of silica gel or a few grains of rice to the container to absorb any lingering moisture. This extra step is especially helpful if you’re storing seeds in a humid environment. Check the container periodically for signs of mold or pests, and transfer seeds to a fresh container if needed.
⏰ Step 5: Test Germination Before Next Year’s Planting
Before you plant, test a few seeds to confirm viability. Place 10 seeds between two damp paper towels in a sealed plastic bag and keep them in a warm spot (70-75°F). Check for sprouts in 7-10 days. If 80% or more germinate, your seeds are ready to plant. If fewer sprout, consider treating them with a seed germination enhancer or planting extra seeds to compensate for lower viability.
This test gives you peace of mind and helps you plan your planting strategy. If germination rates are poor, it might be time to source fresh seeds or try a different drying method next year. Keep notes on what worked best—your future harvests will thank you!
Tips & tricks for perfect seed preservation
These little details make all the difference when saving your harvest for next season.
Pod Selection Matters: In Step 1, those brown, crinkly pods are your goldmine—but don't rush! Wait until they've fully dried on the vine and split open naturally. I've learned the hard way that harvesting too early means immature seeds that won't store well. Look for pods that feel completely dry and brittle, not just slightly browned. This single step determines your seed quality for years to come.
Cleanliness is Critical: During Step 2, when you're removing debris and chaff, take that extra minute to inspect each seed. I use a bright light source to spot any tiny imperfections—shriveled seeds or specks of plant material that could harbor mold. A fine-mesh sieve isn't just for convenience; it's your best defense against future seed loss. Think of it as quality control for your garden's future.
Drying Strategy: For Step 3, the 7-10 day drying time can feel like forever, but patience pays off. If you're in a humid climate, that small fan makes all the difference—it's not about heat, but airflow. I've seen seeds spoiled by rushing them through an oven, so avoid any direct heat sources. The goal is moisture reduction below 10%, not quick drying. You'll know they're ready when they feel dry to the touch and make a rattling sound when shaken.
Storage Wisdom: In Step 4, don't overlook the importance of that airtight container. I've had seeds last 5 years in glass jars with silica gel packets, but I've also seen them fail in plastic bags. The key is complete darkness and consistent cool temperatures—your pantry is perfect. Labeling with the variety and year might seem tedious, but it's a lifesaver when you're planning next season's garden.
Pro Tips for Dry Green Bean Seeds
- These little details make all the difference when saving your harvest for next season.
- Pod Selection Matters: In Step 1, those brown, crinkly pods are your goldmine—but don't rush!
- Cleanliness is Critical: During Step 2, when you're removing debris and chaff, take that extra minute to inspect each seed.
Frequently asked questions
Got questions about drying green bean seeds? You’re not alone! Here are answers to the most common concerns—so you can preserve those seeds like a pro.
How long does it take to properly dry green bean seeds?
With the right conditions (60–80°F and low humidity), seeds typically dry in 7–14 days. Check for readiness by gently squeezing a seed—it should feel hard and dry, like a pebble. If it’s still soft or pliable, keep drying for a few more days.
Can I speed up the drying process?
Yes! Place seeds in a single layer on a mesh screen or paper towel in a well-ventilated, warm spot (like near a sunny window or under a fan). Avoid direct heat (like an oven), as it can damage viability. Stir or flip them daily for even drying.
What if my seeds mold or develop spots?
Mold or spots mean too much moisture or poor airflow. Toss affected seeds immediately—don’t risk planting them. To prevent this, store seeds in a sealed, airtight container with a desiccant packet (like silica gel) once fully dry.
How do I know when seeds are too old to plant?
Green bean seeds stay viable for 2–4 years if stored properly. Test old seeds by planting a few—if germination is slow or patchy, it’s time to source fresh ones. Label containers with the harvest date to track age.
Can I dry green bean seeds in the sun?
While sunlight helps, direct, intense sun can overheat seeds and reduce viability. Opt for indirect sunlight (like a shaded porch) or a dehydrator on low heat (95–115°F) for safer drying. Avoid plastic bags—use paper envelopes or breathable fabric.
Wrapping up and next steps
Drying green bean seeds is a simple yet rewarding way to save money and ensure a thriving garden next season! With just a few tools—patience and a dry, well-ventilated space—you can preserve seeds that stay viable for years.
Whether you’re a seasoned gardener or just starting out, this process is your ticket to homegrown harvests for seasons to come.
Ready to take the next step? Try drying a small batch of seeds today and experiment with storage methods to find what works best for your climate. Happy gardening—your future plants will thank you! 🌱✨