
Container Gardens
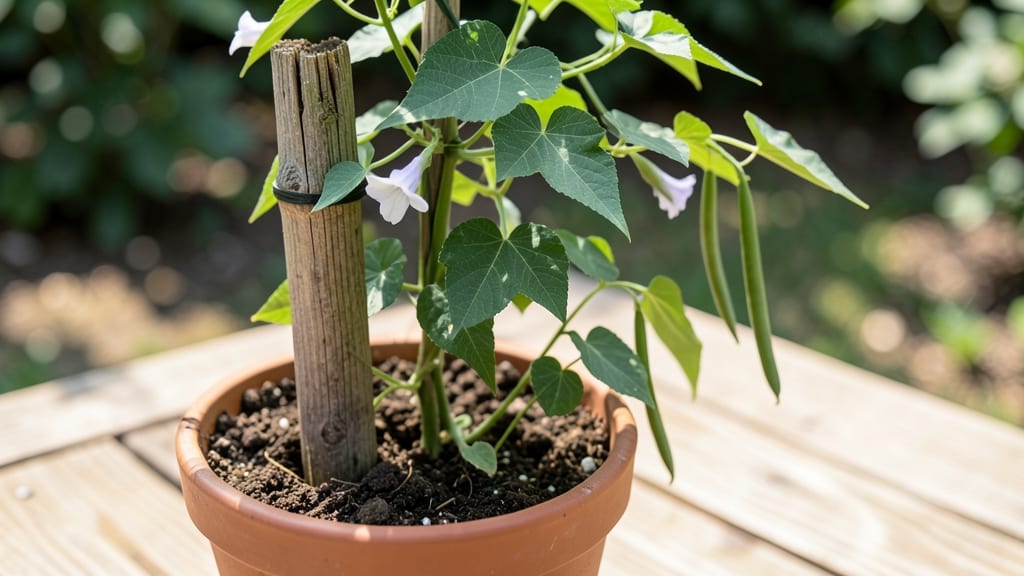
Growing pole beans in a pot turns a small balcony into a vertical harvest factory—60 days from seed to dinner table. 🌱 I learned the hard way that these vigorous climbers need more than just a pot; they demand the right soil, support, and watering rhythm to thrive in confined spaces.
The secret lies in mimicking their natural growing conditions while working with container limitations.
You'll need a 5-gallon pot (minimum) with drainage holes, a sturdy trellis or cage, and a soil mix that drains well but holds moisture. Most garden centers sell "potting mix" labeled for vegetables, but I add a handful of compost to give those hungry beans an extra nutrient boost.
Varieties like 'Kentucky Wonder' or 'Rattlesnake' perform exceptionally well in containers, producing 10-15 pounds of beans per plant when given proper care.
The payoff comes in early summer when your vertical garden bursts with tender pods. With morning sun and consistent moisture, you'll harvest fresh beans for weeks—no weeding, no bending, just reach up and pick.
The best part? You can move the pot to follow the sun or protect it from unexpected storms, giving you control over the growing conditions.
Common challenges like overwatering or nutrient deficiencies disappear when you follow a simple routine: water when the top inch of soil feels dry, fertilize lightly every 3 weeks, and prune regularly to encourage bushier growth.
Whether you're in an apartment or a small yard, this method proves that pole beans in a pot deliver the same rewards as an in-ground garden—just with less space and more flexibility.
📚 In This Guide
- What you need
- Instructions
- Tips and common mistakes
- Wrapping up and next steps
What you need
- ● Container: A 5-gallon pot or larger (at least 12 inches deep) with drainage holes. Examples: fabric grow bags, ceramic pots, or plastic buckets.
- ● Pole bean seeds: 4–6 seeds per pot (choose a fast-maturing variety like 'Kentucky Wonder' or 'Blue Lake' for best results in 60 days).
- ● Potting mix: High-quality, well-draining soil (avoid garden soil—it compacts easily). Look for a mix labeled for vegetable gardens or container gardening.
- ● Support structure: Trellis or cage: A 5–6 foot tall trellis (bamboo, metal, or plastic) or a 5-gallon bucket trellis (DIY-friendly!).
- ● OR A sturdy stake (at least 4–5 feet tall) to tie vines to.
- ● Watering can or hose with a gentle spray nozzle.
- ● Fertilizer: A balanced, organic fertilizer (5-5-5 or 10-10-10) or compost tea for a natural boost.
- ● Mulch: Straw or shredded leaves to retain moisture and suppress weeds.
- ● Slow-release fertilizer pellets (mixed into the soil at planting).
- ● Epsom salt: A spoonful dissolved in water (once a month) for extra magnesium and sulfur.
- ● Pest control: Neem oil or insecticidal soap (if aphids or beetles become an issue).
- ● Soil moisture meter (to check water levels without over-saturating the pot).
Step-by-step instructions for growing pole beans in containers
Here’s how to grow pole beans in pots—fast, productive, and perfect for small spaces.
🌱 Step 1: Choose the Right Container and Soil
Select a container at least 12-18 inches deep with drainage holes—pole beans need room to climb and strong roots. I use fabric grow bags because they allow excess water to evaporate while keeping roots oxygenated. Fill the pot with a lightweight potting mix (never garden soil) blended with compost for nutrients. The mix should feel fluffy but hold moisture when squeezed.
Leave about 2 inches of space at the top for watering. If your container lacks drainage, drill holes yourself—waterlogged roots will kill your plants before they produce pods. I always add a 1-inch layer of perlite at the bottom to improve drainage further.
🌿 Step 2: Plant Seeds and Provide Support
Plant 4-5 pole bean seeds per pot, 1 inch deep, spacing them evenly. I use a 5-gallon bucket for this many seeds—it gives them enough room to sprawl without overcrowding. After planting, water gently until the soil is evenly moist but not soggy. You’ll see first true leaves in 7-10 days if conditions are right.
Once seedlings reach 4-6 inches tall, install a trellis or sturdy stake (at least 6 feet tall) in the center of the pot. Pole beans are aggressive climbers, and without support, they’ll sprawl everywhere. I tie the main stems loosely to the trellis with soft garden twine—this prevents stem damage as they grow.
☀️ Step 3: Water and Fertilize for Maximum Yield
Water when the top inch of soil feels dry, which is usually every 2-3 days in warm weather. Overwatering causes root rot, so always check moisture before adding more. I use a moisture meter to avoid guesswork—pole beans wilt quickly if thirsty, but they bounce back fast once watered.
Start fertilizing with a balanced 10-10-10 formula when flowers appear. I mix 1 tablespoon per gallon of water every 2 weeks to encourage blooming. Stop fertilizing once pods form—too much nitrogen makes plants focus on leaves instead of beans. Watch for white or purple flowers—this is your cue to harvest soon.
✂️ Step 4: Harvest and Maintain Through the Season
Harvest beans when pods are 4-6 inches long and firm to touch. I pick every 2-3 days to keep production going—left too long, they toughen and lose flavor. Use sharp scissors to snip stems cleanly, leaving the plant undamaged. The more you harvest, the more your plant will produce.
Deadhead spent flowers by pinching them off—this redirects energy to new growth. If your plant slows down after 6-8 weeks, trim back one-third of the foliage to encourage a second flush of beans. I’ve had plants keep producing for 3-4 months with this method, even in small pots.
⏰ Step 5: Extend the Season with Simple Care
Pole beans grow best in warm weather (70-85°F), but you can extend the season by covering plants with frost cloth when temperatures drop below 50°F. I’ve grown them until first frost in fall by protecting them at night. If your summer is scorching, provide afternoon shade to prevent wilting.
Rotate pots every few days to ensure even sun exposure—beans grow toward the light, and uneven growth leads to weak vines. Watch for aphids or spider mites, which love pole beans. Spray with neem oil at the first sign of pests—it’s organic and effective. With proper care, your pot-grown beans will keep producing until frost.
Tips & tricks for growing pole beans in containers
These simple yet game-changing strategies will help you maximize your container-grown pole bean harvest—no green thumb required.
Container Depth Matters: That 12-18 inch depth isn't just a suggestion—pole beans need room for roots to establish before they send up vines. If you're working with shallower pots, consider nesting containers (like placing a smaller pot inside a larger one) to create extra depth. I've seen dramatic differences when using fabric grow bags—they allow roots to breathe while preventing waterlogging, which is especially important for container gardening. Trust me, your plants will thank you with bigger yields.
Timing Secret for Seedlings: The 7-10 day window for first true leaves might seem like a long wait, but you can speed things up slightly by placing your pots in a warm spot (around 75-80°F) after planting. A simple heat mat under the container can cut that time by 2-3 days. Just remember—once those first leaves appear, move them to their permanent sunny location immediately. Delaying this step can cause leggy, weak seedlings that struggle to support themselves on the trellis.
Support System Strategy: When installing your 6-foot trellis, position it slightly off-center in the container. This creates more balanced growth and prevents the plant from leaning too heavily in one direction. I also recommend using two trellises in larger containers (like 5-gallon buckets) to give plants multiple climbing options. The more support you provide, the more aggressively your beans will climb—and the more pods you'll end up with. Think of it as giving your plants a safety net for their vertical adventure.
Fertilizer Timing: The 10-10-10 formula is perfect, but timing is everything. Start fertilizing only when you see those first white or purple flowers—this is when your plant is ready to focus on pod production. Too early, and you'll end up with leafy monsters instead of beans. Also, reduce the fertilizer amount by half if you're using a more concentrated formula (like 20-20-20). I've learned this the hard way after creating nitrogen-happy plants that produced more leaves than pods!
Pro Tips for Pole Beans In A Pot
- These simple yet game-changing strategies will help you maximize your container-grown pole bean harvest—no green thumb required.
- Container Depth Matters: That 12-18 inch depth isn't just a suggestion—pole beans need room for roots to establish before they send up vines.
- Timing Secret for Seedlings: The 7-10 day window for first true leaves might seem like a long wait, but you can speed things up slightly by placing your pots in a warm spot (around 75-80°F) after planting.
Frequently asked questions
Got questions about growing pole beans in a pot? You’re not alone! Here are answers to the most common queries to help you crush your container-garden harvest—no fuss, just fresh, homegrown beans in 60 days or less.
How deep should the pot be for pole beans?
Pole beans need at least 12–18 inches of depth to support their vines and roots. A 5-gallon bucket or larger container works best—just ensure it has drainage holes to prevent soggy soil. If your pot is shallow, opt for bush beans instead!
When is the best time to plant pole beans in pots?
Plant after the last frost when soil temps hit 60°F+ (usually late spring). For a fall harvest, sow seeds 80–100 days before the first frost. Pole beans grow fast—60 days to harvest—so time it right to avoid cool nights slowing growth.
Can I grow pole beans in a pot without trellis support?
Yes, but expect messy, sprawling vines and fewer beans. If you skip a trellis, use a cage or stakes (even a sturdy wire frame) to guide growth upward. Without support, beans may flop, reducing airflow and increasing disease risk. Pro tip: Train vines early to save space!
What should I do if my pole beans get pests like aphids or bean beetles?
Start with neem oil or insecticidal soap for mild infestations. For beetles, handpick eggs (tiny yellow dots on leaves) or use row covers early in the season. Encourage ladybugs and lacewings—natural predators that’ll clean up pests for you!
How often should I water pole beans in pots?
Keep soil consistently moist but not waterlogged. Water daily in hot weather (pots dry out fast!) and every 2–3 days when cooler. Check the top inch of soil—if it’s dry, it’s time to water. Morning watering prevents fungal issues from overnight dampness.
Can I harvest pole beans multiple times?
Pick beans every 2–3 days when pods are 4–6 inches long for the best flavor and to encourage more production. Overripe beans toughen up—harvest young, harvest often for a steady supply!
Wrapping up and next steps
Growing pole beans in a pot is a rewarding way to enjoy fresh, homegrown produce—even in small spaces! With just a few supplies and a little patience, you’ll have a thriving harvest in as little as 60 days.
Whether you’re a beginner or a seasoned gardener, this method proves that container gardening can be simple, productive, and delicious.
Ready to take the next step? Start your pot today and watch your beans climb, bloom, and burst with flavor. Share your progress with fellow gardeners—your green thumb might inspire someone else to try it too! 🌱💚