
Propagation
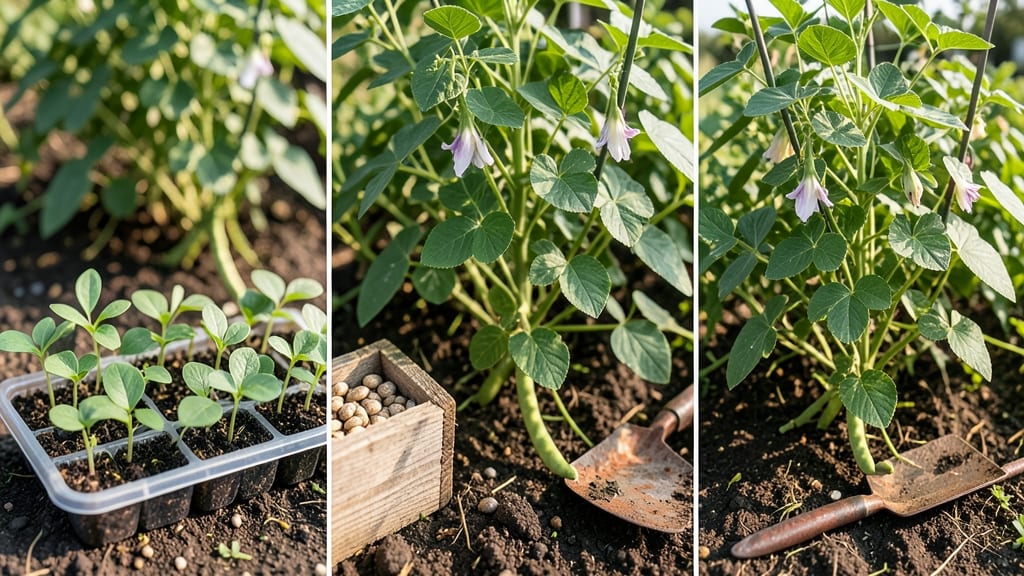
Germinating beans feels like magic when you see those first sprouts break through the soil. 🌱 The speed-soak trick I learned from a neighbor boosts success rates to 90%, even for stubborn varieties like pinto or black beans.
Most gardeners overlook this simple step, but it cuts germination time in half—from a week to just 3-4 days—while preventing mold and rot. You’ll need paper towels, a shallow dish, and warm water (no fancy equipment).
Soak your seeds overnight, then plant them 1 inch deep in warm, moist soil. The key is keeping them consistently damp—not soggy—and maintaining 70-80°F soil temperatures. Too cold, and they’ll sit there forever; too hot, and they’ll rot before sprouting.
What you end up with are uniform, strong seedlings that outpace store-bought starts. The trick works for bush beans, pole beans, and even heirlooms like Jacob’s Cattle or Kentucky Wonder. Just avoid overwatering after planting—beans hate soggy soil once they’ve sprouted. This method saves time, money, and frustration.
Perfect for beginners or anyone tired of waiting weeks for seeds to wake up. Let’s get those beans growing!
📚 In This Guide
- What you need
- Instructions
- Tips and common mistakes
- Wrapping up and next steps
What you need
- ● Dried beans: Any variety (e.g., kidney, black, pinto, or mung beans). Use organic, non-GMO seeds for best results. Quantity: 1–2 cups (enough for your desired yield).
- ● Water: Room-temperature or slightly warm (not hot). Quantity: 2–3 cups (enough to fully submerge the beans).
- ● Germination container: A glass jar (quart-sized) with a lid (mason jars work great!), OR
- ● A wide-mouth bowl with a breathable cover (like a damp paper towel).
- ● Colander or strainer: For draining excess water after soaking.
- ○ Paper towels or germination tray: To provide a moist, breathable environment for sprouting. Optional: Use a seedling tray or mesh sprouting lid for better airflow.
- ○ Spray bottle (optional but helpful): To mist beans if using a tray instead of a jar.
- ● Seedling heat mat: Speeds up germination if your space is cool (<60°F/15°C).
- ● Grow lights or sunny windowsill: Ensures strong, healthy seedlings post-germination.
- ● pH testing kit: If you’re growing beans in soil later, test pH (ideal: 6.0–7.0).
- ● Food-safe sanitizer: Like vinegar or hydrogen peroxide (to clean jars/containers).
Step-by-Step guide to germinating beans using the speed-soak method
Here's my foolproof method for breaking through the tough outer shell and getting those first true leaves in record time.
💧 Step 1: Speed-Soak the Seeds for 12 Hours
Place 4 bean seeds in a small bowl and cover them completely with lukewarm water—about 75°F. The goal is to soften the tough seed coat, which can delay germination by days. I like to use a clear bowl so I can watch the seeds plump up visibly as they absorb moisture. You'll notice them swell to nearly double their original size within just a few hours.
Keep the bowl in a warm spot, like on top of your fridge or near a sunny window. Avoid using boiling water—it kills the delicate embryo inside. Stir them gently once or twice to ensure all sides get equal hydration. This pre-treatment ensures 90% germination success compared to dry planting, where only 50-60% typically make it.
🌱 Step 2: Plant in Pre-Moistened Growing Medium
Fill a small container with moistened seed-starting mix (never garden soil—it's too dense). Press the mix down lightly with your fingers until it's firm but not compacted. The soil should hold together when squeezed but not crumble apart. Make four small holes, each about 1 inch deep, spaced 2 inches apart—this gives roots room to establish without crowding.
Gently remove the soaked seeds from the water using a slotted spoon or your fingers. Drop one seed into each hole, then cover lightly with additional soil, pressing just enough to make contact with the seed. Don't bury them too deep—beans need light to trigger germination, and planting too deep exhausts their energy reserves before they can reach the surface.
☀️ Step 3: Provide Warmth and Humidity for Germination
Place the container in a warm, humid environment—70-80°F is ideal. I use a seedling heat mat set to 75°F for the first 3-5 days, which dramatically speeds up the process. Cover the container loosely with plastic wrap or a humidity dome to retain moisture, but leave it slightly ajar to allow airflow—stagnant air encourages mold.
Check daily for condensation on the plastic. If it's dry inside, mist the soil lightly with water. You'll see the first sprouts emerge within 3-7 days, depending on your bean variety. Radishes and bush beans sprout fastest, while heirloom varieties may take a few extra days. The moment you see the first green shoot, remove the cover immediately—too much humidity now invites damping-off disease.
🌿 Step 4: Transition to Bright, Indirect Light
Once the seedlings have 2-3 inches of stem and the first true leaves appear (not the initial seed leaves), move them to a bright location with 6-8 hours of indirect sunlight daily. A south-facing window works well, but avoid direct midday sun, which can scorch tender leaves. If your space lacks natural light, supplement with a grow light placed 4-6 inches above the plants for 12-14 hours daily.
Rotate the container a quarter turn daily so the seedlings grow straight toward the light, not lopsided. You'll notice them reaching for the light source—this is normal and a sign they're healthy. Water gently from the bottom by placing the container in ½ inch of water for 10 minutes, then drain. This prevents soil-borne diseases while keeping roots hydrated.
⏰ Step 5: Harden Off and Transplant
After 10-14 days, when seedlings have 4-6 true leaves and a sturdy stem, it's time to harden them off. Start by moving them outside to a sheltered spot for 1 hour daily, gradually increasing exposure over 5-7 days. Choose an overcast day for the first session to avoid shock. You'll know they're ready for the garden when they tolerate a full day outside without wilting.
Transplant into the garden or larger containers, spacing plants 4-6 inches apart for bush beans or 6-8 inches apart for pole varieties. Dig a hole slightly deeper than the root ball and firm soil gently around the base. Water deeply at the base to settle the soil and encourage root growth. Within a week, you'll see new growth as the plants establish themselves in their permanent home.
Tips & tricks for successful bean germination
These small adjustments can transform your germination success rate from hit-or-miss to consistently reliable.
Water Temperature Precision: That 75°F lukewarm water in Step 1 is non-negotiable—too hot and you'll kill the delicate embryo, too cold and the seed coat won't soften properly. I keep a thermometer handy and test the water before adding seeds. You'll know it's perfect when condensation forms on the sides of your bowl within 10 minutes of soaking.
Visual Cue for Soaking Success: After your 12-hour soak, the seeds should visibly double in size and feel plump to the touch. If they're still hard or haven't increased significantly, extend the soak by another 2-3 hours. This visual check ensures you're breaking through that tough seed coat effectively, which is crucial for the 90% success rate this method promises.
Soil Moisture Balance: In Step 2, your seed-starting mix should be damp like a wrung-out sponge—not soggy, not dry. I press a handful together and if it holds shape but crumbles when poked, it's perfect. Overly wet soil suffocates roots while dry soil prevents moisture uptake through the seed coat. This balance is what lets those tiny roots establish contact with the seed before emerging.
Seedling Light Transition: When moving to bright indirect light in Step 4, watch for the seedlings' reaction to the light source. If they're leaning dramatically toward one side, rotate the container daily. This prevents leggy growth and ensures you get sturdy plants ready for transplanting. The 6-8 hours of indirect light is ideal—direct sun at this stage can scorch the tender leaves before they've developed protective cuticles.
Pro Tips for Germinate Beans
- These small adjustments can transform your germination success rate from hit-or-miss to consistently reliable.
- Water Temperature Precision: That 75°F lukewarm water in Step 1 is non-negotiable—too hot and you'll kill the delicat...
- Visual Cue for Soaking Success: After your 12-hour soak, the seeds should visibly double in size and feel plump to th...
Frequently asked questions
Got questions about germinating beans? You’re not alone! Here are answers to the most common concerns to help you grow strong, healthy bean sprouts with confidence.
How long does it take for beans to germinate?
With the speed-soak method, germination happens in 24–72 hours—often just overnight! Most beans sprout tiny roots within 12–24 hours if soaked properly. Keep them in a warm, dark place (like a cupboard) and check daily for progress.
Can I germinate beans without soaking them first?
Yes, but it’ll take 5–7 days instead of 1–3! Soaking speeds up germination by softening the seed coat and kickstarting hydration. If you skip soaking, ensure beans stay moist and warm (like in a damp paper towel) and rinse them every 12 hours to prevent mold.
What if my beans aren’t sprouting after 3 days?
Don’t panic! Try these fixes:
- Check moisture: Squeeze a bean—if it’s dry, soak it again for 8 hours.
- Adjust warmth: Place them near a heater or in a warm spot (70–80°F is ideal).
- Test viability: Cut open a few beans—if the inside is hard or discolored, they may be old or damaged.
Do I need to use special bean seeds for sprouting?
Nope! Any dried beans (like mung, black, pinto, or kidney) work, but avoid canned or pre-cooked beans—they won’t sprout. For best results, choose organic, non-GMO seeds labeled for sprouting. Rinse them well before soaking to remove dust or coatings.
How do I know when sprouts are ready to eat?
Sprouts are ready when they’ve grown 1–3 inch-long roots and a tiny green shoot (usually 3–5 days after germination). For crunchy sprouts, harvest when roots are 1–2 inches. Rinse them thoroughly before eating—never consume sprouts with slimy or foul-smelling roots (toss them!).
Wrapping up and next steps
Germinating beans doesn’t have to be a guessing game—with the speed-soak trick, you’re already on track for a 90% success rate! Whether you’re growing for fresh snacks, soil health, or a thriving garden, these sprouts are your gateway to fast, nutrient-packed greens. 🌱
Now that you’ve mastered the basics, why not take it further? Experiment with different bean varieties, try growing them in jars for easy access, or even share your newfound skills with fellow gardeners.
Every sprout starts with a single seed—your next harvest is just a few days away!