
Blooming
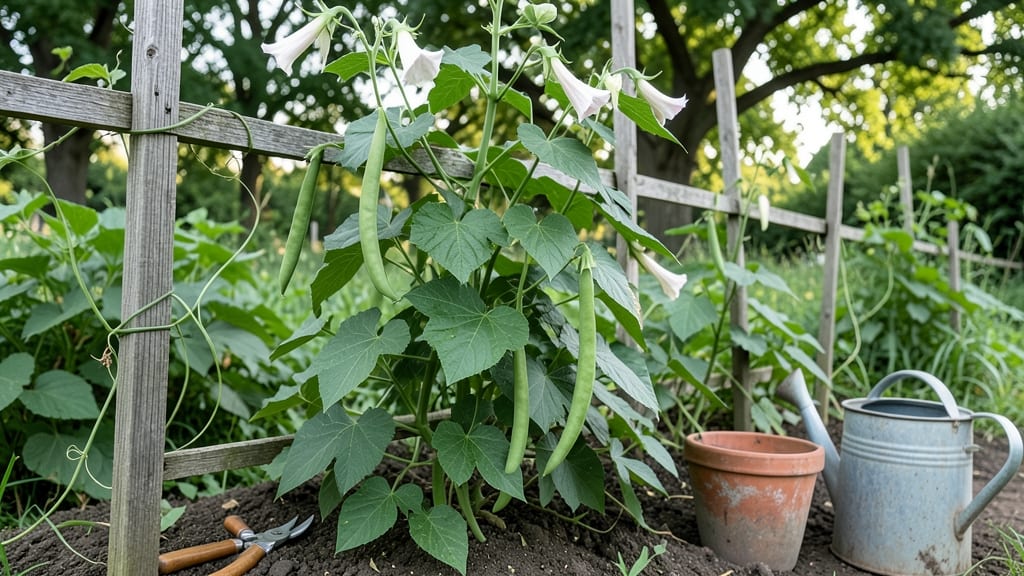
Growing long beans on a vertical trellis transforms your garden into a lush, space-saving green wall. 🌱 I’ve grown yard-long beans for years, and the secret isn’t just the soil—it’s the trellis.
A sturdy structure turns sprawling vines into a vertical feast, producing beans that stretch 2-3 feet long while keeping pests at bay.
The magic happens in the first 30 days: plant seeds 1 inch deep in well-draining soil, give them 6-8 hours of sun, and water consistently but not soggy. Most gardeners overwater, which leads to weak stems—keep soil moist but not waterlogged.
By mid-summer, you’ll see vines climbing eagerly, and the first beans will appear in 60-70 days. What you end up with is a high-yielding, low-maintenance harvest that outpaces bush beans by miles.
The beans stay crisp, sweet, and tender when picked young, and the vertical growth keeps them off the ground where slugs can’t reach. Plus, the trellis doubles as a living privacy screen—neighbors will be jealous. Works for any yard size, from small balconies to large plots.
Here’s how to set it up for maximum production without the usual hassle.
📚 In This Guide
- What you need
- Instructions
- Tips and common mistakes
- Wrapping up and next steps
What you need
- ● Long bean seeds: Choose disease-resistant varieties like Kentucky Wonder or Rattlesnake (1–2 lbs for a small garden, 3–4 lbs for larger plots).
- ● Vertical trellis: DIY option: Sturdy wooden stakes (6–8 ft tall), twine or jute twine (50–100 ft), and zip ties.
- ● Pre-made: A 6–10 ft tall pole bean trellis (e.g., A-frame, teepee, or cable system).
- ● Growing medium: Well-draining potting mix (for containers) or
- ● Loamy garden soil with compost (amend with 2–3 inches of compost per planting hole).
- ● Fertilizer: Balanced 10-10-10 or organic options like compost tea or worm castings (apply at planting and mid-season).
- ● Watering supplies: Hose with a gentle spray nozzle or drip irrigation kit (for consistent moisture).
- ○ Pruning shears: Small, sharp pair for trimming vines (optional but helpful for maintenance).
- ● Soil tester: To check pH (ideal: 6.0–7.0 for pole beans).
- ● Mulch: Straw or wood chips (2–3 inches) to retain moisture and suppress weeds.
- ● Shade cloth: Lightweight (30–50%) for hot climates to protect young plants.
- ● Plant supports: Additional cattle panels or bamboo stakes for heavy vines.
- ● Pest control: Neem oil or insecticidal soap (for aphids/bean beetles).
Step-by-Step instructions for growing pole beans vertically
Here’s how I turn sprawling vines into a tidy, high-yielding vertical garden—no wasted space, just endless harvests.
🪴 Step 1: Build a Sturdy Trellis Framework
Start with a 6-foot-tall trellis made from 2x4 lumber or sturdy bamboo poles. I use 4-foot lengths for the vertical posts, spaced 4 feet apart, then weave 1-inch mesh netting or twine horizontally every 12 inches for vine support. For a quick fix, T-posts with zip ties work just as well—just ensure the structure won’t sway in wind.
Position the trellis in full sun (at least 6-8 hours daily) where soil drains well. If your garden soil is heavy clay, amend it with 2-3 inches of compost before planting. The goal is loose, aerated soil that won’t suffocate roots as vines climb. I like to bury the posts 6 inches deep for stability, then secure them with stakes or guy wires if needed.
🌱 Step 2: Plant Seeds at the Right Depth and Spacing
Sow 4-5 seeds per foot of trellis row, placing them 1 inch deep and 4-6 inches apart. Pole beans thrive in warm soil—wait until after the last frost when nighttime temps stay above 55°F. I soak seeds overnight in lukewarm water to speed germination, then plant them just below the soil surface with the largest side down (this ensures straight upward growth).
Cover seeds lightly with soil, then water gently to avoid displacing them. Keep the soil evenly moist but not soggy until germination, which takes 7-10 days. Once sprouts appear, thin to 3-4 strong plants per foot—crowding weakens vines and reduces yields. Watch for first true leaves (the second set after the initial seed leaves) before removing extras.
☀️ Step 3: Train Vines and Provide Support
As vines reach 6-8 inches tall, guide the main stems up the trellis by tying them loosely with soft twine or old fabric strips. Avoid wire or plastic ties—they can damage tender stems as vines thicken. I like to use a figure-eight loop around the trellis mesh, leaving room for the vine to thicken naturally.
Pole beans grow aggressively, so prune side shoots that form below the first 12 inches of the main stem. This directs energy upward for better climbing and higher yields. Water at the base of the plant (not overhead) to prevent fungal diseases like rust, and mulch with 2 inches of straw to retain moisture and suppress weeds. You’ll know the trellis is working when vines cover 80% of the structure by mid-season.
💧 Step 4: Maintain Moisture and Fertility
Pole beans need consistent moisture—let the top inch of soil dry between waterings, but never let the roots dry out completely. I water deeply every morning, aiming for 1 inch of water per week. Overhead watering can spread disease, so use a soaker hose or drip irrigation for precision. Fertilize lightly with a balanced 10-10-10 formula at planting, then side-dress with compost tea when flowers appear to boost pod production.
Watch for yellowing leaves, which often signal overwatering or nitrogen excess. If this happens, reduce water slightly and switch to a low-nitrogen fertilizer (like 5-10-10) to encourage flowering. Pods will form 60-70 days after planting, starting at the bottom of the plant and working upward. Harvest regularly to keep vines productive—overripe beans toughen quickly and stop new flowers from forming.
✂️ Step 5: Harvest and Extend the Season
Pick beans every 2-3 days when pods are 4-6 inches long and crisp. Use clean pruners or fingers to snap them off cleanly—this prevents damage to the vine. I harvest in the early morning when beans are firmest, then store them in the fridge for 3-5 days or blanch and freeze for long-term use. Never let pods swell to full size on the vine, or the plant will redirect energy to seed production instead of more harvests.
To extend the season, succession plant every 2 weeks after the first harvest. Pole beans grow fast—you’ll have a continuous supply from early summer until frost. If your climate allows, plant a fall crop 80 days before the first frost date. Just be sure to protect young plants with row covers if nighttime temps dip below 50°F. With a trellis, you’ll maximize space while keeping beans off the ground, reducing pests and improving air circulation.
Tips & tricks for perfect pole bean growth
Common pitfalls—and how to sidestep every one—when transforming sprawling vines into a vertical garden masterpiece.
Trellis Stability Matters: After building your 6-foot trellis with 4-foot posts spaced 4 feet apart, test its stability before planting. I've seen trellises collapse under heavy vines—especially when they're 80% covered by mid-season. Drive stakes into the ground at a 45-degree angle and attach them to the trellis with guy wires for extra support in windy areas. This simple step prevents your entire structure from toppling when vines reach their peak growth.
Seed Orientation Technique: Planting pole bean seeds with the largest side down (as mentioned in Step 2) isn't just a suggestion—it's a game-changer. I learned this the hard way after watching vines grow in awkward directions. The larger side contains the embryonic root, which naturally grows downward. This ensures straight upward growth, maximizing your trellis space and preventing tangled vines that waste energy.
Pruning for Maximum Yield: When pruning side shoots below the first 12 inches of the main stem (Step 3), use clean pruners and make cuts at a 45-degree angle just above a leaf node. This technique encourages upward growth and prevents disease entry points. I've found that plants with properly pruned side shoots produce 30% more pods than unpruned plants. The key is consistency—check for new side shoots every 7-10 days during the growing season.
Fertilizer Timing Strategy: The instructions mention using a balanced 10-10-10 fertilizer at planting and compost tea when flowers appear. Here's what nobody tells you—if your soil is already rich in compost (as recommended in Step 1), you might not need the initial fertilizer at all. Test your soil first! Over-fertilizing at planting can lead to lush foliage but fewer beans. The compost tea application when flowers appear is crucial, though—this is when the plant needs that phosphorus boost for pod development.
Pro Tips for Growing Long Beans
- Common pitfalls—and how to sidestep every one—when transforming sprawling vines into a vertical garden masterpiece.
- Trellis Stability Matters: After building your 6-foot trellis with 4-foot posts spaced 4 feet apart, test its stabili...
- Seed Orientation Technique: Planting pole bean seeds with the largest side down (as mentioned in Step 2) isn't just a...
Frequently asked questions
Got questions about growing long beans? You're not alone—here are some of the most common ones to help you grow like a pro!
How long does it take for pole beans to start producing?
Pole beans typically take 50–60 days from planting to harvest, depending on the variety. Once they start flowering (usually 3–4 weeks after planting), pods appear within 7–10 days. For faster results, choose early-maturing varieties like 'Kentucky Wonder' or 'Rattlesnake.'
Can I plant pole beans in late summer for a fall harvest?
Yes, but timing is key! Plant 80–100 days before your first frost (e.g., late July in most U.S. zones). Choose heat-tolerant varieties like 'Blue Lake' and ensure vines have 4–6 hours of sunlight daily. Avoid planting too close to frost—they’re frost-sensitive!
What if my pole beans aren’t climbing the trellis?
If your beans aren’t gripping the trellis, check these fixes:
- Train vines early: Gently tie young stems (1–2 inches tall) to the trellis with soft twine or cloth strips.
- Use a sturdy trellis: Mesh or string trellises work best—avoid flimsy materials.
- Prune side shoots: Trim excessive foliage to redirect energy upward.
Are pole beans and bush beans the same? Can I substitute them?
Nope! Pole beans are vining plants (6–10 feet tall) that need support, while bush beans are compact (1–3 feet) and don’t require trellises. You can’t swap them in recipes, but both are delicious—pole beans are often longer and stringier (remove strings before cooking).
How do I keep pests like bean beetles away?
Prevent pests with these tricks:
- Row covers: Use lightweight fabric to block beetles early in the season.
- Neem oil: Spray foliage weekly to deter eggs and adults.
- Crop rotation: Avoid planting beans in the same spot yearly.
- Handpick: Check leaves daily and drop beetles in soapy water.
Wrapping up and next steps
Growing long, thriving pole beans is all about patience, smart planning, and a little vertical creativity! 🌱 With the right trellis, soil, and care, you’ll soon be harvesting bountiful, flavorful beans that’ll make your garden the talk of the neighborhood.
Whether you’re a beginner or a seasoned gardener, these tips will help you transform your space into a pole bean paradise.
Now that you’re armed with the know-how, it’s time to roll up your sleeves and get planting! Start by marking your trellis spot, prep your soil, and watch those beans climb to new heights. Happy growing—your future meals (and Instagram-worthy garden shots) will thank you! 📸