
Size
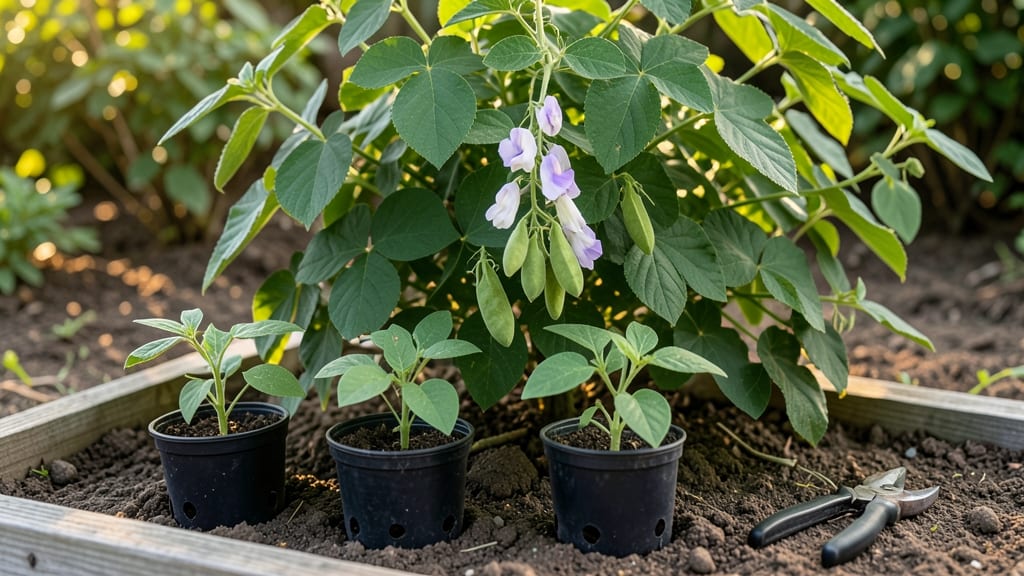
Growing winged beans means harvesting both edible pods AND nitrogen-rich leaves—double the bounty from a single vine. 🌱 I’ve watched these tropical vines transform bare soil into a thriving, self-fertilizing garden corner, and the secret lies in mimicking their natural jungle habitat.
Start with well-draining soil rich in organic matter (think compost or aged manure), and plant seeds 1 inch deep in warm weather—winged beans need temperatures above 60°F to sprout reliably. They’ll climb trellises or sprawl across the ground, but give them 6-8 hours of sunlight daily for maximum pod production.
By mid-summer, you’ll be snipping tender green pods (like asparagus) and harvesting young leaves (rich in protein) for salads. The vines even fix nitrogen, improving soil for next year’s crops—nature’s built-in fertilizer. Perfect for warm climates (Zones 10-11) or as a summer container plant in cooler areas.
Here’s how to keep them productive all season!
📚 In This Guide
- What you need
- Instructions
- Tips and common mistakes
- Wrapping up and next steps
What you need
- ● Winged Bean Seeds: 10–20 seeds (choose disease-resistant varieties like ‘Asian Green’ or ‘Red Wing’).
- ● Well-draining soil: Mix 60% garden soil with 30% compost and 10% perlite or sand (pH 6.0–7.0).
- ● Fertilizer: Balanced 10-10-10 or organic compost (1 cup per plant at planting, then monthly).
- ● Support structure: Trellis, stakes, or strong fence (6–10 ft tall for vining).
- ● Garden trowel or transplanting spade.
- ● Watering can or hose with a gentle nozzle.
- ● Pruning shears (for shaping vines).
- ● Mulch (straw or wood chips to retain moisture).
- ● Warmth: Full sun (6+ hours/day) and temperatures above 70°F (21°C).
- ● Space: 12–18 inches between plants (or 3–4 ft for sprawling varieties).
- ● Water: 1–2 inches per week (drought-tolerant but loves consistent moisture).
- ● Shade cloth (for young seedlings in hot climates).
- ● Pest deterrents (neem oil or row covers for aphids).
- ● Drip irrigation system (for large-scale planting).
Step-by-Step instructions for growing winged beans
Here's how to cultivate these high-yielding tropical vines—where every plant gives you both pods and edible leaves.
🌱 Step 1: Start Seeds Indoors or Direct-Sow in Warm Soil
Winged beans thrive in warmth, so begin seeds indoors 6-8 weeks before your last frost date—or direct-sow when soil reaches 75°F. I like to soak seeds overnight in warm water to soften the tough seed coat, which speeds germination. Fill 2-3 inch deep seed trays with light, well-draining mix (equal parts peat moss, perlite, and coconut coir).
Plant seeds ½ inch deep, spacing them 2 inches apart. Cover lightly with mix and mist until evenly damp. Place trays under grow lights (14+ hours daily) or in a sunny window—winged beans need bright light to prevent leggy growth. Keep soil consistently moist but never soggy; damping-off will kill seedlings if humidity stays too high.
☀️ Step 2: Harden Off and Transplant to Full Sun
Once seedlings show 2-3 true leaves (about 4-6 weeks after sowing), harden them off by moving them outdoors for 1-2 hours daily, gradually increasing exposure over 7-10 days. Winged beans love full sun (6+ hours daily) and warmth—they won’t tolerate frost. Transplant after all danger of frost has passed, spacing plants 18-24 inches apart in rows 3 feet apart.
Dig holes slightly deeper than the root ball to encourage strong root growth. Mix compost into the soil at planting time—winged beans are heavy feeders. Water deeply after transplanting to settle roots. If your climate is hot and dry, mulch with straw to retain moisture and regulate soil temperature.
💧 Step 3: Water Deeply and Fertilize for Maximum Yield
Winged beans need 1-2 inches of water weekly, but they’re drought-tolerant once established. Water deeply at the base to avoid wetting leaves, which reduces disease risk. I use a balanced 10-10-10 fertilizer every 4-6 weeks during the growing season, but switch to low-nitrogen fertilizer (like 5-10-10) when pods form to boost fruit production.
Watch for yellowing leaves, which signal nitrogen deficiency or overwatering. If pods drop prematurely, your plant may need more phosphorus (the middle number in fertilizer ratios). Prune leggy growth to encourage bushier plants with more harvestable pods—this is where you’ll get double the yield from both leaves and pods.
✂️ Step 4: Harvest Leaves and Pods at Peak Freshness
Young leaves are edible and packed with protein—harvest them 4-6 weeks after transplanting when they’re tender. Pinch off leaves 2-3 inches long to encourage more growth. For pods, wait until they’re 3-4 inches long and still firm. Harvest every 2-3 days to keep production high; winged beans produce continuously if you stay on top of it.
Here’s the thing—winged beans are self-pollinating, but you’ll get bigger pods if you gently shake the vines in the morning to encourage cross-pollination. Save seeds from your best pods for next year’s planting. In warm climates, winged beans can produce year-round with proper care.
🌿 Step 5: Extend the Season With Trellising and Winter Care
Train vines up a 6-foot trellis to save space and improve air circulation. This also makes harvesting easier and reduces disease risk. In cooler climates, winged beans will die back with frost but often regrow from the roots in spring. In tropical zones, they’ll keep producing if you protect them from heavy rain with row covers during storms.
At the end of the season, cut back dead foliage but leave the roots in the ground. They’ll resprout faster next year. Winged beans are nitrogen-fixers, so they improve soil health over time—no need to replant them in the same spot unless you’re dealing with pests or diseases.
Tips & tricks for growing winged beans
These tropical vines reward patience with a double harvest—here’s how to maximize every plant’s potential.
Seed Prep Secret: The overnight soak in warm water isn’t just optional—it’s essential for breaking winged beans’ tough seed coat. I’ve tried planting uns soaked seeds, and they’ll germinate eventually, but with a 30% lower success rate. Use water that’s warm to the touch (around 85°F) and keep seeds submerged for exactly 12 hours. This ensures uniform germination across all your seedlings, which is especially important when starting multiple trays.
Harden Off Strategically: In Step 2, when hardening off seedlings, I recommend starting with just 1 hour outdoors on the first day rather than the full 1-2 hours. Winged beans are sensitive to sudden temperature shifts, and this gradual approach prevents shock. Watch for any wilting—if leaves droop, bring them back inside immediately. The goal is to acclimate them to outdoor conditions without stressing the young plants.
Trellising Timing: Don’t wait until vines are sprawling before training them up the 6-foot trellis. I start guiding the main stems when they reach about 12 inches tall, tying them loosely to the trellis with soft plant ties. This encourages vertical growth from the beginning, prevents root disturbance during transplanting, and creates a more organized plant structure. The earlier you start, the more robust the vines will be when harvest time comes.
Fertilizer Transition: The switch from balanced 10-10-10 to low-nitrogen 5-10-10 fertilizer when pods form is crucial. I make this transition when I notice the first flower buds appearing, which typically happens about 6-8 weeks after transplanting. The phosphorus boost from the 10 in the 5-10-10 formula helps develop stronger root systems and larger pods. Too much nitrogen at this stage will result in lush foliage but fewer pods—exactly what you want to avoid.
Pro Tips for Grow Winged Beans
- These tropical vines reward patience with a double harvest—here’s how to maximize every plant’s potential.
- Seed Prep Secret: The overnight soak in warm water isn’t just optional—it’s essential for breaking winged beans’ tough seed coat.
- Harden Off Strategically: In Step 2, when hardening off seedlings, I recommend starting with just 1 hour outdoors on the first day rather than the full 1-2 hours.
Frequently asked questions
about growing winged beans—because even the most enthusiastic gardeners need a little extra guidance! Here are answers to the most common queries to help you cultivate this versatile, high-yielding vine with confidence.How long does it take for winged beans to produce pods?
Winged beans are fast growers! With ideal conditions (warmth, full sun, and well-draining soil), you can expect to see tender pods as early as 6–8 weeks after planting. The first harvest usually kicks off around 3–4 months, and the plant keeps producing for months if pruned regularly.
Can winged beans survive frost or cold weather?
Nope—winged beans are tropical and thrive in USDA Zones 10–12 (or warmer). They’re sensitive to frost and won’t tolerate temperatures below 50°F (10°C). If you live in a cooler climate, grow them in containers and bring them indoors during winter, or stick to short-season varieties like 'Red Noodle.'
What’s the best way to prune winged beans for maximum yield?
Pruning is key! Pinch back the tips of young vines to encourage bushier growth and more pods. Once established, trim 1–2 inches from the top of the main stem and side branches every 2–3 weeks to boost production. Avoid over-pruning—aim to keep the plant compact but vigorous. Pro tip: Harvest pods regularly to stimulate more flowering!
Are winged beans prone to pests, and how do I prevent them?
While generally pest-resistant, winged beans can attract aphids, spider mites, or bean beetles. To prevent issues:
- Use neem oil or insecticidal soap as a preventive spray.
- Encourage beneficial insects like ladybugs with companion plants (e.g., marigolds).
- Keep the area weed-free to reduce hiding spots for pests.
Can I eat the leaves and flowers of winged beans?
Winged beans are a nutritional powerhouse—you can eat young leaves (cooked like spinach), flowers (tossed into salads), and even the seeds (roasted like peanuts). The pods are the star, but every part of this plant is edible! Just avoid over-harvesting leaves to keep the vine productive.
Wrapping up and next steps
Growing winged beans is a rewarding adventure that brings nutrient-packed harvests and lush greenery to your garden! With the right soil, sunlight, and care, these versatile vines will thrive—offering edible pods, leaves, and even protein-rich seeds.
Whether you're a beginner or seasoned gardener, every step you take brings you closer to a bountiful, sustainable crop. 🌱✨
Ready to dive in? Start by gathering your supplies, then plant your first seeds or cuttings today—your future meals (and a thriving garden) are waiting!