
Propagation
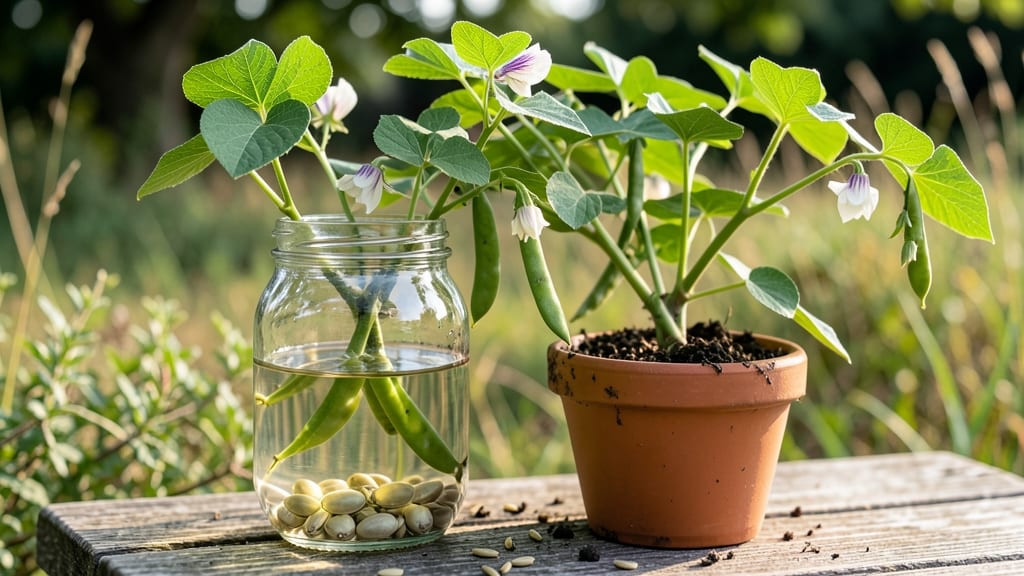
Soaking bean seeds before planting in warm water slashed my germination time from weeks to days—here’s how this simple trick transformed my first batch of kidney beans. 🌱 The secret? Softening the tough seed coat so moisture and nutrients can rush in, giving your plants a head start.
You’ll need a bowl, warm (not hot) water, and a breathable container for planting. The process takes 8-12 hours, but timing matters—too long and you risk over-soaking. I use a simple glass jar method: fill with water, add seeds, and let them soak while I prep the garden bed.
The key is consistency: keep seeds submerged but not drowning. After soaking, you’ll see plump, swollen seeds ready to plant. They’ll sprout faster, resist soil-borne diseases better, and give you a 2-3 week head start on growth. The roots establish quicker, meaning stronger plants that produce more pods.
Just don’t skip the planting prep—soaked seeds need loose, well-draining soil to avoid rot. This method works for kidney, mung, and runner beans alike. Whether you’re growing in raised beds or containers, soaking is the easy upgrade that makes all the difference. Ready to try it?
📚 In This Guide
- What you need
- Instructions
- Tips and common mistakes
- Wrapping up and next steps
What you need
- ● Bean seeds: High-quality, non-treated seeds (e.g., heirloom or organic varieties). Aim for 10–20 seeds depending on your planting goals.
- ● Clean container: A bowl, jar, or mesh bag (at least 2–3 inches deep to accommodate seeds and water). Glass or food-grade plastic works best.
- ● Water: Room-temperature (68–75°F) or warm water (avoid hot water—it can damage seeds!). Use enough to fully submerge seeds (typically 1–2 cups for 10 seeds).
- ○ Colander or strainer: For draining excess water after soaking (optional but helpful).
- ● Paper towels or damp cloth: To wrap seeds for germination (if not planting directly after soaking).
- ● Seedling heat mat: Speeds up germination in cooler climates (70–80°F ideal).
- ● Planting tray or pots: With drainage holes, ready for transplanting after soaking.
- ● Hydrogen peroxide (3%): 1 tsp per cup of water to disinfect seeds and boost early growth.
- ● Seedling fertilizer: Diluted liquid fertilizer (e.g., fish emulsion) for post-soak nourishment.
- ● Timer or alarm: To track soaking duration (most seeds need 8–12 hours).
Step-by-Step guide to soaking bean seeds before planting
Here's my foolproof method to jumpstart germination and get strong, healthy bean plants in half the time.
🌱 Step 1: Choose the Right Bean Seeds and Water
Start with fresh, high-quality bean seeds—old seeds won't respond well to soaking. I like to use dry, untreated seeds (like kidney, pinto, or black beans) because they soak up moisture faster. Fill a clean bowl with warm water (around 80-85°F)—this temperature mimics spring soil and speeds up the process.
Use enough water to fully submerge the seeds by 1-2 inches. If your seeds float, don't worry—most beans are buoyant until they absorb water. I like to add a pinch of unrefined sea salt (about ½ teaspoon per quart of water) to prevent seed rot, but it's optional. Stir gently to distribute the seeds evenly.
💧 Step 2: Soak for 8-12 Hours (No Longer!)
Let the seeds soak for 8-12 hours—this is critical. Over-soaking (beyond 12 hours) can cause the seeds to split or develop mold. I set a timer on my phone so I don’t forget. You’ll see the seeds swell and double in size as they absorb water. This is your signal that germination is about to kick in.
After soaking, drain the water completely and rinse the seeds under cool, running water for 30 seconds. This removes any excess salt or impurities. Gently pat them dry with a clean paper towel—just enough to remove surface moisture, but don’t let them dry out. Now they’re ready for planting!
☀️ Step 3: Plant the Soaked Seeds at the Right Depth
Fill your planting container or garden bed with well-draining soil (beans hate soggy roots). Dig small holes 1-2 inches deep—this is key because soaked seeds need less depth to reach the surface. I like to space them 3-4 inches apart in rows, depending on the bean variety. Drop 1-2 seeds per hole (just in case one doesn’t sprout).
Cover the seeds with soil and water lightly—just enough to settle the soil around them. Avoid soaking the soil afterward, as beans need consistent moisture but not waterlogged conditions. Place the container in a warm, sunny spot (or under a grow light) where temperatures stay between 65-85°F. You should see sprouts in 3-7 days—much faster than unsoaked seeds!
🌿 Step 4: Monitor for Sprouting and Transplant Carefully
Once the first true leaves appear (not just the initial seed leaves), your beans are ready for the next phase. Keep the soil evenly moist but not soggy—beans are drought-tolerant once established, but young seedlings need steady water. If you’re planting in a garden, wait until the soil is warm (at least 60°F) and all frost risk has passed.
When transplanting, handle the seedlings gently—beans have delicate roots. Space mature plants 4-6 inches apart for bush beans or 6-8 inches apart for pole beans. This gives them room to grow without competing for nutrients. Watch for yellowing leaves or stunted growth—these are signs of overwatering or poor drainage.
Tips & tricks for perfect bean seed soaking
These little tricks will help you maximize germination and avoid common pitfalls when prepping your seeds.
Water Temperature Matters: The 80-85°F water temperature in Step 1 is ideal because it mimics spring soil conditions. If you don't have a thermometer, use warm tap water that feels comfortable to your wrist—not scalding. Cold water slows germination, while water above 90°F can cook the seeds. For extra warmth, place your bowl in a sunny window during soaking.
Visual Cues for Soaking: In Step 2, watch for seeds that swell to nearly double their original size—this means they're ready! If any seeds develop a grayish tint or fuzzy mold after 12 hours, rinse them immediately and plant right away. I also like to stir the seeds gently every 4-6 hours to prevent them from sticking together, which helps with even germination.
Planting Depth Trick: The 1-2 inch depth in Step 3 might seem shallow, but soaked seeds need less soil cover to reach sunlight quickly. For container gardening, use a small trowel to make precise holes—this prevents overcrowding and makes transplanting easier later. If you're planting in poor soil, mix in a handful of compost to the planting holes for extra nutrients.
Sprout Timing: The 3-7 day window for sprouts in Step 3 assumes ideal conditions. If your space stays cooler (60°F or below), germination may take up to 10 days. Keep a small notebook by your plants to track when you planted each batch—this helps you anticipate harvest times later.
Pro Tips for Soak Bean Seeds Before Planting
- These little tricks will help you maximize germination and avoid common pitfalls when prepping your seeds.
- Water Temperature Matters: The 80-85°F water temperature in Step 1 is ideal because it mimics spring soil conditions.
- Visual Cues for Soaking: In Step 2, watch for seeds that swell to nearly double their original size—this means they're ready!
Frequently asked questions
Got questions about soaking bean seeds before planting? You’re not alone! Here are answers to the most common queries to help you grow strong, healthy plants with confidence.
How long should I soak bean seeds before planting?
Most bean seeds need 4 to 12 hours of soaking in warm water (70–80°F). Larger seeds like kidney beans may take longer, while smaller varieties like mung beans can germinate faster. Pro tip: Avoid over-soaking—beyond 12 hours, seeds can develop mold or rot.
Can I soak bean seeds overnight?
Soaking overnight (8–12 hours) is generally safe for beans, but avoid exceeding 12 hours unless you’re prepping for long-term storage. Overnight soaking can leach nutrients or encourage mold, especially in humid conditions. For best results, soak for 6–8 hours and plant immediately.
What if my soaked seeds start to sprout before planting?
If seeds sprout while soaking, plant them within 24 hours to prevent the delicate sprouts from drying out. Handle gently—sprouted seeds are fragile! If you can’t plant right away, wrap them in a damp paper towel and store in a cool, dark place (like a fridge) for up to 3–5 days.
Does the water temperature matter when soaking bean seeds?
Yes! Use warm water (70–80°F) to speed up germination. Cold water slows the process, while hot water (above 100°F) can damage seeds. For extra warmth, soak seeds in a bowl of warm water for 30–60 minutes before transferring to room-temperature water.
What if I forget to soak my seeds—can I still plant them dry?
While soaking speeds up germination, dry seeds will still sprout—just slower (5–14 days vs. 2–5 days). For dry planting, ensure your soil is moist and warm (60–80°F). Water thoroughly after planting to kickstart the process.
Why did my soaked seeds turn mushy or smell bad?
Mushy seeds or a rotten smell mean over-soaking or mold. Drain and rinse seeds immediately if you see fuzz, discoloration, or foul odors. Discard affected seeds and use fresh ones. To prevent this, soak in clean, filtered water and avoid reuse.
Wrapping up and next steps
Soaking bean seeds before planting is a simple yet powerful trick to boost germination speed and plant health! 🌱 With just warm water and a little patience, you’ll give your seeds the best start possible—leading to stronger, faster-growing plants.
Whether you're a beginner or a seasoned gardener, this method is easy to master and makes all the difference.
Ready to try it? Grab your seeds, follow the steps, and watch your garden thrive! Next, experiment with different soaking times or try planting in containers—your green thumb will thank you!