
Container Gardens
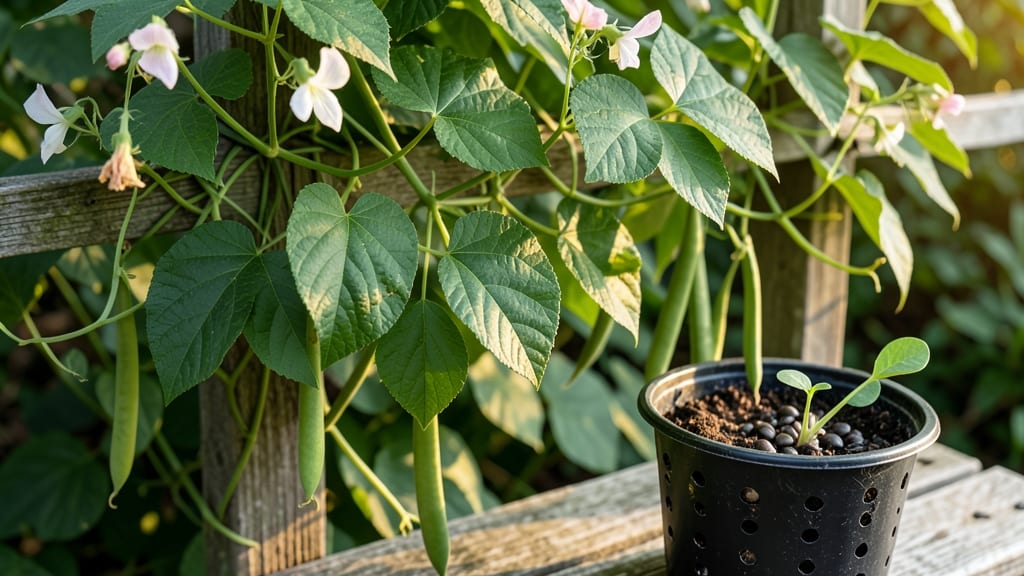
To plant pole beans in containers 🌱, you’ll need a tall, sturdy pot and a trellis—these fast-growing climbers reward the right setup with bountiful harvests in even the smallest spaces.
Running out of garden space shouldn’t stop you from growing delicious, high-yield pole beans—these fast-growing climbers thrive in containers with the right vertical trellis setup. Here’s how to maximize your harvest in minimal square footage while avoiding common mistakes that stunt growth.
Whether you’re working with a balcony railing or a five-gallon bucket, the key is root room, moisture control, and support that won’t topple under six-foot vines. I’ll walk you through container choices, soil prep, and trellis hacks that turn even a tiny patio into a pole bean powerhouse.
By the end, you’ll know exactly how deep to plant those seeds, when to water without drowning the roots, and which trellis style keeps your beans climbing straight—and your containers from tipping over.
Best container setups and trellis types for pole beans
Pole beans are one of my favorite container plants because they transform small spaces into productive vertical gardens. The key to success lies in choosing the right container size and trellis type to support their rapid growth.
A 5-gallon container is my minimum recommendation for a single plant, but larger pots hold more soil moisture and nutrients for bigger yields.
Container materials matter too—fabric pots prevent root circling and allow better airflow, while plastic containers retain moisture longer. I’ve found that fabric pots work best for balcony setups where drainage is critical, while plastic containers excel in patio environments where consistent moisture is easier to maintain.
Vertical trellises are non-negotiable for pole beans. Without support, plants sprawl and produce fewer pods. The most effective options include A-frame trellises, spiral cages, and twine systems. Each has unique advantages depending on your space constraints and maintenance preferences.
| Container Type | Material | Best For | Pros | Cons |
|---|---|---|---|---|
| Fabric Pots (5-7 gallons) | Breathable fabric | Balconies, urban gardens | Prevents root circling, excellent drainage | Dries out faster, requires more frequent watering |
| Plastic Containers (10+ gallons) | Rigid plastic | Patios, ground-level gardens | Retains moisture, durable, lightweight | Risk of root circling, less airflow |
| Self-Watering Containers | Plastic with reservoir | Travel, busy gardeners | Reduces watering frequency, consistent moisture | Bulky, higher cost |
| Trellis Type | Max Height | Best For | Ease of Use | Space Efficiency |
|---|---|---|---|---|
| A-Frame Trellis | 6-8 ft | Patios, ground-level gardens | Moderate (requires assembly) | High (freestanding) |
| Spiral Cage | 4-6 ft | Balconies, small spaces | Easy (pre-made) | Very High (compact) |
| Twine System | 8-10 ft | DIYers, large containers | Low (ongoing maintenance) | Moderate (needs space for growth) |
| Cage Trellis | 5-7 ft | Containers, raised beds | Easy (sturdy) | High (enclosed design) |
For balcony gardens, I recommend spiral cages or cage trellises because they maximize vertical space without taking up floor area. These setups work perfectly in 5-gallon fabric pots and allow you to grow 3-4 plants per square foot—ideal for small spaces.
If you’re working with a patio or ground-level setup, an A-frame trellis is my top choice. It supports the 6-10 foot height of mature pole beans while keeping the base stable. Pair it with a 10-gallon plastic container for better moisture retention during hot afternoons.
For DIY enthusiasts, a twine trellis is a budget-friendly option that lets you customize height. Simply
Step-by-step planting guide: from seed to climbing success
Growing pole beans in containers starts with the right prep—skipping these steps can lead to weak vines or poor yields. First, choose a container with at least 10-12 inches of depth and 12-18 inches of diameter per plant to accommodate their deep root systems.
Fabric pots or self-watering containers work best for moisture control, while plastic retains heat better in cooler climates.
Fill your container with a lightweight, well-draining potting mix blended with 20% compost or aged manure. Pole beans thrive in slightly acidic to neutral soil (pH 6.0-7.0), so test your mix if possible. Avoid garden soil—it compacts too easily in containers and suffocates roots.
🌱 Step-by-Step Planting Process
- 1. Plant seeds 1 inch deep – Use your finger or a small stick to create holes 1 inch deep, spacing them 4-6 inches apart in rows 6 inches apart (if planting multiple seeds per container).
- 2. Water gently but thoroughly – Mist the soil surface first, then water until it drains from the bottom. Avoid soaking the seeds directly to prevent rot.
- 3. Install trellis immediately – Bury a 5-6 foot tall trellis (A-frame, cage, or spiral) 6 inches deep into the soil at one edge of the container. Secure it with stakes if needed.
- 4. Thin seedlings to strongest 2-3 plants – Once sprouts appear (7-14 days), snip weaker seedlings at soil level, leaving the healthiest stems to climb.
- 5. Water consistently at soil level – Keep soil evenly moist (not soggy) by watering early morning at the base. Containers dry out faster than ground soil!
- 6. Guide vines weekly – Gently weave new growth around trellis supports every 7-10 days to prevent tangling. Avoid tying—pole beans hate being tied down!
One common mistake is overcrowding—if your container holds multiple plants, space them 6 inches apart in all directions. Too many vines competing for space will lead to stunted growth and fewer pods.
If you notice leaves yellowing mid-season, it’s often a sign of nutrient deficiency—switch to a balanced fertilizer (5-10-10) every 4-6 weeks during the growing season.
For containers on balconies or patios, place them in full sun (6+ hours daily) and rotate the container quarter-turns weekly to ensure even growth. If your pole beans start to leaf out excessively without flowering, they need more sunlight or may be overwatered.
Reduce watering slightly and move to a sunnier spot immediately.
Harvest begins when pods reach 4-6 inches long—pick regularly to encourage more production! Use sharp scissors to snip stems, leaving 1 inch of stem attached to the vine. This simple habit prevents disease and keeps your plants productive until the first frost.