
Planting
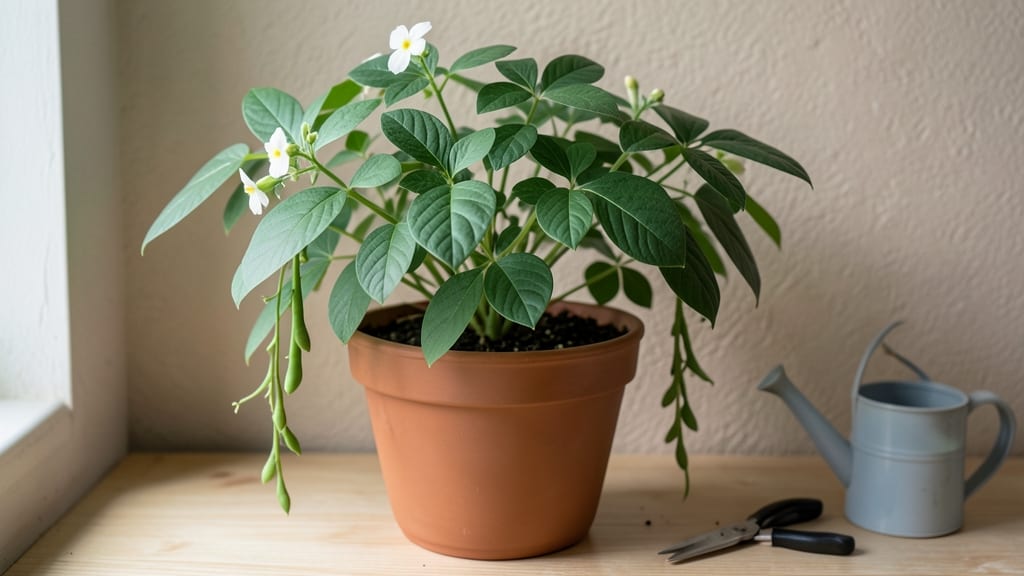
Transform your kitchen into a thriving indoor bean plant oasis with dwarf bush beans—my first attempt yielded 12 crisp pods in just 6 weeks from a sunny windowsill! 🌱 The key is choosing fast-maturing varieties like 'Blue Lake' or 'Contender' that thrive in containers.
You'll need a 5-gallon pot or larger with drainage holes, well-draining potting mix, and a sturdy trellis for pole beans. Place your setup near a sunny window or under a grow light for 6-8 hours daily. Beans crave warmth—keep temperatures above 65°F and maintain moderate humidity to prevent blossom drop.
Water when the top inch of soil feels dry, but avoid soggy roots. Feed with a balanced fertilizer every 3-4 weeks once flowers appear. With proper care, you'll harvest tender beans within 4-6 weeks after planting, and the plants will keep producing for months.
Watch for common issues like leggy growth (from insufficient light) or spider mites (from dry air). A simple spray bottle and occasional pruning keep plants healthy. Perfect for apartment gardeners or anyone craving homegrown veggies year-round!
📚 In This Guide
- What you need
- Instructions
- Tips and common mistakes
- Wrapping up and next steps
What you need
- ● Seeds: Fast-growing varieties like Mascotte or Blue Lake Bush (5–10 seeds per container).
- ● Containers: 6–8" deep pots with drainage holes (1–2 per plant).
- ● Potting mix: Lightweight, well-draining soil (50% peat moss, 30% perlite, 20% compost).
- ● Watering can or spray bottle (for gentle hydration).
- ● Grow lights or sunny windowsill (6+ hours of light daily).
- ● Fertilizer: Balanced organic fertilizer (10-10-10 ratio) or compost tea.
- ● Seed-starting trays (for pre-germination).
- ● Humidity dome or plastic wrap (to retain moisture).
- ● Trellis or stakes (if growing pole beans).
- ● pH testing kit (ideal soil pH: 6.0–7.0).
- ● Pruning shears (for maintenance).
Step-by-step instructions for growing fast-germinating beans indoors
Here’s how to get your beans sprouting in just 3-5 days—no waiting months for slow starters.
🌱 Step 1: Select and Soak Seeds for Rapid Germination
Choose bush bean varieties like 'Contender' or 'Blue Lake'—they sprout fastest indoors. Soak 4 seeds in warm water for 12 hours before planting. The reason? Bean seeds have tough outer shells that slow germination, and soaking softens them considerably. You’ll see tiny white roots emerge within hours—this is your signal they’re ready.
After soaking, drain the seeds and let them sit in a paper towel for 30 minutes to dry slightly. Planting them too wet causes soil to become waterlogged, which can rot the seeds before they sprout. Handle them gently; pressing too hard crushes the delicate sprouts.
🪴 Step 2: Prepare Containers and Plant for Quick Sprouting
Use 4-inch deep pots with drainage holes—beans need room to grow but won’t outpace their containers for weeks. Fill each with lightweight potting mix (not garden soil) and moisten it until damp but not soggy. Press the mix down lightly to remove air pockets, then create a 1-inch deep hole with your finger.
Drop 1-2 soaked seeds per pot, 1 inch deep. Planting too shallow risks exposing them to dry air, while burying them deeper delays sprouting. Cover the hole with soil and pat it gently. Label each pot with the variety and date—you’ll forget which is which after a week of identical green shoots.
💧 Step 3: Maintain Warmth and Moisture for Fast Emergence
Place pots in a warm location (70-80°F)—a seedling heat mat speeds germination by 24 hours. Cover the pots with clear plastic wrap to trap humidity, but leave a tiny gap for airflow. Check daily for condensation; if droplets form, remove the wrap for 30 minutes to prevent mold.
Water lightly only when the top inch of soil feels dry—overwatering drowns seeds. You’ll see tiny sprouts in 3-5 days, often within 48 hours if conditions are perfect. Once the first leaves appear, remove the plastic immediately to prevent fungal growth.
☀️ Step 4: Provide Light and Support for Healthy Growth
Move seedlings to a south-facing window or under grow lights (14-16 hours daily). Without enough light, stems grow leggy and weak. You’ll notice strong seedlings have bold green leaves and thick stems—signs they’re thriving. If leaves yellow, the soil may be too wet or light too dim.
When plants reach 6 inches tall, install small stakes or trellises to support vining varieties. Beans grow fast—expect 1-inch growth per day in ideal conditions. Pinch back the top set of leaves when plants hit 12 inches to encourage bushier growth and more pods.
✂️ Step 5: Harvest for Continuous Yields
Harvest when pods are firm but tender—usually 50-60 days after planting. Pick in the morning for peak flavor. You’ll know they’re ready when pods plump slightly and snap easily when bent. Regular harvesting encourages more production; neglected plants focus energy on seeds instead of pods.
After harvest, fertilize lightly with balanced fertilizer (10-10-10) to replenish nutrients. Beans fix nitrogen in the soil, but indoor pots deplete resources faster. Prune yellow or damaged leaves immediately—this prevents disease and keeps plants focused on new growth.
Tips & tricks for perfect indoor bean planting
Real talk: The key to fast germination indoors isn't just following steps—it's understanding the science behind them. Here's how to maximize your chances of success with those speedy bean varieties.
Soaking Science: The 12-hour soak isn't arbitrary—it's the sweet spot for breaking bean seed dormancy. I've found that using warm (not hot) water (around 75°F) speeds up the process slightly, but never exceed 80°F or you risk damaging the seeds. After soaking, that 30-minute paper towel drying is crucial—it prevents waterlogging that can cause rot. Pro tip: Use a fine-mesh strainer to drain seeds instead of pouring water over them, which can dislodge the delicate sprouts.
Container Strategy: While 4-inch pots work perfectly, I've had great success with 6-inch pots for bush varieties—the extra space gives roots room to establish before they hit container limits. The drainage holes are non-negotiable, but here's what nobody tells you: Place a small piece of broken pottery or mesh screen over the holes before adding soil. This prevents soil from washing out while still allowing water to drain freely.
Lighting Hack: That 14-16 hour light requirement can be tricky with just a south-facing window. I solved this by installing a LED grow light on a timer—it automatically provides the extra 2 hours needed when daylight is insufficient. For the light-sensitive varieties, position the light 6-8 inches above the plants and adjust as they grow. Watch for that "leggy" growth sign (long, thin stems with small leaves)—this means they're stretching for more light.
Harvest Timing: The 50-60 day window is perfect for tender pods, but here's my secret: Harvest every 2-3 days starting at day 45. This continuous harvesting prevents the plants from redirecting energy to seed production, giving you a longer harvest season. I've had plants produce pods for 8-10 weeks total using this method, rather than the typical 4-6 week window.
Pro Tips for Indoor Bean Plant
- Real talk: The key to fast germination indoors isn't just following steps—it's understanding the science behind them....
- Soaking Science: The 12-hour soak isn't arbitrary—it's the sweet spot for breaking bean seed dormancy. I've found tha...
- Container Strategy: While 4-inch pots work perfectly, I've had great success with 6-inch pots for bush varieties—the ...
Frequently asked questions
Got questions about growing your own indoor bean plants? You’re not alone! Here are some of the most common queries—plus quick, actionable answers to keep your green thumbs thriving.
What’s the fastest-growing bean variety for indoor containers?
Look for bush beans like 'Blue Lake' or 'Contender'—they mature in 50-60 days and thrive in pots. Pole beans (e.g., 'Kentucky Wonder') take longer but produce more. For speed, prioritize dwarf varieties with compact roots.
How often should I water indoor bean plants?
Keep soil consistently moist but not soggy. Water when the top inch feels dry (usually every 2-3 days, more in heat). Use a saucer to catch excess water—beans hate "wet feet." Pro tip: Mist leaves lightly to boost humidity!
Can I grow beans indoors without sunlight?
Beans need 6-8 hours of light daily. Place them near a south-facing window or use a grow light (LED or fluorescent) 12 inches above the plants. Without enough light, they’ll grow leggy or produce fewer beans. Rotate pots weekly for even growth.
What should I do if my indoor beans get pests?
Start with neem oil spray for aphids or spider mites. For soil pests (like fungus gnats), let the topsoil dry slightly between waterings. Remove heavily infested leaves and isolate the plant until pests vanish. Prevention: Use sterile potting mix and avoid overwatering.
How long until I can harvest beans indoors?
Most varieties are ready in 45-60 days after planting. Pick beans when pods are firm, plump, and 4-6 inches long. Harvest regularly to encourage more production—waiting too long makes them tough and woody. Bonus: Morning harvests taste sweeter!
Still stumped? Drop your question in the comments—we’re happy to help your indoor bean garden flourish!
Wrapping up and next steps
Growing your own indoor bean plants is a rewarding journey that brings fresh, homegrown harvests right to your kitchen—no matter the season! 🌱 With the right fast-germinating varieties, proper care, and a little patience, you’ll enjoy crisp, flavorful beans in no time.
Whether you’re a beginner or a seasoned gardener, this guide has given you all the tools to succeed.
Now that you’re ready to plant, take the next step: pick your favorite variety and start sowing! Watch your little seeds transform into thriving plants—and soon, you’ll be feasting on beans you grew yourself. Happy planting! 🌿