
Planting
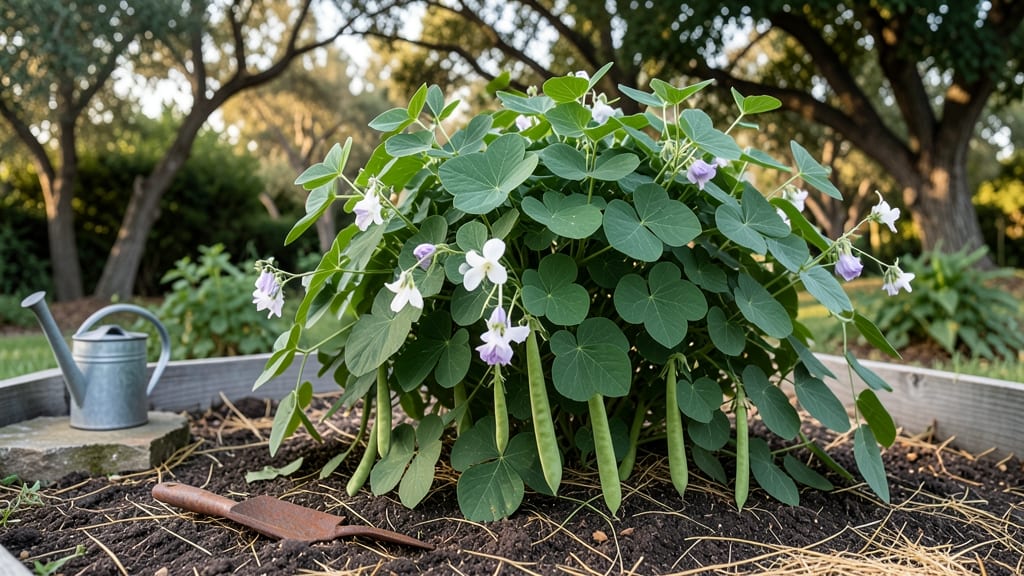
Lima bean plant care starts with warm soil and a 60-day race against the heat—because these vines thrive when planted just as the last frost fades. 🌱 I’ve grown both bush and pole varieties, and the secret to their lush, productive vines isn’t complicated: it’s about timing, sunlight, and letting them climb (or sprawl) without competition.
The first pods appear around 70 days, but proper care turns "maybe" into "abundance." Soil prep is where most gardeners trip up—lima beans hate soggy roots but need moisture to germinate. Mix in compost before planting, then keep the soil consistently moist (not soaked) until vines establish.
Pole varieties need sturdy trellises; bush types sprawl but still benefit from a little support to keep leaves off damp ground. A balanced fertilizer at planting gives them a strong start, but too much nitrogen later means fewer beans and more foliage.
By mid-summer, you’ll be harvesting buttery, tender pods straight from the vine—if you’ve avoided the two biggest mistakes: overwatering (which causes rot) and letting weeds steal nutrients. The vines reward patience with weeks of harvests, and saved seeds mean next year’s garden starts even earlier.
Even in small spaces, these plants deliver big rewards with minimal fuss.
Here’s the kicker: lima beans fix nitrogen in the soil, so they improve the garden for years after harvest. That means better tomatoes and peppers next season—just from what you’ve already grown.
The key is consistency: water at the base (not overhead), prune only to remove dead leaves, and harvest regularly to encourage more production. With these simple steps, you’ll go from seeds to bowls of fresh, homegrown beans in no time.
📚 In This Guide
- What you need
- Instructions
- Tips and common mistakes
- Wrapping up and next steps
What you need
- ● Lima bean seeds: Choose between large lima beans (e.g., 'Fordhook') or baby lima beans (e.g., 'Christmas'). Aim for 10–20 seeds per 10-foot row or 3–5 seeds per hill (if planting in clusters).
- ● Well-draining soil: Lima beans thrive in loamy, slightly acidic to neutral soil (pH 6.0–7.0). Amend clay or sandy soil with 2–3 inches of compost or well-rotted manure.
- ○ Fertilizer: Optional starter: A balanced, low-nitrogen fertilizer (5-10-10 or 10-10-10) at planting (follow package rates).
- ● Side-dressing: Bone meal (1–2 tbsp per plant) when flowers appear to boost pod development.
- ● Watering supplies: A garden hose with a gentle spray nozzle or drip irrigation system to keep soil consistently moist but not soggy.
- ● Support structures: Trellis or stakes (5–6 feet tall) for climbing varieties (e.g., 'King of the Garden').
- ● Mulch (straw or grass clippings) to retain moisture and suppress weeds.
- ● Row covers or frost cloth to protect young plants from light frosts (lima beans are warm-season crops!).
- ● Organic pest control: Neem oil or insecticidal soap for aphids/bean beetles.
- ● Harvesting tools: Pruning shears or a sharp knife for clean cuts.
- ● Garden journal to track planting dates, watering schedules, and growth milestones!
Step-by-Step instructions for growing lima beans from seed to harvest
Here’s how to coax these vigorous vines into producing sweet, buttery pods—no fancy equipment needed.
🌱 Step 1: Time Your Planting for Warm Soil
Lima beans demand soil temperatures above 60°F to germinate—any cooler and they’ll sulk in the ground for weeks. Wait until after your last frost date (usually mid- to late spring) and test soil warmth by pressing your hand into the ground for 5 seconds. If it feels comfortably warm to your palm, it’s ready.
Direct-sow seeds 1-2 inches deep, spacing them 4-6 inches apart in rows 18-24 inches apart. I like to plant in mounds or hills (3-4 seeds per mound) to improve drainage and airflow—this prevents the soil-borne diseases that plague flat-planted beans. Water lightly after sowing to settle the seeds without displacing them.
Here’s the thing—lima beans hate being transplanted, so don’t start them indoors. The shock of moving sets them back, and you’ll lose precious growing time. If your season is short, opt for larger seeds (like ‘Fordhook’) that germinate faster in cool soil.
☀️ Step 2: Provide Support and Full Sun Early
Within 2-3 weeks, you’ll spot first true leaves—that’s your cue to install 5-6 foot tall trellises, stakes, or cages. Lima beans are vigorous climbers, and unsupported vines sprawl, making pods hard to reach and increasing disease risk. I use bamboo stakes (cheap and sturdy) or wire trellises for larger varieties.
Position plants in full sun (6+ hours daily)—they’ll wilt dramatically if shaded. Watch for yellowing leaves or stunted growth after a few weeks; this signals insufficient light. If your garden gets afternoon shade, choose bush-type limas like ‘Christmas’ instead of pole varieties.
Mulch around the base with straw or grass clippings to retain moisture and suppress weeds. Keep mulch 2 inches away from stems to prevent rot. You’ll see first flowers in 4-6 weeks, but don’t harvest yet—pods need 60-70 days to reach peak sweetness.
💧 Step 3: Water Deeply and Consistently
Lima beans are drought-sensitive once flowering begins—uneven watering causes blossom drop (flowers fall off without setting pods). Water deeply 1-2 times per week, aiming for 1 inch of water per week. The soil should feel damp 2 inches down but not soggy.
I water in the early morning to reduce evaporation and fungal risks. Avoid wetting the leaves—water at the base to prevent mildew. If your area gets hot, dry winds, increase frequency to every other day. You’ll know you’re nailing it when leaves stay dark green and vines grow 6-12 inches per week.
Real talk: Overwatering is worse than underwatering. Yellowing leaves with crispy edges mean too much moisture. If this happens, let the top 3 inches of soil dry out before watering again.
✂️ Step 4: Harvest at Peak Sweetness
Harvest when pods are 4-6 inches long and firm—this is the 60-day mark for most varieties. Check plants every 2-3 days in peak season; pods go from tender to stringy fast. Use pruning shears or a sharp knife to cut stems cleanly, leaving ½ inch of stem attached to encourage more flowers.
For bush beans, pick pods every 2 days to keep production going. For pole beans, focus on one or two main vines—overcrowded pods compete for energy. You’ll see second flushes of flowers after harvest if you keep plants well-watered and supported.
Don’t skip harvesting! Pods left on the vine turn woody and tough. Store fresh picks in the fridge for 3-5 days or blanch and freeze for long-term use. If you miss a pod, it’ll swell to 8+ inches—edible but past its prime.
🌿 Step 5: Extend the Season (If You’re Lucky)
If your growing season stretches into late summer, you can sow a second crop 60 days before your first frost. Choose heat-tolerant varieties like ‘Henderson’ or ‘King of the Garden’. Succession planting ensures a steady supply without waiting for a full season.
For cooler climates, cover plants with row fabric at night if temperatures dip below 50°F. Lima beans tolerate light frosts (down to 28°F) but won’t produce pods in cold soil. If frost threatens before harvest, pick all remaining pods—they’ll keep for 2-3 weeks in the fridge.
After harvest, pull plants and compost the vines (unless diseases struck—then trash them). Rotate next year’s beans to a different spot to prevent soil-borne issues. I mark my garden calendar now to plant a fall crop of bush beans—they handle cooler temps better than their pole cousins.
Tips & tricks for thriving lima bean vines
Let me share the hard-earned wisdom that’ll turn your lima beans from struggling seedlings to prolific producers.
Soil Temperature Secret: That 60°F soil temperature threshold isn't just a number—it's the difference between germination in 7-10 days versus weeks of waiting. I've seen seeds planted in 55°F soil take 30 days to sprout, and that's time you don't have. Use a soil thermometer if you're unsure, especially in spring when mornings stay chilly. For cooler climates, consider black plastic mulch laid down 2 weeks before planting to warm the soil faster.
Planting Geometry: The mound/hill planting method in Step 1 isn't just about drainage—it's about creating microclimates. The center of each mound stays warmer and drier than flat soil, which gives your seeds a better chance against soil-borne diseases like Fusarium. Space those mounds 18-24 inches apart to allow airflow between plants, reducing humidity that invites fungal problems. Think of it as creating little ventilation systems for your beans.
Watering Precision: The 1-2 inches per week guideline is your baseline, but timing matters more than volume. I've learned the hard way that watering in the afternoon can lead to mildew—those damp leaves overnight are an invitation for trouble. Morning watering gives leaves time to dry completely. And here's a trick: if your soil feels cool to the touch at 2 inches down, your beans aren't getting enough water. Warm soil indicates proper moisture penetration.
Harvesting Strategy: Those 4-6 inch pods at the 60-day mark are your sweet spot, but don't get tunnel vision. Check for pods at different stages on the same plant—you'll often find some ready while others need more time. For bush varieties, I harvest every 2 days to keep production going, but for pole beans, I focus on 2-3 main vines to avoid overcrowding. The key is consistency: pods left on the vine for even a day start losing their buttery texture.
Pro Tips for Lima Bean Plant Care
- Let me share the hard-earned wisdom that’ll turn your lima beans from struggling seedlings to prolific producers.
- Soil Temperature Secret: That 60°F soil temperature threshold isn't just a number—it's the difference between germination in 7-10 days versus weeks of waiting.
- Planting Geometry: The mound/hill planting method in Step 1 isn't just about drainage—it's about creating microclimates.
Frequently asked questions
Got questions about growing lima beans? You’re not alone! Here are answers to the most common queries—from planting to troubleshooting—to help you grow a bountiful harvest with ease.
How long does it take for lima beans to grow from seed?
Lima beans are fast growers! With the right conditions, you’ll see sprouts in 7–14 days. From seed to harvest, expect 60–90 days, depending on the variety (bush or pole). Early-maturing types like ‘Fordhook’ can be ready in as little as 60 days—perfect for short seasons!
What’s the best temperature for growing lima beans?
Lima beans thrive in warm soil (60–65°F or 15–18°C) and air temperatures between 70–90°F (21–32°C). They’re sensitive to frost—wait until after the last frost date to plant. If your spring is chilly, opt for large lima beans, which tolerate cooler soil better than baby lima beans.
Why are my lima bean leaves turning yellow?
Yellowing leaves usually signal overwatering, nutrient deficiency, or pests. Check the soil—it should stay moist but not soggy. Lack of nitrogen? Try a balanced fertilizer. Spider mites or aphids can also cause yellowing. Spray leaves with water to deter pests or use neem oil if infestations persist.
Can I grow lima beans in containers? How big should the pot be?
Lima beans are great for containers, especially bush varieties. Use pots at least 12–18 inches deep and 12 inches wide per plant. Pole beans need taller containers (24+ inches) with a trellis. Ensure pots have drainage holes and use a lightweight, well-draining potting mix.
How do I know when lima beans are ready to harvest?
For baby limas, harvest when pods are 2–4 inches long and tender (about 50–60 days). For large limas, wait until pods are 4–6 inches long and firm (typically 70–90 days). Pick regularly to encourage more production—check plants every 2–3 days during peak season!
Wrapping up and next steps
Growing lima beans is a rewarding journey that delivers both nutritious harvests and the joy of nurturing a thriving plant! 🌱 With the right soil, sunlight, and care, you’ll enjoy lush vines and delicious beans in just 60 days.
Whether you’re a beginner or a seasoned gardener, these fast-growing plants are perfect for adding variety to your garden—or even your dinner table.
Ready to take the next step? Start your seeds indoors now or prep your outdoor space—your future harvest is waiting! 🌿