
Tools
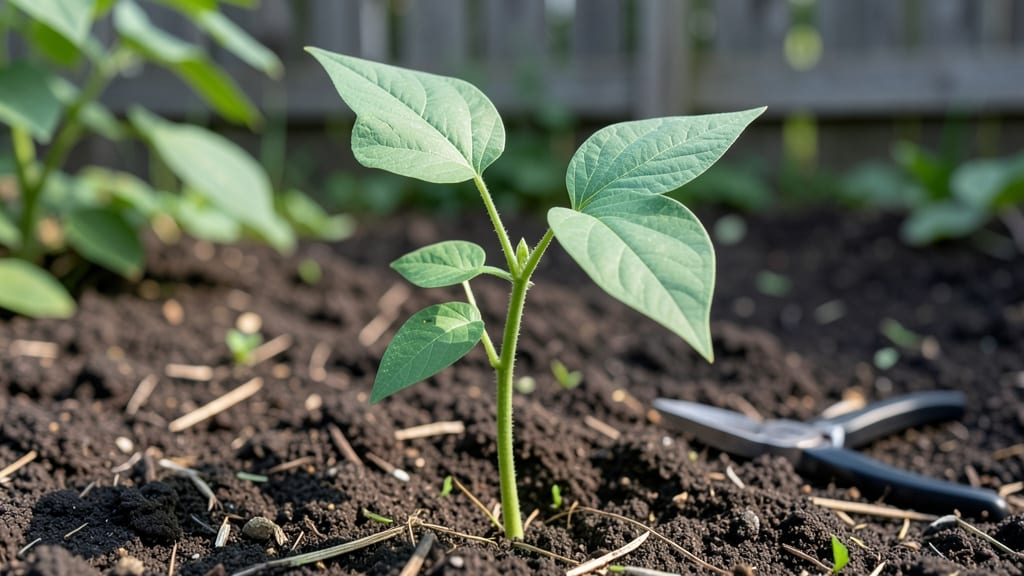
Growing pole bean sprouts that climb into lush, productive vines feels like magic—especially when you're working with limited space. 🌱 The secret isn't complicated: a sturdy trellis, the right soil, and a little patience turn tiny seeds into a 55-day harvest of sweet, tender beans.
I've grown them in everything from balcony planters to backyard corners, and the vertical growth saves room while producing more than bush varieties ever could.
Start with a 5-foot tall trellis or sturdy poles, and plant seeds 1 inch deep in well-draining soil mixed with compost. Space them 4-6 inches apart—they’ll spread as they climb. Pole beans need 6-8 hours of sunlight daily, so place them where they’ll get plenty of warmth.
Water consistently, keeping the soil moist but not soggy, and watch those first sprouts emerge in 7-10 days. The real payoff? No bending, no weeding, just a tower of beans ready to harvest.
If your sprouts take longer to appear or look weak, check the soil temperature—it should stay above 60°F for best germination. Thin seedlings to the strongest ones to avoid competition, and fertilize lightly with compost tea when vines reach 12 inches tall.
By mid-summer, you’ll be picking beans every 2-3 days, and the trellis will be a lush green curtain in your garden. The best part? You’ll have space left for more plants below.
This method works in containers, raised beds, or directly in the ground—just adjust the trellis height to fit your space. Whether you're a beginner or a seasoned gardener, pole beans are one of the most rewarding vertical crops to grow. Ready to turn your small space into a bean bonanza?
📚 In This Guide
- What you need
- Instructions
- Tips and common mistakes
- Wrapping up and next steps
What you need
- ● Pole bean seeds: 1–2 lbs (or ~30–50 seeds per 5-foot trellis). Recommended varieties: Kentucky Wonder, Blue Lake, or Scarlet Runner (fast-growing and trellis-friendly).
- ● Organic, non-GMO seeds preferred for best results.
- ● Trellis or vertical support: 5–6 ft tall (e.g., A-frame, netting, or bamboo stakes).
- ● Width: 3–4 ft (for 2–3 plants per trellis).
- ● Potting mix: 5–10 gallons of well-draining, organic potting soil (avoid garden soil—it compacts).
- ● Containers: 5-gallon buckets, fabric grow bags, or raised beds (12–18" deep).
- ● Drainage holes mandatory to prevent root rot.
- ● Watering can or hose: With a gentle spray nozzle (pole beans hate soggy roots!).
- ● Fertilizer: Balanced organic fertilizer (e.g., 10-10-10) or compost tea.
- ● Gloves (to protect hands from thorns on varieties like Scarlet Runner).
- ● Pruners or scissors (for trimming vines or harvesting).
- ● Twine or plant ties (to secure vines to the trellis early on).
- ● Shade cloth (30–50% coverage for hot climates).
- ● pH test kit (ideal soil pH: 6.0–7.0).
- ● Mulch (straw or wood chips to retain moisture).
- ○ Grow lights (optional for indoor setups or early starts).
Step-by-Step instructions for growing pole beans vertically
Here's how to turn a small corner into a high-yielding pole bean garden in just 55 days.
🪴 Step 1: Set Up Your Vertical Trellis System
Start by choosing a sturdy trellis that's at least 6 feet tall—pole beans need vertical space to climb. I use a simple A-frame design made from bamboo stakes and twine, but you could also repurpose a metal ladder or install a commercial trellis kit. The key is stability; a wobbly trellis will snap under the weight of vining plants. Position it in a spot that gets full sun (6+ hours daily)—partial shade will produce fewer beans.
Drive the support stakes 12 inches deep into the ground or secure them firmly to a wall if growing against a structure. For extra support, add horizontal crossbars every 2 feet to help the main stems find purchase. This isn't just about looks—proper structure prevents broken stems when the plants get heavy with beans.
🌱 Step 2: Prepare the Soil and Plant Seeds
Pole beans thrive in well-draining soil with a pH between 6.0-7.0. Work in 2-3 inches of compost or aged manure into the top 6 inches of soil to provide nutrients without overfeeding. I like to add a handful of bone meal at planting time for extra phosphorus—this encourages strong root and vine development. Avoid fresh manure, which can burn tender roots.
Plant seeds 1 inch deep and 4-6 inches apart in rows spaced 18-24 inches apart—this gives plants room to spread before they start climbing. For a vertical setup, you can plant 2-3 seeds at the base of each trellis stake. After planting, water gently but deeply to settle the soil around the seeds without disturbing them. Keep the soil consistently moist (but not soggy) until germination, which typically occurs in 7-14 days.
☀️ Step 3: Train Vines and Maintain Growth
Once seedlings reach 4-6 inches tall, gently guide the main stems up the trellis using soft twine or plant ties. Don't wrap the ties too tightly—they should support the vine without constricting growth. As the plants climb, they'll naturally twine around the trellis structure. You'll see new leaves forming every 3-5 days if conditions are right.
Water at the base of the plant in the morning to avoid wetting the leaves, which can lead to fungal diseases. Pole beans need about 1 inch of water per week, but check the soil—if the top 2 inches feel dry, it's time to water. Mulch around the base with straw to retain moisture and suppress weeds. Fertilize lightly with a balanced organic fertilizer (like 5-5-5) every 4-6 weeks—too much nitrogen will produce lots of leaves but few beans.
✂️ Step 4: Harvest and Encourage Continuous Production
Start harvesting when pods are 4-6 inches long and firm to the touch—this is when they're most tender and flavorful. I pick every 2-3 days to encourage more production. Use pruning shears or simply pinch the pod off the vine; avoid pulling, which can damage the plant. Regular harvesting prevents the plant from diverting energy to seed production, keeping it focused on producing more edible pods.
As the season progresses, you'll notice older leaves yellowing and dying back. This is normal—remove them to improve air circulation and redirect the plant's energy to new growth. If your trellis gets crowded, gently weave new vines through the existing structure to maximize space. With proper care, a single pole bean plant can produce 10-15 pounds of beans per season—that's a lot of harvest from a small footprint!
⏰ Step 5: Extend the Season (Optional)
For a second harvest, wait until the first frost threatens, then cut the plants back to 6 inches tall and cover them with row fabric or a cold frame. Many pole bean varieties are frost-tolerant and will produce a smaller second crop in cooler weather. Alternatively, save seeds from your best pods for next year—pole beans are easy to dry and store for future planting.
This is the moment that matters: as you watch those vines spiral upward and pods swell with harvest potential, you're proving that even the smallest space can yield big rewards. The real magic happens when you taste that first fresh-picked bean—crisp, sweet, and straight from your vertical garden.
Tips & tricks for perfect pole bean sprouts
Here's what nobody tells you about turning your small space into a thriving pole bean garden—these tricks make all the difference.
Stability is Everything: When setting up your trellis in Step 1, don't just eyeball the depth of those 12-inch stakes. Use a tape measure and pound them in straight—crooked stakes will cause the entire structure to lean. I've seen trellises collapse under the weight of mature plants because the stakes weren't properly secured. For extra security, especially in windy areas, add diagonal supports between stakes to create a triangle shape.
Soil Prep Shortcut: If you're working with heavy clay soil in Step 2, mix in 2 inches of coarse sand along with your compost to improve drainage. The goal is to create a loose, crumbly texture that mimics the ideal growing conditions. I've found that adding a handful of perlite to the planting hole also helps—it creates air pockets around the roots, which is especially helpful in containers or small garden plots where drainage can be an issue.
Germination Hack: After planting your seeds in Step 2, cover the area with a clear plastic dome or even a cut-open plastic bottle to create a mini greenhouse effect. This keeps the soil warm and moist, which can cut your germination time from 14 days down to just 7-10 days. Just remember to remove the cover once you see the first sprouts to prevent fungal growth. The key is to maintain that consistent moisture without creating a swampy environment.
Harvest Timing Secret: In Step 4, those 4-6 inch pods are perfect for picking, but here's what I've learned: the best time to harvest is actually in the early morning when the pods are still cool and crisp. If you wait until afternoon, the pods can become slightly tougher and less flavorful. Also, always harvest with your fingers or pruning shears—never pull the pods off the vine, as this can damage the plant and reduce future production.
Pro Tips for Pole Bean Sprout
- Here's what nobody tells you about turning your small space into a thriving pole bean garden—these tricks make all the difference.
- Stability is Everything: When setting up your trellis in Step 1, don't just eyeball the depth of those 12-inch stakes.
- Soil Prep Shortcut: If you're working with heavy clay soil in Step 2, mix in 2 inches of coarse sand along with your compost to improve drainage.
Frequently asked questions
Got questions about growing pole bean sprouts?
You’re not alone! Here are answers to the most common queries to help you master your vertical harvest with ease.
How long does it take for pole bean sprouts to grow into edible pods?
With the right conditions, pole bean sprouts (like the classic Kentucky Wonder or Rattlesnake varieties) typically produce edible pods in 55–65 days from planting. Early varieties may yield slightly sooner, while heirloom types can take a few extra days. Keep an eye on the pods—harvest when they’re firm but still tender, usually 4–6 inches long.
Can I grow pole beans indoors or in containers?
Pole beans thrive in 5-gallon buckets, fabric grow bags, or even tall containers (12+ inches deep) with proper trellising. Just ensure they get 6–8 hours of sunlight daily (or grow lights) and a sturdy support like a cattle panel or bamboo stake. For indoor setups, choose compact varieties like Blue Lake Bush or Mascotte to save space.
What’s the best temperature range for pole bean sprouts?
Pole beans love warmth but hate extremes. Ideal soil temps are 60–85°F (15–29°C). If nights dip below 50°F (10°C), use frost cloth or plant in a greenhouse. Avoid planting until all frost risk has passed—cold soil slows germination and stunts growth. In hot climates, provide afternoon shade to prevent wilting.
What pests or diseases should I watch for?
Common threats include:
- Bean beetles: Handpick adults or use neem oil.
- Japanese beetles: Cover plants with floating row cloth.
- Powdery mildew: Improve airflow and spray with baking soda solution (1 tsp per quart of water).
- Root rot: Avoid overwatering and use well-draining soil.
Rotate crops yearly to prevent soil-borne issues.
What’s a good alternative if pole beans don’t grow well in my climate?
If your zone is too short or hot, try:
- Bush beans (e.g., Blue Lake): Compact, fast-growing, and great for containers.
- Dwarf pole beans (e.g., Mascotte): Reach 4–5 feet but produce heavy yields.
- Lima beans: Heat-tolerant and perfect for warm climates.
- Peas (sugar snap or snow peas): Cool-season crops that thrive in early spring or fall.
Each offers a similar vertical-growing advantage with adjusted care needs!
Wrapping up and next steps
Growing pole bean sprouts is a game-changer for small-space gardeners—yielding fresh, nutritious harvests in just 55 days with minimal effort! Whether you’re a beginner or a seasoned gardener, this vertical method maximizes space while delivering crisp, flavorful beans packed with protein and fiber. 🌱
Ready to transform your balcony, patio, or windowsill into a thriving harvest zone? Start small—try a single 5-foot trellis or repurpose an old ladder—and watch your confidence (and crop!) grow. Plant your first seeds today! 🌟