
Container Gardens
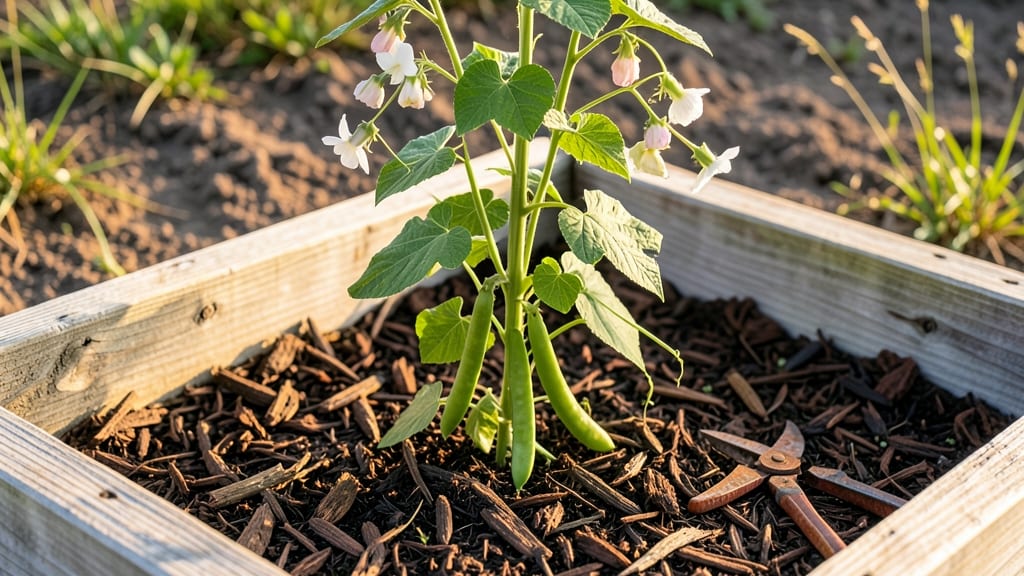
A raised garden bed for green beans isn’t just a container—it’s a vertical growing machine that turns tiny seeds into a harvest you’ll brag about at the farmers’ market. 🌱 I’ve tested countless setups, and the right design (with sturdy poles and loose soil) turns green beans from a maybe-crop into a foolproof yield every time.
The secret? Matching the bed’s height to your trellis, spacing plants for airflow, and keeping the soil moist but never soggy.
Start with a 4-foot by 8-foot bed (or smaller if space is tight) filled with 6 inches of compost, 2 inches of sand, and 2 feet of topsoil—this mix drains fast and warms up quicker than heavy garden soil.
Add 5-foot bamboo stakes at each corner and cross them with jute twine for a simple trellis. Plant seeds 1 inch deep, 4 inches apart, and watch them climb within weeks.
The key? Consistent watering (1 inch per week) and a light fertilizer every 3 weeks—no fancy tricks, just steady care.
By mid-summer, you’ll be harvesting pounds of beans with minimal effort. The plants stay disease-resistant when spaced properly, and the vertical growth saves space while maximizing sunlight. Pole beans even taste sweeter when they climb—no bending required!
Just snap a pod when it’s firm but still tender, and keep picking to encourage more production. A single 4x8 bed can yield 10+ pounds of beans if you follow these steps.
Works in containers too—just scale down the bed size and trellis. For cooler climates, start seeds indoors 4-6 weeks before last frost and transplant when soil hits 60°F.
Troubleshooting tip: If seeds rot, they’re too wet—amend soil with perlite for better drainage. Ready to turn your backyard into a bean-producing powerhouse? Let’s build that bed!
📚 In This Guide
- What you need
- Instructions
- Tips and common mistakes
- Wrapping up and next steps
What you need
- ● Untreated lumber or cedar planks (2x6 or 2x8 inches, 6–8 feet long): 4–6 pieces (depending on bed size). Cedar resists rot and pests naturally!
- ● Corrugated metal roofing or hardware cloth (1/4-inch mesh): 1 sheet (to deter burrowing pests like voles).
- ● Garden fabric or landscape fabric: 1 roll (to suppress weeds and retain moisture).
- ● Staple gun + staples: 1 (for securing fabric and mesh).
- ● Galvanized screws or decking screws (2.5–3 inches): 50–100 screws (for assembling the frame).
- ● Wooden stakes or bamboo poles (4–6 feet tall): 4–6 stakes (for trellising green beans).
- ● Compost or well-aged manure: 2–3 cubic feet (for enriching soil).
- ● Potting soil or garden soil mix: 1–2 cubic feet (depending on bed size).
- ○ Organic mulch (straw or wood chips): Optional but recommended (to retain moisture and suppress weeds).
- ● Measuring tape: 1 (for precise cuts and assembly).
- ● Circular saw or handsaw: 1 (to cut lumber to size).
- ● Drill/driver: 1 (for assembling the frame).
- ● Level: 1 (to ensure your bed is even).
- ● Gloves: 1 pair (for handling rough materials).
- ○ Wheelbarrow or garden cart: Optional (for hauling soil and compost).
- ● Sunny location: Choose a spot with 6–8 hours of direct sunlight daily (green beans are sun-lovers!).
- ● Flat, stable ground: Clear rocks, debris, or uneven terrain to ensure longevity.
- ● Well-draining soil: If your bed is on grass or compacted soil, remove the top layer or add a 2-inch layer of gravel at the bottom.
- ● Water source nearby: Green beans need 1–1.5 inches of water per week (more during flowering/fruiting).
Step-by-Step instructions for building a pole-friendly raised bed for green beans
Here’s how to create a sturdy, high-yielding raised bed designed specifically for pole green beans—with built-in support for their climbing habits.
🪴 Step 1: Choose and Assemble the Bed Frame
Select untreated cedar or redwood lumber for durability (it resists rot and pests). Cut 2x6 boards into lengths of 8 feet long for the sides and 2 feet wide for the ends—this creates a 4-foot by 8-foot bed, ideal for pole beans. Assemble the frame with 3-inch exterior screws at each corner, reinforcing with 2x4 corner braces for stability.
Elevate the frame 12 inches off the ground using cinder blocks or landscape timbers to prevent soil compaction and improve drainage. This height also makes harvesting easier and keeps slugs at bay. I always pre-drill screw holes to avoid splitting the wood—green beans grow best in a bed that won’t collapse under their weight.
🌱 Step 2: Layer the Soil for Optimal Drainage and Fertility
Start with a 2-inch layer of coarse gravel at the bottom for drainage. This prevents waterlogging, which can rot bean roots. Next, add 4 inches of compost—this feeds the soil microbes that green beans rely on. Top with 12 inches of high-quality garden soil mixed with 2 inches of aged manure for extra nitrogen.
Fluff the layers like a lasagna, ensuring no compaction. Green beans thrive in loose, well-aerated soil, and this stratification mimics their natural growing conditions. Avoid garden soil from your yard—it’s often too dense and may harbor pests. A quick squeeze test tells me if the mix is right: it should hold shape but crumble easily when touched.
☀️ Step 3: Install Trellis Supports for Pole Beans
Drive 6-foot wooden stakes into the corners of the bed, then stretch heavy-duty twine or jute twine between them in a zigzag pattern (like a ladder). Space the twine 6 inches apart vertically—this gives vines plenty of grip as they climb. For extra support, add horizontal cross-pieces every 2 feet to prevent sagging.
I’ve seen green beans snap under their own weight when trellises aren’t sturdy enough. Test the structure by gently pulling on the twine—it should hold firm without wobbling. If your bed is wider than 4 feet, add a central support stake to distribute weight evenly. Pole beans grow 6-8 feet tall, so the trellis must match their ambition.
🌿 Step 4: Plant Seeds and Train Vines Early
Sow seeds 1 inch deep and 4 inches apart in rows, spacing rows 18 inches apart for airflow. Water gently until the soil is moist but not soggy—green beans hate wet feet. Once seedlings reach 4 inches tall, guide the first vines onto the trellis by tucking them under the lowest twine strand. This encourages upward growth and prevents tangled messes later.
Here’s the thing—if you wait too long to train vines, they’ll flop over and break. I tie the main stems loosely with soft plant ties (never wire or anything that can cut into the stems). Watch for first flowers around 50 days—this is your cue to start checking for pods every 2-3 days to keep the harvest rolling.
⏰ Step 5: Maintain Moisture and Fertility Through the Season
Green beans need 1-1.5 inches of water weekly, delivered at the base to avoid wetting leaves (which spreads disease). Mulch with 2 inches of straw to retain moisture and suppress weeds. Every 4-6 weeks, top-dress with compost tea or a balanced fertilizer (10-10-10) to sustain growth—pole beans are heavy feeders.
Prune any side shoots that form below the first 6 inches of the main stem. These compete for energy and reduce yield. I also remove any yellowing leaves promptly—they’re a sign of overcrowding or nutrient deficiency. By mid-summer, your trellis should be a lush green curtain, and the pods should be coming in faster than you can pick them.
Tips & tricks for building the perfect pole-friendly raised bed
Real talk: A well-built raised bed isn't just about the plants—it's about creating a system that supports their growth from day one. Here's what nobody tells you about maximizing your green bean harvest.
Frame Stability is Non-Negotiable: The 4-foot by 8-foot dimensions in Step 1 are perfect, but the secret lies in the reinforcement. I've seen beds collapse under the weight of pole beans when corner braces are skipped. Use 3-inch exterior screws at every corner and add an extra 2x4 brace halfway along the long sides. This creates a triangle support system that prevents racking—trust me, your beans will thank you when they're not sprawling on the ground. The 12-inch elevation isn't just for aesthetics; it keeps soil temperature consistent and prevents soil-borne diseases from reaching the roots.
Soil Layering Science: That 2-inch gravel layer in Step 2 isn't just for drainage—it's the foundation of your bed's longevity. Compacted gravel creates air pockets that prevent waterlogging while allowing excess moisture to drain. When adding the 4 inches of compost, mix in 1 cup of bone meal (optional) for phosphorus boost during flowering. The key is to fluff each layer like you're making lasagna—no compaction! Use a garden fork to aerate between layers. I've had beds last 5+ years with this method because the soil structure remains perfect.
Trellis Engineering: The zigzag pattern in Step 3 might look decorative, but it's actually a climbing aid. Space those 6-inch vertical strands exactly as specified—they create natural handholds for vines. For extra insurance, I add 1-inch wide PVC pipes (optional) as vertical supports every 3 feet. These prevent the twine from sagging under bean weight. When testing your trellis, imagine a 6-foot-tall vine covered in pods—if it wobbles, reinforce it. The horizontal cross-pieces every 2 feet should be 1x2 boards for maximum support.
Planting Precision: Those 4-inch spacing and 18-inch rows in Step 4 might seem generous, but they're calculated for airflow. Crowded plants develop powdery mildew faster. When training vines at 4 inches tall, use soft plant ties made from old T-shirts (cheap and biodegradable). The 50-day flower mark is your harvest countdown—set a calendar reminder! For continuous production, stagger planting by 2 weeks in successive beds.
Pro Tips for Raised Garden Bed For Green Beans
- Real talk: A well-built raised bed isn't just about the plants—it's about creating a system that supports their growt...
- Frame Stability is Non-Negotiable: The 4-foot by 8-foot dimensions in Step 1 are perfect, but the secret lies in the ...
- Soil Layering Science: That 2-inch gravel layer in Step 2 isn't just for drainage—it's the foundation of your bed's l...
Frequently asked questions
Got questions about growing green beans in raised garden beds?
You’re not alone! Here are answers to the most common queries to help you cultivate a thriving harvest with confidence.
How deep should a raised bed be for green beans?
Aim for 6–12 inches deep—this gives roots enough room to spread while keeping soil warm and well-drained. Shallow beds (4–6") work for bush beans, but pole beans thrive in deeper beds (10–12") for sturdy trellising. Pro tip: Add compost to improve drainage and fertility!
When is the best time to plant green beans in a raised bed?
Green beans are cool-season crops—plant them 2–3 weeks after your last frost date (soil temp: 60–70°F). For extended harvests, sow a second crop 60–90 days later in warm climates. Avoid planting in hot, dry soil, as it stresses young seedlings.
Can I use a wooden raised bed for green beans?
Yes! Wooden beds (cedar or untreated lumber) are ideal—they retain moisture and warm up faster in spring. Just ensure they’re at least 2 feet wide for easy access and proper airflow. Line the bottom with landscape fabric if your soil is poor to prevent weeds from invading.
How do I keep pests away from green beans in a raised bed?
Pests like bean beetles and aphids love green beans, but prevention is key! Use row covers early in the season, plant marigolds or nasturtiums nearby as deterrents, and handpick pests daily. Avoid overwatering—damp soil attracts slugs. Bonus: Interplant with basil to repel flies!
What’s the best trellis option for pole beans in a raised bed?
Opt for durable, vertical supports like T-posts with wire mesh, bamboo stakes, or heavy-duty garden netting. Install trellises before planting—pole beans climb aggressively! Space supports 18–24 inches apart for even growth. Pro tip: Train vines early to save time later!
Can I grow green beans in a raised bed over winter?
Most green beans won’t survive frost, but cold-hardy varieties (like Blue Lake Bush) can tolerate light freezes. Extend the season with row covers or a mini greenhouse. In warm climates, plant fall crops 8–10 weeks before first frost for a late harvest.
Wrapping up and next steps
Growing green beans in a raised garden bed is a rewarding way to boost your yield while keeping pests at bay and saving space! With the right pole-friendly design, you’ll enjoy fresh, crisp beans all season long—whether you’re a beginner or a seasoned gardener. 🌱
Now that you’re equipped with the perfect setup, it’s time to plant those seeds and watch your garden thrive! Start by choosing your favorite green bean variety and follow the planting tips from earlier. Happy gardening—and soon, you’ll be harvesting a bountiful crop!