
Advice
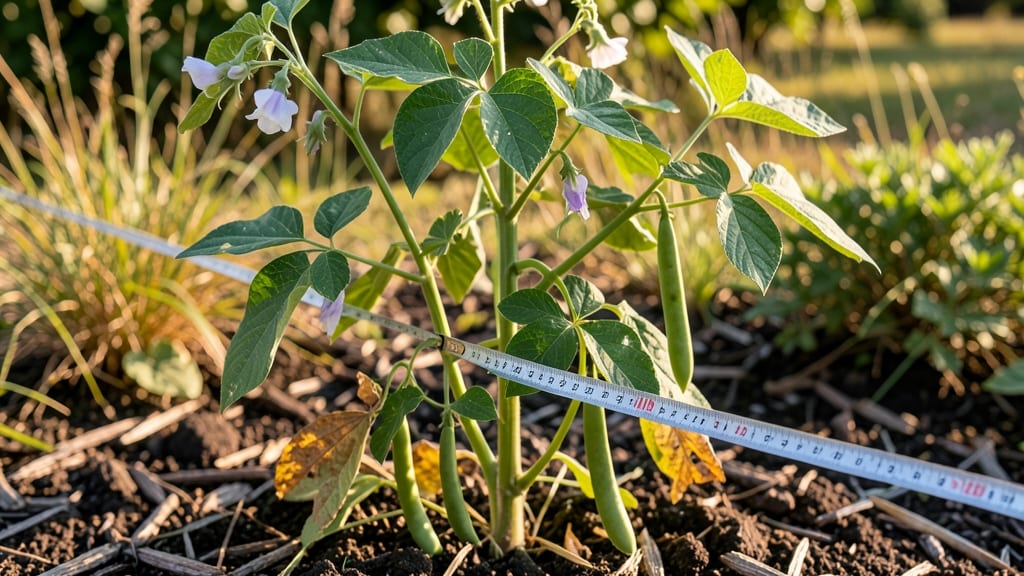
Fast germination isn’t luck—it’s science you can test right on your kitchen counter. 🌱 My bean growth experiment started with a handful of mung beans and a spray bottle, proving that patience pays off when you tweak the right variables.
The fastest sprouts? Warmth, moisture, and darkness did the trick, with tiny roots popping in just 24 hours.
You’ll need basic supplies: a shallow container (like a pie tin), damp paper towels, and a plastic bag to trap humidity. Track your results with a simple chart—measure sprouting time, root length, and when leaves unfurl.
This isn’t just a science project; it’s a hands-on lesson in how plants respond to their environment.
By day 5, you’ll see bold harvest potential in those little seedlings. The experiment reveals which conditions (like indirect light or extra water) speed up growth—and which ones slow it down. No fancy equipment needed, just curiosity and a notebook.
Perfect for classrooms, curious kids, or anyone eager to grow beans faster. The same tricks work for green beans too—just adjust the timing. Ready to see what your beans can do?
📚 In This Guide
- What you need
- Instructions
- Tips and common mistakes
- Wrapping up and next steps
What you need
- ● Dried beans – Choose fast-sprouting varieties like mung beans or lentils (1 cup / ~200g).
- ● Water – Room-temperature, filtered if possible (enough to soak beans thoroughly).
- ● Germination container – A wide, shallow dish (9" x 13" / 23 x 33 cm) or a mesh sprouting lid.
- ● Paper towels or sprouting cloth – 2-3 layers (unbleached, food-safe).
- ○ Spray bottle – For gentle misting (optional but helpful for humidity control).
- ● Measuring cup/spoon – For precise bean quantities.
- ● Colander or strainer – For rinsing (if using a bowl setup).
- ● Plastic wrap or lid – To retain moisture (if not using a spray bottle).
- ● Grow light or sunny windowsill – 6-8 hours of indirect light daily (after sprouting).
- ○ Notebook & pen – To track growth progress (optional but fun!).
Step-by-Step instructions for a bean growth experiment
Here's how to coax beans to sprout faster and give them the best start possible.
🌱 Step 1: Soak the Seeds Overnight for Faster Germination
Place 4 bean seeds in a small bowl and cover them with warm water (about 80°F). Let them soak for 8-12 hours—you'll see them plump up noticeably. This softens the seed coat and kickstarts the germination process. I like to use a clear glass so I can watch the seeds swell right before my eyes.
After soaking, drain the water and let the seeds sit in a damp paper towel overnight. The towel should stay moist but not dripping. This keeps the seeds hydrated while preventing rot. You'll know they're ready when they start to crack open slightly—this is your signal that germination is about to begin.
💧 Step 2: Plant in Moistened Soil at the Right Depth
Fill a small pot or seed tray with light, well-draining soil (about 1 inch deep of soil in a 4-inch wide container). Press the soil down gently so it's firm but not compacted. Make a small hole about 1 inch deep—this is just deep enough to hold the seed without burying it too far.
Drop one soaked seed into each hole, then cover it with a thin layer of soil (about ¼ inch deep). Water gently until the soil feels damp all the way through. You want the soil to be moist but not soggy—think of a wrung-out sponge. This ensures the seeds have enough water to sprout without drowning.
☀️ Step 3: Provide Warmth and Indirect Light for Speed
Place the pot in a warm spot (around 70-75°F) where it gets bright, indirect light. A sunny windowsill works, but avoid direct midday sun, which can dry out the soil too quickly. You'll see the first sprouts push through the soil in as little as 3-5 days—this is where the soaking trick pays off.
Once the seedlings emerge, keep the soil consistently moist by watering lightly every 2-3 days. You'll know it's time when the top inch of soil feels dry to the touch. Avoid overwatering, as this can cause the seedlings to rot. Watch for the first true leaves (the second set after the initial seed leaves)—this is your cue that the plant is ready for a bit more sunlight.
✂️ Step 4: Thin and Support for Stronger Growth
If more than one seedling sprouts in a pot, thin them to the strongest one by carefully snipping the weaker stems at the base with scissors. This prevents overcrowding and gives the remaining plant more room to grow. Leave the strongest seedling with the most vibrant leaves—this one will thrive.
Once the seedlings reach about 4-6 inches tall, provide a small trellis or stake for climbing varieties. Tie the main stem loosely to the support with a soft strip of fabric or twist tie. This helps the plant grow upright and prevents it from flopping over. You'll notice the leaves will start to fill out more as the plant puts energy into climbing.
🌿 Step 5: Monitor and Harvest for Bold Results
Keep the soil consistently moist and fertilize lightly every 2 weeks with a balanced, water-soluble fertilizer. You'll see the beans start to form pods in about 4-6 weeks, depending on the variety. Harvest when the pods are firm and fully colored—this ensures the best flavor and texture.
To harvest, gently twist the pod until it releases from the vine. Avoid pulling, as this can damage the plant. With this method, you'll have a steady supply of fresh beans in no time. The key to a bold harvest is consistency—keep the soil moist, provide support, and watch your beans grow strong and healthy.
Tips & tricks for perfect bean germination
These little tricks will help you turn those tiny seeds into thriving plants in record time.
Soaking Secret: The 8-12 hour soak is your first chance to speed things up—warm water (around 80°F) activates enzymes that break down the seed coat faster. I like to add a drop of dish soap to the water (just a drop!) to help reduce surface tension and let water penetrate those tough seed shells more efficiently. This tiny addition can shave hours off your germination time.
Temperature Matters: Those 70-75°F temperatures in Steps 3 and 4 aren't just suggestions—they're crucial for speed. If your home runs cooler, place the pot on top of your fridge (not inside) or use a seedling heat mat. I've seen germination times cut in half when seeds stay consistently warm. Just avoid heat sources that dry out the soil too quickly.
Visual Cues for Success: In Step 3, when you're watching for those first sprouts, look for tiny white roots breaking through the seed coat during the 8-12 hour soak—that's your first sign of life! Later, when thinning seedlings in Step 4, choose plants with the most vibrant leaves and sturdiest stems. These visual cues help you pick the winners early, setting up your strongest harvest.
Lighting Strategy: For that bright indirect light in Step 3, fluorescent grow lights work perfectly if natural light is limited. Position them about 6 inches above the seedlings and keep them on for 12-14 hours daily. This mimics natural sunlight patterns and prevents those leggy seedlings that stretch toward weak light sources.
Pro Tips for Bean Growth Experiment
- These little tricks will help you turn those tiny seeds into thriving plants in record time.
- Soaking Secret: The 8-12 hour soak is your first chance to speed things up—warm water (around 80°F) activates enzymes...
- Temperature Matters: Those 70-75°F temperatures in Steps 3 and 4 aren't just suggestions—they're crucial for speed. I...
Frequently asked questions
Got questions about your bean growth experiment?
You’re not alone! Here are answers to the most common queries—from speeding up germination to troubleshooting bumps along the way.
How long does it take for beans to germinate in a simple experiment?
Most beans (like mung or pinto) sprout in 3–7 days under ideal conditions—warmth (70–85°F), moisture, and darkness. Fastest results? Use fast-germinating varieties (like adzuki) and keep them in a damp paper towel or jar. Patience pays off—tiny roots may peek out before you see leaves!
Can I speed up germination beyond the usual timeframe?
Try these pro tips:
- Soak overnight: Place dry beans in warm water for 8–12 hours before planting.
- Warmth boost: Use a heating pad or place the container near a sunny window.
- Oxygen trick: Poke tiny holes in a sealed jar to prevent mold while keeping humidity.
What if my beans aren’t sprouting after a week?
Don’t panic! Check these troubleshooting steps:
- Moisture check: Are the beans still damp but not soggy? Add water if dry.
- Temperature: Below 60°F? Move them to a warmer spot (like a kitchen counter).
- Viability test: Soak a few beans—if they sink, they’re likely good. Floaters may be old.
- Use a seedling heat mat to mimic soil warmth.
- Transplant to soil after sprouting (when roots are 1–2 inches long).
- Opt for dwarf varieties (like Bush Blue Lake) for compact growth.
- Mung beans: Fastest (2–3 days), great for sprouting.
- Adzuki beans: Sweet flavor + quick sprouts (3–4 days).
- Lentils: Tiny but speedy (3–5 days).
- Radish seeds: Not beans, but sprout in just 3 days!
Mold? : Tiny white fuzz? Discard and restart with fresh beans and a clean container.
Still stuck? Try a new batch with fresh, organic seeds for better odds!Can I grow beans indoors without sunlight?
Yes! Beans thrive under grow lights (12–16 hours/day) or near a bright window. For no-light setups:
Are there faster-growing beans than others for experiments?
Absolutely!
These top picks germinate in 2–5 days:
Wrapping up and next steps
Your bean growth experiment is a fantastic way to explore nature’s magic while reaping delicious rewards! 🌱 Whether you’re a seasoned gardener or a curious beginner, these fastest germination tricks prove that patience and the right techniques pay off.
Now that you’ve mastered the setup, why not expand your green thumb?
🚀 Next Steps to Try:
- Scale up! Test different bean varieties (like runner or mung beans) to compare growth speeds.
- Go tech-savvy. Track progress with a simple growth journal or app for data-driven fun.
- Share the joy! Gift your homegrown beans to friends or use them in recipes—because fresh beats store-bought every time.
Your garden awaits—get growing! 🌿