
Planting
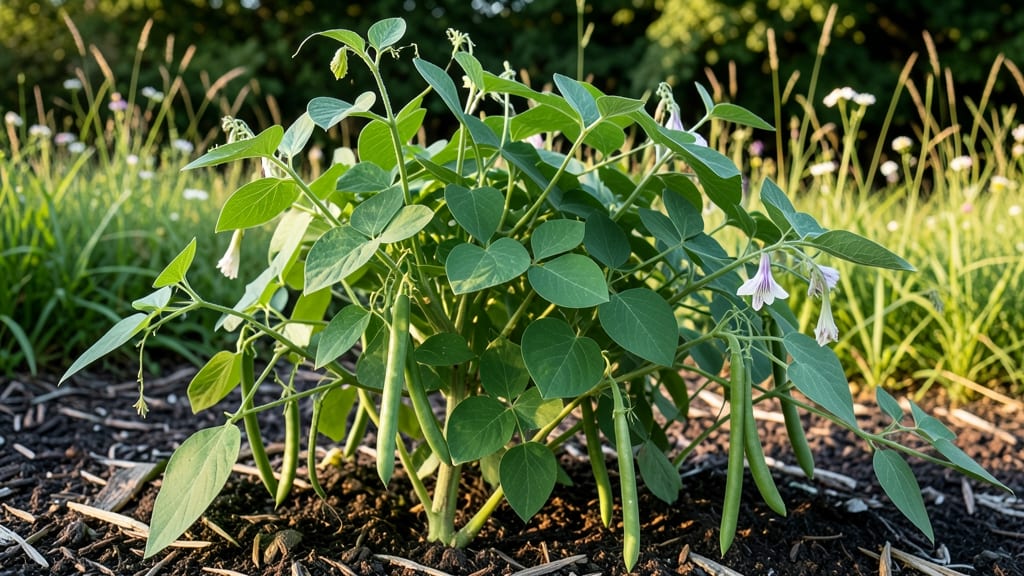
Cracking the code on bean plant care means bountiful harvests instead of sad, stunted vines. 🌱 I’ve grown thousands of beans—some thrived, others flopped—and the difference always came down to three things: soil that’s just right, watering that doesn’t drown, and knowing when to let them climb (or sprawl).
The best part? Beans are forgiving once you get the basics, and they repay you with pounds of fresh pods in just 60 days.
Start with loose, well-draining soil mixed with compost—beans hate soggy roots, but they love nitrogen-rich dirt. Plant seeds 1 inch deep, 3-4 inches apart, and give them 6-8 hours of sun daily. Bush beans? Let them sprawl.
Pole beans? Train them on sturdy trellises (they’ll climb like crazy). Water at the base, not overhead, to avoid fungal issues, and keep the soil consistently moist but never soggy—that’s the sweet spot.
Here’s where it gets fun: beans feed themselves. Their roots team up with bacteria to pull nitrogen from the air, so skip the fertilizer unless your soil is truly poor. Instead, focus on regular harvesting—picking pods keeps plants productive.
Watch for yellowing leaves (too much water) or stunted growth (not enough sun), and you’ll spot problems before they spiral. With these tweaks, you’ll go from struggling seedlings to bucketfuls of fresh beans by summer.
Pro tip: Save seeds from your best plants for next year—beans store easily and grow true to type. Whether you’re growing bush beans for quick snacks or pole beans for drying, this method works for any variety and any garden size. Ready to turn those seeds into a harvest?
📚 In This Guide
- What you need
- Instructions
- Tips and common mistakes
- Wrapping up and next steps
What you need
- ● Bean seeds: Choose your favorite variety (e.g., pinto, kidney, or green beans). Buy 1–2 packets (50–100 seeds) for a small garden or 3–5 packets for larger harvests.
- ● Potting soil or garden soil: Use high-quality, well-draining soil (e.g., Miracle-Gro Potting Mix or compost-enriched garden soil). You’ll need about 1–2 cubic feet per plant (or 10–20 lbs for containers).
- ● Containers or garden space: For containers: 5-gallon pots or deeper planters (12+ inches) with drainage holes. Use 1–2 plants per container.
- ● For gardens: Full sun (6+ hours/day) and loose, fertile soil. Space seeds 4–6 inches apart in rows 18–24 inches apart.
- ● Watering can or hose with a gentle spray nozzle: Beans need consistent moisture—aim for 1–1.5 inches of water per week.
- ○ Fertilizer (optional but helpful): Balanced fertilizer (10-10-10) or compost at planting time.
- ● Low-nitrogen fertilizer (e.g., 5-10-10) when flowers appear to boost pod production.
- ● Garden trowel or transplanter: For digging holes or planting seeds at the right depth (1–2 inches deep).
- ● Trellis or stakes (for pole beans): 5–6 foot tall stakes or a trellis net to support climbing varieties.
- ● Mulch (straw or shredded leaves): Helps retain moisture and suppress weeds. Spread a 2–3 inch layer around plants.
- ○ Pruning shears (optional): For trimming overgrown or damaged foliage.
- ● Gloves and knee pads: Because gardening is easier (and more comfortable) with protection! 😉
- ● Warm soil: Beans thrive in temperatures 60–85°F (15–29°C). Wait until after the last frost or use a seedling heat mat indoors.
- ● Sunlight: 6+ hours of direct sunlight daily—no skimpiness here!
- ● Patience: Germination takes 7–14 days, depending on the variety and conditions.
Step-by-Step instructions for growing healthy bean plants
Here's how I grow beans that produce abundant, flavorful pods every season—no matter your growing space.
🌱 Step 1: Choose and Prepare Your Planting Site
Beans thrive in loose, well-draining soil with a pH between 6.0 and 7.0. Work in a 2-3 inch layer of compost into the top 6 inches of soil before planting. I always test my soil first—beans are sensitive to acidity, and a pH below 5.5 will stunt their growth. If your soil is heavy clay, mix in 1 part sand to 2 parts soil to improve drainage.
Select a location with full sun exposure—at least 6-8 hours of direct sunlight daily. Morning sun with afternoon shade works well in hot climates, but avoid planting in low-lying areas where cold air settles, as beans are frost-sensitive. If growing in containers, choose pots that are at least 12 inches deep—shallow containers restrict root growth and reduce yields.
🌿 Step 2: Plant Seeds at the Right Depth and Spacing
Sow seeds 1 inch deep and 3-4 inches apart for bush beans or 4-6 inches apart for pole beans. I like to plant seeds in pairs 2 inches apart, then thin to the strongest seedling once they reach 2 inches tall. This ensures even spacing without wasting seeds. For pole beans, provide trellis support at planting—waiting until later weakens the vines and makes training harder.
Water the soil to a depth of 1-2 inches before planting to encourage root growth. After sowing, keep the soil consistently moist but never soggy—beans need 1 inch of water per week, but overwatering can cause root rot. Mulch with 2-3 inches of straw or grass clippings to retain moisture and suppress weeds, but keep the mulch 2 inches away from the stems to prevent rot.
☀️ Step 3: Maintain Consistent Watering and Fertilization
Beans are shallow-rooted, so water deeply 2-3 times per week rather than daily shallow waterings. Let the top 1 inch of soil dry out between waterings—consistent moisture prevents blossom end rot and ensures steady pod production. I water in the early morning to reduce evaporation and fungal risks. Avoid wetting the leaves, especially in humid conditions, to prevent powdery mildew.
Beans fix their own nitrogen, so they don’t need heavy fertilization. However, a light application of balanced fertilizer (10-10-10) at planting and again when flowers appear encourages stronger growth. Too much nitrogen promotes leafy growth at the expense of pods. Watch for yellowing leaves—this can signal over-fertilization or nitrogen deficiency. If leaves yellow between the veins, it’s likely iron deficiency, which responds well to a chelated iron supplement.
✂️ Step 4: Support, Prune, and Harvest for Maximum Yield
Pole beans need sturdy trellises—6-foot bamboo stakes or wire cages work well. Train vines by gently weaving them along the support as they grow. For bush beans, avoid pruning unless you see yellowing or diseased leaves, which should be removed immediately to prevent spread. Pinch back the top 2 inches of flowering stems to encourage bushier growth and more pods.
Harvest beans when pods are firm but still tender—usually 50-60 days after planting, depending on the variety. I check plants every 2-3 days in peak season to avoid overripe pods. Use clean scissors or fingers to snap pods at the stem; never pull them, as this can damage the plant. Regular harvesting stimulates more flowers and prolongs the harvest season by 2-4 weeks. If you miss a pod, it’ll dry out and turn brown—remove it promptly to keep the plant focused on new growth.
🌿 Step 5: Extend the Season and Prevent Common Pests
To prolong harvests, succession-plant beans every 2 weeks in warm climates. In cooler regions, use black plastic mulch to warm the soil and plant 2-3 weeks after the last frost. Beans are susceptible to bean beetles and aphids—I prevent infestations by hand-picking pests in the morning and spraying with neem oil if needed. Avoid chemical pesticides, as they can harm beneficial insects like ladybugs that control aphids.
Watch for powdery mildew on leaves, which appears as white, powdery spots. Improve airflow by spacing plants properly and watering at the base. If mildew appears, treat with a baking soda spray (1 tablespoon baking soda + 1 quart water + a drop of dish soap) every 7-10 days. Rotate crops annually—never plant beans in the same spot two years in a row—to prevent soil-borne diseases like rust or root rot.
Tips & tricks for thriving bean plants
These insights will help you avoid common pitfalls and maximize your bean harvest from seed to table.
Soil Preparation Secret: The 2-3 inch layer of compost I recommend isn't just for nutrients—it also improves soil structure. For heavy clay soils, mix in sand before adding compost to create ideal drainage. I've found that pre-mixing compost and sand in a wheelbarrow ensures even distribution, preventing pockets of poor drainage that can stunt root growth. Test your soil's pH before planting—beans are particularly sensitive to acidity, and adjusting the pH to 6.0-7.0 can double your yield.
Planting Strategy: When planting seeds in pairs 2 inches apart (as mentioned in Step 2), I recommend using a small ruler to ensure consistent spacing. This prevents overcrowding while minimizing wasted seeds. For pole beans, install trellises at planting time—waiting until later creates weak vines that struggle to support heavy pods. I use 6-foot bamboo stakes for bush beans and wire cages for pole varieties, both of which provide sturdy support without restricting growth.
Watering Wisdom: The 2-3 times per week watering schedule works best when paired with morning watering to reduce evaporation and fungal risks. I've noticed that beans develop blossom end rot when soil moisture fluctuates too much—maintain consistent moisture by checking the top inch of soil daily. Mulching with 2-3 inches of straw helps retain moisture while keeping mulch 2 inches away from stems prevents rot. For container-grown beans, water more frequently since pots dry out faster than garden beds.
Harvesting Timing: The 50-60 day window for harvest is just a guideline—actual timing depends on your climate and variety. I check plants every 2-3 days during peak season, harvesting when pods are firm but still tender. Overripe pods turn brown and tough, while underripe ones remain pale and stringy. Regular harvesting stimulates more flowers, extending your harvest season by 2-4 weeks. Use clean scissors or fingers to snap pods at the stem to avoid damaging the plant's delicate growth points.
Pro Tips for Bean Plant Care
- These insights will help you avoid common pitfalls and maximize your bean harvest from seed to table.
- Soil Preparation Secret: The 2-3 inch layer of compost I recommend isn't just for nutrients—it also improves soil structure.
- Planting Strategy: When planting seeds in pairs 2 inches apart (as mentioned in Step 2), I recommend using a small ruler to ensure consistent spacing.
Frequently asked questions
Got questions about growing beans? You’re not alone!
Here are answers to the most common concerns—from timing to troubleshooting—so your bean plants stay happy and productive.
How long does it take for bean plants to grow from seed to harvest?
Most bean varieties mature in 50–60 days after planting, but this depends on the type (bush vs. pole) and growing conditions. Bush beans (like pinto or black-eyed peas) typically harvest in 50–60 days, while pole beans (like Kentucky Wonder) can take 60–70 days. Check seed packets for exact days-to-maturity!
Can I plant beans too early or too late in the season?
Beans are warm-weather lovers—plant them after the last frost when soil temps hit 60°F (15°C). If planted too early, cold soil slows germination. Late planting? Avoid sowing 6–8 weeks before your first fall frost (for short-season varieties). Use a soil thermometer to test!
What should I do if my bean plants have holes or chewed leaves?
Those are likely bean beetles, slugs, or Mexican bean beetles. Handpick pests early, or spray with neem oil or soapy water. For slugs, set out beer traps or use copper barriers. Prevention tip: Plant nasturtiums nearby to deter pests naturally!
How often should I water bean plants, and do they need deep watering?
Beans need 1–1.5 inches of water per week, but avoid wetting leaves to prevent disease. Water at the base deeply 2–3 times per week (more in extreme heat). Drought stress? Mulch with straw to retain moisture—beans hate soggy roots but love consistent hydration!
Can I grow beans in containers, and what’s the best setup?
Yes! Use 5-gallon pots or deeper containers (12+ inches) for bush beans, or tall trellises in 5-gallon pots for pole beans. Ensure drainage holes and a lightweight potting mix. Place containers in full sun (6+ hours/day) and fertilize lightly with compost tea every 3–4 weeks.
Why are my bean leaves yellowing, and how can I fix it?
Yellow leaves often signal overwatering, nutrient deficiency, or fungal issues. Check soil moisture—beans prefer well-draining soil. For nutrients, add balanced fertilizer (10-10-10) or compost. If spots appear, prune affected leaves and improve airflow. Pro tip: Avoid wetting foliage when watering!
Wrapping up and next steps
Caring for bean plants is a rewarding journey that connects you to nature while yielding delicious, nutrient-packed harvests! 🌱 With the right soil, sunlight, water, and patience, you’ll watch your seeds transform into thriving vines brimming with fresh beans.
Whether you’re a beginner or seasoned gardener, every step—from planting to pruning—builds confidence and skills.
Now that you’re armed with bean plant care essentials, it’s time to roll up your sleeves and get growing! Start by picking a sunny spot in your garden (or container) and plant those seeds this weekend. Happy gardening—your future harvest is waiting! 🌟