
Vegetables
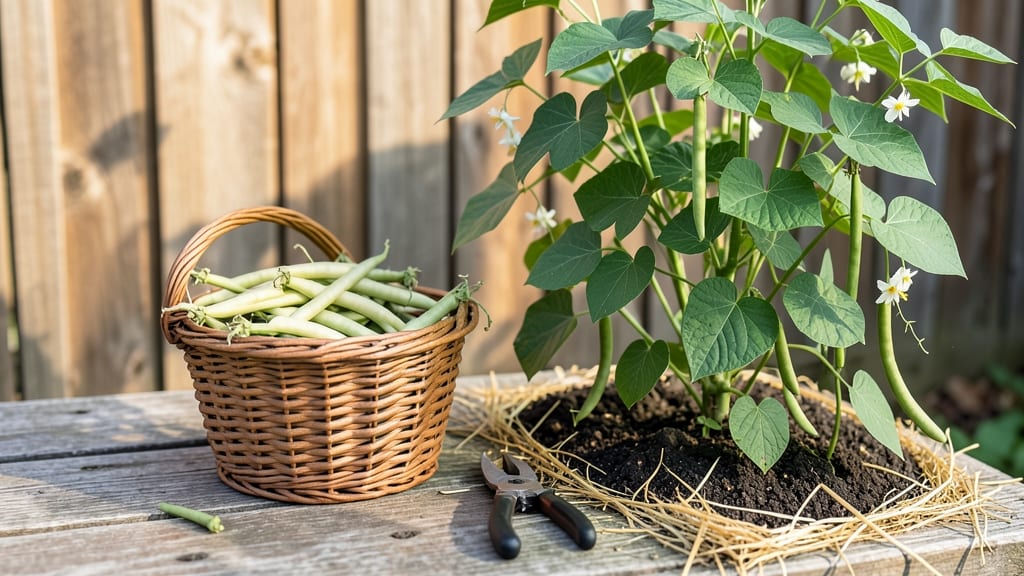
Growing beans in a bag lets you harvest fresh green beans all season without taking over your garden. 🌱 I discovered this method after my tiny balcony refused to accommodate traditional rows—now I get 2-3 harvests from a single 5-gallon bag.
The secret lies in the right fabric, soil, and a little patience that pays off with tender pods straight from the porch.
You’ll need breathable fabric bags (like those designed for vertical growing), a 50/50 mix of potting soil and compost, and a sunny spot getting 6+ hours of light daily.
Pole beans thrive in this setup, climbing naturally, while bush varieties stay compact. The bags keep roots contained, so you avoid the mess of traditional gardening while preventing soil compaction.
By week 6, you’ll be picking beans every 3-4 days—just snip the pods before they toughen. The bags make harvesting effortless, and you can even move them to follow the sun.
Overwatering is the only real pitfall, so let the top inch dry between waterings. My bags last 2 seasons before needing a refresh.
Perfect for balconies, patios, or even indoors near a bright window. Try Kentucky Wonder pole beans or Blue Lake bush beans for reliable results. Once you master this, you’ll wonder why you ever planted beans any other way.
📚 In This Guide
- What you need
- Instructions
- Tips and common mistakes
- Wrapping up and next steps
What you need
- ● Grow bags: 5-10 gallon fabric or mesh bags (5–7 inches deep, with drainage holes). Pro tip: 💡 Use heavy-duty landscape fabric for durability.
- ● Potting soil: 1–2 bags of well-draining, organic potting mix (avoid garden soil—it compacts!). Look for labels with "moisture control" for best results.
- ● Bean seeds: Bush beans: 3–5 seeds per bag (e.g., 'Blue Lake' or 'Provider').
- ● Pole beans: 1–2 seeds per bag (e.g., 'Kentucky Wonder'—use a small trellis or stakes).
- ● Watering can or hose: With a gentle spray nozzle to avoid displacing soil.
- ○ Fertilizer (optional but helpful): Balanced 5-10-5 fertilizer or compost tea for a nutrient boost.
- ● Slow-release bean-specific pellets (follow package instructions).
- ● Trellis or stakes: For pole beans (3–4 ft tall, lightweight metal or bamboo).
- ● Mulch: Straw or shredded leaves to retain moisture.
- ● pH test kit: Ensure soil pH is 6.0–7.0 (beans prefer slightly acidic to neutral).
- ● Seedling heat mat: If starting indoors in cool climates (70–75°F ideal).
- ● Pruners: Small, sharp pair for harvesting or trimming.
Step-by-Step instructions for growing beans in a bag
Here's how to transform those simple fabric bags into a thriving, space-saving bean garden.
🌱 Step 1: Select and Prepare Your Grow Bags
Choose 5-gallon fabric grow bags with drainage holes—these provide perfect airflow while containing roots. Cut the top corners off at a 45-degree angle to create wider openings for planting. This prevents soil from spilling while giving your bean plants room to grow upward. I always soak the empty bags in water for 10 minutes before filling to help them retain moisture better once planted.
Fill each bag about ¾ full with a mix of 50% potting soil and 50% compost. The compost adds nutrients without being too heavy, and the potting soil ensures good drainage. Press down gently to remove air pockets, but don't compact it—beans need loose soil for their roots to spread easily. Leave about 2 inches of space at the top for watering.
🌿 Step 2: Plant Your Bean Seeds
Plant 3-4 seeds per bag, placing them 1 inch deep and 2 inches apart in a small cluster. Beans grow best when they have support, so I like to tuck a 3-foot bamboo stake into each bag alongside the seeds. This gives them something to climb immediately, preventing weak stems later. Cover the seeds lightly with additional soil, then water gently until the soil feels damp but not soggy.
Here's the thing—don't overcrowd the seeds. If you plant too many, the plants will compete for nutrients and sunlight, resulting in smaller yields. Once the seeds sprout (usually within 7-14 days), thin to the 2 strongest plants per bag. You'll know which ones to keep—they'll be the first to show true leaves (not the initial seed leaves).
☀️ Step 3: Provide Light and Water Consistently
Beans need 6-8 hours of direct sunlight daily, so place your bags in the sunniest spot possible. If you're growing indoors near a window, supplement with a grow light to ensure they get enough light. You'll see leggy growth if they're not getting sufficient light—this means the stems stretch too tall and weak, and the leaves turn pale.
Water your beans deeply 2-3 times per week, allowing the top 2 inches of soil to dry between waterings. Check the soil with your finger—it should feel slightly damp but not wet. Beans are drought-sensitive, so consistent moisture is key. I like to water in the morning so the plants have all day to absorb what they need before evening.
💧 Step 4: Support and Maintain Your Plants
As your beans grow, gently weave the vines around the bamboo stake to encourage upward growth. This prevents them from sprawling and tangling. Once the plants reach the top of the stake, trim the tips to promote bushier growth and more pod production. You'll notice new side shoots forming—these are where the most flowers (and eventually pods) will develop.
Fertilize lightly every 3-4 weeks with a balanced, water-soluble fertilizer diluted to half strength. Beans are nitrogen-sensitive, so too much fertilizer can lead to lush foliage but fewer pods. Watch for signs of over-fertilizing, like yellowing leaves or excessive leaf growth with no flowers. If this happens, flush the soil with water to dilute the excess nutrients.
✂️ Step 5: Harvest and Encourage Continuous Growth
Start harvesting when pods are 4-6 inches long and firm to the touch. Pick regularly to encourage more production—beans produce continuously as long as you keep harvesting. Use scissors or your fingers to snap pods cleanly at the stem. The more you harvest, the more your plants will focus on producing new pods instead of maturing old ones.
To extend your harvest season, replace spent plants with new seeds every 2-3 weeks. This staggered planting ensures a steady supply of fresh beans throughout the growing season. Once the first frost threatens, you can either harvest remaining pods or bring the bags indoors to a sunny spot and continue growing until the plants naturally decline.
Tips & tricks for perfect year-round bean harvests
These space-saving secrets will help you maximize your vertical garden's potential while avoiding common pitfalls that stifle growth.
Soil Mix Matters: The 50% potting soil to 50% compost ratio is ideal, but if you're working with limited resources, you can substitute up to 25% coconut coir for the compost—it retains moisture better in dry climates. The key is avoiding garden soil, which compacts too much and blocks root expansion. I've seen bags with garden soil develop waterlogged bottoms within weeks, so stick with the loose mix specified.
Lighting Hacks for Indoor Growers: When supplementing with grow lights in Step 3, position them 6-12 inches above the plants for optimal light penetration. I use a simple LED grow bulb on a timer for 12-14 hours daily—this mimics natural daylight cycles better than leaving lights on continuously. Watch for leaves growing toward the light (phototropism)—this means they're not getting enough coverage from all angles.
Staggered Planting Strategy: The 2-3 week staggered planting in Step 5 works beautifully for continuous harvests, but here's the pro move: plant your first batch 2 weeks earlier than your last. This creates a natural succession where early plants mature just as later ones are establishing. I've extended my harvest by nearly 3 months using this technique in cooler climates where frost comes early.
Pest Prevention: Beans in bags are less vulnerable to ground pests, but watch for aphids on tender new growth. If you spot them, spray with a mix of 1 part water, 1 part rubbing alcohol, and a drop of dish soap—it's organic, effective, and won't harm your plants. The alcohol disrupts their waxy coating while the soap helps it stick. I apply this in the evening when bees aren't active to protect pollinators.
Pro Tips for Beans In A Bag
- These space-saving secrets will help you maximize your vertical garden's potential while avoiding common pitfalls that stifle growth.
- Soil Mix Matters: The 50% potting soil to 50% compost ratio is ideal, but if you're working with limited resources, you can substitute up to 25% coconut coir for the compost—it retains moisture better in dry climates.
- Lighting Hacks for Indoor Growers: When supplementing with grow lights in Step 3, position them 6-12 inches above the plants for optimal light penetration.
Frequently asked questions
Got questions about growing beans in a bag? You’re not alone! Here are some of the most common queries—plus quick, practical answers to keep your compact garden thriving.
How long does it take for beans in a bag to grow?
Most varieties of beans in a bag are ready to harvest in 6 to 8 weeks after planting, depending on the type (bush beans mature faster than pole beans). Check the seed packet for exact timelines—some dwarf varieties can even be ready in 4-5 weeks!
How often should I water beans in a bag?
Keep the soil consistently moist but not soggy. Water daily during hot, dry spells, especially in the first 2 weeks after planting. A self-watering bag or drip irrigation helps maintain steady moisture without overwatering. Pro tip: Water at the base, not the leaves, to prevent fungal issues.
Can I reuse the bag for another crop after harvesting beans?
Yes! After harvesting, sterilize the bag by rinsing it with a 1:10 bleach-water solution (let it soak for 10 minutes, then rinse thoroughly). Use it for fast-growing crops like lettuce, radishes, or green onions—but avoid heavy feeders like tomatoes, which deplete nutrients quickly.
What do I do if my beans in a bag get pests?
Start with prevention: Use row covers to block flying pests like Mexican bean beetles. For chewed leaves or holes, spray with neem oil or introduce beneficial insects like ladybugs. If aphids strike, blast them off with water. Act fast! A few pests can turn into an infestation quickly in confined spaces.
What are some alternatives to growing beans in a bag?
If bags aren’t your style, try these space-saving methods:
- Vertical towers: Use trellises or hanging pockets for pole beans.
- Grow bags with built-in trellises for climbing varieties.
- Fabric pots (1-gallon size) for bush beans—easy to move and drain well.
- Window-box gardens with deep pockets for dwarf beans.
Just ensure your chosen method has good drainage and at least 6-8 inches of soil depth.
Wrapping up and next steps
Growing beans in a bag is a game-changer for small-space gardeners—no fancy tools, no sprawling plots, just delicious, homegrown harvests year-round! Whether you’re a beginner or a seasoned green thumb, this method proves that big results come in tiny packages. 🌱✨
Ready to dive in? Start with a single bag today—your future self (and taste buds) will thank you! Share your progress or swap tips with fellow gardeners—community makes the journey even sweeter.