
Tools
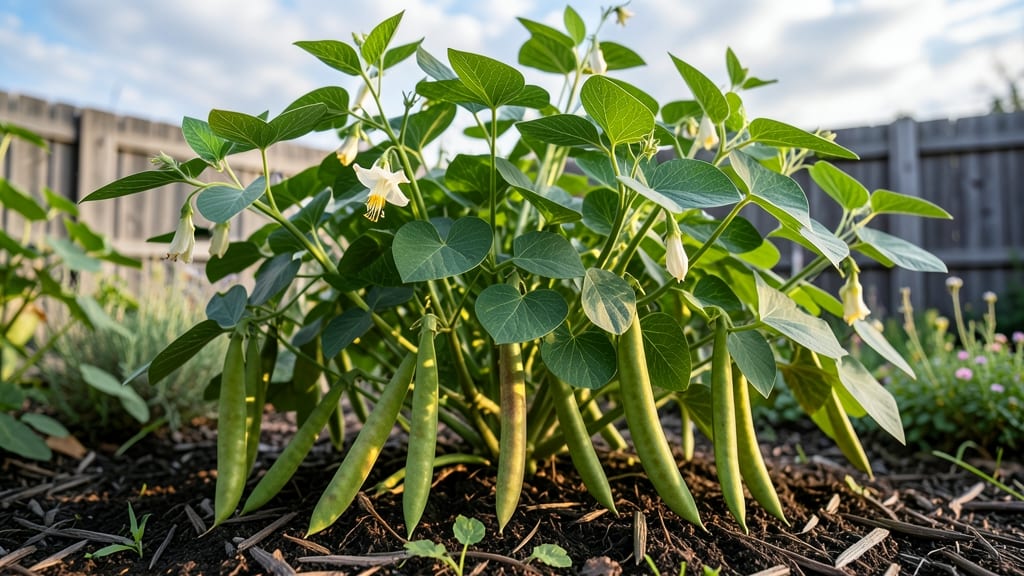
Burpee garden beans will turn your backyard into a green machine this summer. 🌱 I’ve grown both pole and bush varieties for years, and the difference in yield—and ease—is night and day. Pole beans climb and produce for weeks, while bush beans deliver a quick harvest in tight spaces.
Start with well-draining soil mixed with compost, and plant seeds 1 inch deep, 3–4 inches apart for bush beans or 4–6 inches apart for pole beans (with trellises ready).
They thrive in full sun (6+ hours daily) and need 1–1.5 inches of water weekly, keeping soil consistently moist but not soggy. Watch for Mexican bean beetles and Japanese beetles—they’ll strip leaves faster than you can say “pesticide.” Handpick them early, or use row covers for prevention.
Harvest when pods are firm and 3–4 inches long for best flavor, and keep picking to encourage more production. For maximum yield, succession-plant bush beans every 2 weeks through midsummer. Pole beans, once established, will reward you with weeks of harvests—just keep them trellised and watered. The key?
Start early, stay consistent, and enjoy the freshest beans you’ve ever tasted.
📚 In This Guide
- What you need
- Instructions
- Tips and common mistakes
- Wrapping up and next steps
What you need
- ● Seeds: Burpee Garden Bean seeds (pole or bush—check the packet for variety specifics!). Quantity: ~30–50 seeds per 10-foot row (adjust based on spacing needs).
- ● Specs: Non-GMO, heirloom, or hybrid (e.g., Burpee Blue Lake or Kentucky Wonder for pole beans).
- ● Soil: Well-draining, fertile soil with a pH of 6.0–7.0 (test your soil or amend with compost).
- ● Fertilizer: Balanced, low-nitrogen fertilizer (e.g., 5-10-10) or composted manure.
- ● Water: Consistent access to 1–1.5 inches of water per week (more during flowering/fruiting).
- ● Garden tools: Trowel or transplanting spade.
- ● Garden rake (for soil prep).
- ● Measuring tape or ruler (for spacing).
- ● Support structures (pole beans only): Trellis, stakes, or netting (height: 6–10 feet, width: 3–4 feet).
- ○ Optional: String or twine for tying vines.
- ● Mulch: Straw or grass clippings (to retain moisture and suppress weeds).
- ● Gloves & knee pads: For comfort during planting/harvesting.
- ● Timing: Plant after the last frost when soil is at least 60°F (warm soil = faster germination!).
- ● Sunlight: Full sun (6–8 hours daily).
- ● Space: Bush beans: 4–6 inches apart, rows 18–24 inches apart.
- ● Pole beans: 4–6 inches apart, rows 3–4 feet apart (or along trellises).
- ● Knowledge: Basic gardening skills (or a willingness to learn! 🌟).
- ● Seedling trays (for starting indoors 2–3 weeks before transplanting).
- ● Drip irrigation system (for precise watering).
- ● Row covers (to protect from pests early in the season).
- ● Bean-specific pest control (e.g., neem oil or companion plants like marigolds).
Step-by-step guide to planting and cultivating Burpee garden beans
Let’s focus on maximizing your harvest with these two popular varieties—whether you choose climbing poles or compact bushes.
🌱 Step 1: Choose and Prepare Your Planting Site
Burpee’s pole beans thrive in full sun (at least 6-8 hours daily) with well-draining soil, while bush varieties tolerate slightly more shade but still need 5-6 hours. Test your soil’s pH—beans prefer 6.0-7.0. If your soil is heavy clay, mix in 2-3 inches of compost to improve drainage and fertility.
I like to plant beans after the last frost when soil temperatures reach 60°F or warmer. Cold soil slows germination, so wait for consistent warmth. If you’re in a short-season zone, opt for Burpee’s early-maturing varieties to beat the heat. Mark your rows with stakes or string—beans grow fast, and you’ll want to keep them organized.
🌿 Step 2: Plant Seeds at the Right Depth and Spacing
For bush beans, sow seeds 1 inch deep and 3-4 inches apart in rows spaced 18-24 inches apart. Pole beans get planted 1 inch deep but 4-6 inches apart along a trellis or support structure. I tap the seed packet gently to release one seed at a time—planting too many in one hole leads to weak, crowded seedlings.
If you’re planting multiple varieties, space rows 2 feet apart to prevent cross-pollination. Water gently after planting to settle the soil around the seeds. Keep the soil moist (not soggy) until germination, which usually takes 7-14 days depending on temperature. Watch for the first true leaves—those are your signal that the seeds have sprouted successfully.
☀️ Step 3: Provide Support and Consistent Care
Pole beans need sturdy supports—use 5-6 foot tall trellises, stakes, or strong fencing to keep them climbing. Install supports before planting so you don’t disturb young roots later. For bush beans, skip the trellis and let them sprawl naturally, but mulch around the base to retain moisture and suppress weeds.
Water beans deeply 1-2 times per week, aiming for 1 inch of water total. Let the top 1-2 inches of soil dry out between waterings—consistent moisture prevents blossom drop. I avoid overhead watering after germination to reduce disease risk. Fertilizer isn’t usually needed, but if your soil is poor, a light application of balanced 10-10-10 at planting time helps.
⏰ Step 4: Monitor Growth and Harvest at Peak Ripeness
Bush beans mature in 50-60 days, while pole beans take 55-65 days. Watch for pods to reach the variety’s described size—Burpee’s pole beans are ready when pods are 4-6 inches long and firm. Harvest regularly to encourage more production; left on the vine, beans toughen and lose flavor.
I pick beans in the morning when they’re cool and crisp. Use pruners or your fingers to snap pods cleanly from the stem. For pole beans, check the top of the plant first—those pods ripen earliest. If you miss a pod or two, don’t worry; they’ll still produce, but the plant may slow down. Store fresh beans in the fridge for up to 5 days or freeze them for later use.
✂️ Step 5: Extend the Season with Successive Plantings
Burpee’s beans grow best in warm soil, so plan 2-3 successive plantings spaced 2 weeks apart for a continuous harvest. In hot climates, plant early in the season or late summer to avoid the peak heat. If you’re in a cooler zone, focus on one planting and enjoy a shorter but sweeter harvest.
After harvest, let the plants decompose in the soil—beans are nitrogen-fixers and improve soil health. If you notice yellowing leaves or stunted growth, check for pests like Mexican bean beetles or aphids. A strong spray of water usually dislodges them, but severe infestations may require neem oil. With proper care, your Burpee beans will reward you with a bountiful, homegrown harvest.
Tips & tricks for growing Burpee garden beans
Here's what nobody tells you about maximizing your bean harvest—these tricks make all the difference between a decent yield and a garden overflowing with fresh pods.
Soil Prep Secret: Before planting, I always mix in a handful of egg shells (crushed) into the planting hole for each seed. The calcium helps prevent blossom end rot later in the season, especially for pole beans. For extra insurance, add a sprinkle of wood ash (1 tablespoon per plant) at planting time—it raises soil pH slightly and provides potassium. Just don't overdo it, as too much ash can make soil too alkaline.
Germination Hack: To speed up those 7-14 days of germination, soak your seeds overnight in warm water before planting. I use a clean sock or paper towel—just wrap them up and let them soak for 8-12 hours. This trick works especially well if you're planting in cooler soil temperatures (60°F). The seeds will sprout faster, giving you a head start on the growing season. Plant them immediately after soaking to avoid drying out.
Sunlight Strategy: While bush beans tolerate 5-6 hours of sun, pole beans absolutely thrive with 6-8 hours daily. Here's my pro move: if you're planting in partial shade, position your pole bean trellises to face east-west rather than north-south. This way, they'll catch morning and afternoon sun when the angle is lower, maximizing their light exposure throughout the day. For bush beans, interplant with fast-growing radishes or lettuce that can handle the shade while your beans establish.
Harvest Timing: The 50-60 day window for bush beans and 55-65 day window for pole beans can feel like a guessing game, but here's my foolproof method: harvest when pods are firm to the touch but still slightly flexible—like a good quality green bean should be. For pole beans specifically, check the top pods first since they mature earliest. If you're unsure, harvest a few pods to taste test—they should be crisp with a sweet snap. Waiting too long turns them woody and less flavorful.
Pro Tips for Burpee Garden Bean
- Here's what nobody tells you about maximizing your bean harvest—these tricks make all the difference between a decent yield and a garden overflowing with fresh pods.
- Soil Prep Secret: Before planting, I always mix in a handful of egg shells (crushed) into the planting hole for each seed.
- Germination Hack: To speed up those 7-14 days of germination, soak your seeds overnight in warm water before planting.
Frequently asked questions
Got questions about growing Burpee Garden Beans?
Here are answers to the most common ones—whether you're a first-timer or a seasoned gardener looking to optimize your harvest!
What’s the difference between pole and bush Burpee Garden Beans?
Pole beans climb trellises or stakes (saving space!) and produce continuously for weeks, while bush beans grow in compact bushes and yield all at once. Choose pole for higher yields over time or bush for quick, low-maintenance harvests.
How long does it take for Burpee Garden Beans to mature?
Bush beans typically mature in 50–60 days, while pole beans take 60–70 days. Check the seed packet for exact days-to-maturity, and plant early in spring (after frost) or late summer for a fall crop. Patience pays off—sweetest beans are ready when pods are firm and snap easily!
Can I grow Burpee Garden Beans in containers or small spaces?
Bush beans
thrive in 5-gallon pots (1 plant per pot), while pole beans need a tall trellis or 5+ gallon container with support. Just ensure 6+ hours of sun daily and well-draining soil. Containers work great for balconies or patios!
Why are my Burpee Garden Beans getting holes or wilting?
Holes? Likely bean beetles or slugs—handpick pests or use row covers. Wilting? Check for underwatering (soil should stay moist) or overcrowding (thin seedlings to 4–6 inches apart). Yellow leaves may signal nutrient deficiency; add compost or a balanced fertilizer.
Are Burpee Garden Beans drought-tolerant?
They prefer consistent moisture, especially during flowering/fruiting. While they tolerate short dry spells, deep watering 1–2x weekly (1 inch total) prevents stress. Mulch with straw to retain moisture and keep roots cool. Drought stress = smaller yields!
Wrapping up and next steps
Growing Burpee Garden Beans—whether pole or bush varieties—is a rewarding way to enjoy fresh, homegrown produce!
Whether you’re maximizing space with climbing vines or opting for compact bushes, the key is choosing the right variety for your garden’s needs. Start small, experiment, and soon you’ll be harvesting a bountiful crop of crisp, flavorful beans!
Ready to dive in? Pick your favorite variety, grab your seeds, and get planting! 🌱 Share your progress or tips in the comments—we’d love to hear how your bean adventure unfolds!