
Pests and Diseases
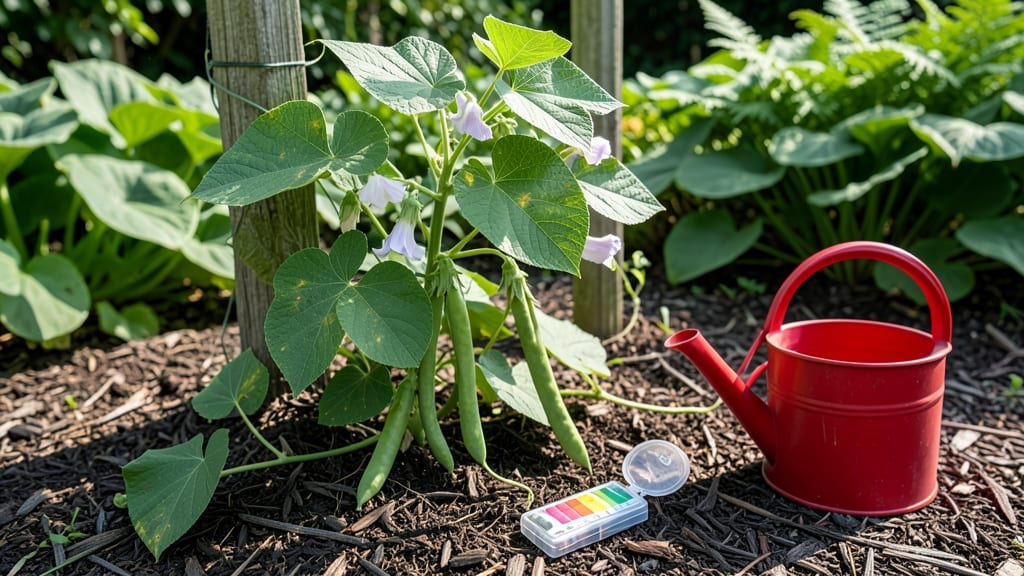
Pole bean leaves turning yellow is the most common sign your plants are screaming for help—but it’s usually fixable. I’ve seen my own beans go from vibrant green to sad and yellow in just a few days, and the culprit was almost never what I first guessed.
The good news? Most yellowing leaves mean your beans are still alive, just stressed by something simple like too much water or missing nutrients.
First, check the soil—it’s either too wet or too dry. Overwatering drowns roots, cutting off oxygen, while underwatering stresses plants into dropping nutrients. Then look for pests like aphids or spider mites hiding on the undersides of leaves, sucking out chlorophyll.
Even fungal infections can start with yellowing, though they often come with black spots or powdery residue. The key is acting fast before the problem spreads.
Once you identify the issue, solutions are straightforward. For nutrient deficiencies, a balanced fertilizer with extra nitrogen (like 10-10-10) works wonders—just mix it into the soil at the base of the plant.
If it’s water-related, adjust your schedule: beans need about 1-1.5 inches of water per week, but never soggy soil. For pests, a strong spray of water or neem oil usually clears them up in a day or two.
With the right fix, your beans bounce back in 3-5 days, and you’ll avoid the heartbreak of watching a thriving plant decline. The best part?
Once you spot the early signs, you’ll catch problems before they ruin your harvest. Let’s turn those sad yellow leaves back into lush, productive growth.
Root Causes Behind Yellowing
Pole beans are hardy plants, but when their leaves start turning yellow, it’s often a cry for help from the roots—or something else entirely. Understanding the why behind this symptom is the first step to reviving your plants.
Below, we break down the most common culprits, from soil issues to hidden pests, with science-backed explanations to help you diagnose and fix the problem.
Yellowing leaves in pole beans often start at the older, lower leaves and spread upward if the roots are drowning. Overwatering disrupts oxygen flow to the roots, leading to anaerobic conditions—a suffocating environment where beneficial microbes can’t thrive.
This triggers: - Root rot (often caused by Fusarium or Phytophthora fungi), which blocks nutrient uptake. - Nutrient leaching, where excess water washes away essential minerals like nitrogen, potassium, and magnesium. - Chlorosis (yellowing between veins) due to iron or manganese deficiency, common in waterlogged soils.
Actionable fix:
- Test your soil’s drainage by digging a 6-inch hole, filling it with water, and timing how long it takes to drain. If it takes more than 2–3 hours, amend with perlite, coarse sand, or compost to improve aeration.
- Water deeply but less frequently—pole beans prefer 1–1.5 inches of water per week, including rainfall. Let the top 1–2 inches of soil dry out between waterings.
- Raise beds or use containers if your garden has heavy clay soil to prevent water pooling.
Yellowing leaves can signal a specific nutrient shortage, often tied to soil imbalances or poor fertility. Here’s how to decode the clues:
| Symptom | Likely Deficiency | Why It Happens | Quick Fix |
|---|---|---|---|
| Uniform yellowing (pale green/yellow) | Nitrogen (N) | Nitrogen is vital for chlorophyll production. Deficiency often occurs in poor or depleted soils or after heavy harvests. | Apply balanced fertilizer (10-10-10) or compost/manure at planting. Side-dress with alfalfa meal mid-season. |
| Yellow edges with green veins | Potassium (K) | Potassium regulates water and nutrient transport. Symptoms worsen under stress (drought, heat, or disease). | Use potassium-rich amendments like greensand, wood ash, or a low-N, high-K fertilizer (e.g., 5-10-10). |
| Interveinal yellowing (chlorosis) | Iron (Fe) or Magnesium (Mg) | Common in alkaline soils (pH > 7.0), where iron becomes unavailable. Magnesium deficiency often appears in older leaves first. | For iron: Apply chelated iron or iron sulfate. For magnesium: Use Epsom salt (1 tbsp/gallon of water) as a foliar spray. Test soil pH and amend with sulfur if needed. |
Pro tip: 💡 If your soil is alkaline (pH > 7.0), acidify it with peat moss, pine needles, or sulfur to unlock iron and manganese for your beans.
Hidden underground, pests and diseases can severely damage roots, starving the plant of water and nutrients. Watch for these sneaky culprits:
- Root-knot nematodes 🐛: Microscopic worms that form galls (lumpy roots), reducing water/nutrient absorption.
Yellowing + stunted growth = likely nematodes. - Fungal infections (e.g., Rhizoctonia or Pythium): Cause dark, mushy roots and yellowing leaves, especially in cool, wet conditions. - Aphids or spider mites 🕷️: While they feed above ground, they weaken plants, making them more susceptible to nutrient deficiencies.
Actionable fix:
- Inspect roots when transplanting or after uprooting. Healthy roots are white/firm; rotten roots smell foul and are mushy.
- Rotate crops to break pest/disease cycles—avoid planting beans in the same spot for 3+ years.
- Use nematicides (like neem oil or beneficial nematodes) or fungal treatments (e.g., Trichoderma spores) if pests are confirmed.
- Encourage beneficial insects (ladybugs, lacewings) to control aphids naturally.
Pole beans are sensitive to extreme temperatures and physical stress.
Yellowing can occur when: - Heat stress (above 90°F/32°C) causes protein breakdown, leading to yellowing and leaf scorch. - Cold damage (below 50°F/10°C) slows nutrient uptake, causing chlorosis in older leaves. - Strong winds dry out leaves quickly, mimicking transpiration stress and nutrient imbalance.
Actionable fix:
- Provide shade cloth (30–50%) during heatwaves to protect leaves.
- Mulch heavily (2–3 inches of straw or wood chips) to insulate roots and retain moisture.
- Stake or trellis beans early to reduce wind exposure and prevent leaf desiccation.
- Avoid planting in low-lying areas where cold air pools overnight.
Pole beans thrive in slightly acidic to neutral soil (pH 6.0–7.0).
Outside this range, nutrient availability plummets: - High pH (>7.0): Locks out iron, manganese, and zinc, causing interveinal yellowing. - Low pH (<5.5): Leaches calcium and magnesium, leading to crinkled or yellowing leaves.
Actionable fix:
- Test your soil with a home pH kit or send a sample to a local extension office.
- Raise pH (if <6.0): Add lime (calcium carbonate) or wood ash.
- Lower pH (if >7.0): Mix in sulfur, peat moss, or pine needles and re-test in 4–6 weeks.
Even after planting, beans can struggle to adapt, leading to temporary yellowing. Common triggers:
- Root damage during transplanting (cut or bruised roots).
- Inconsistent watering post-planting (fluctuating moisture stresses roots).
- Over-fertilizing at planting (burns tender roots).
Actionable fix:
- Water deeply before and after transplanting to reduce shock.
- Avoid fertilizing for 1–2 weeks after planting to let roots establish.
- Use root stimulators (like mycorrhizal fungi) to speed up recovery.
Revive Your Pole Beans Now
Yellowing leaves on your pole beans don’t have to mean the end of your harvest—with the right fixes, you can nurse them back to health and even prevent future issues. Below are targeted solutions based on the most common causes, from quick fixes to long-term care.
Each step is designed to be simple, effective, and easy to implement, even for beginner gardeners.
If your pole beans are yellowing due to a lack of essential nutrients, act fast to restore balance.
🔥 Step 1: Test Your Soil (Know the Problem) Before adding anything, check your soil’s pH and nutrient levels.
A DIY soil test kit (available at garden centers) or a lab test will reveal deficiencies like: - Nitrogen (N) – Pale yellow leaves, stunted growth - Magnesium (Mg) – Yellowing between leaf veins (interveinal chlorosis) - Iron (Fe) – Yellowing on younger leaves first - Zinc (Zn) or Manganese (Mn) – Yellowing with brown spots
💡 Pro Tip: If you’re unsure, start with a balanced fertilizer (like 10-10-10) while diagnosing.
🍳 Step 2: Apply the Right Fertilizer
| Deficiency | Quick Fix | Prevention |
|---|---|---|
| Nitrogen (N) | Side-dress with compost or blood meal (high in N) | Add aged manure or fish emulsion before planting. |
| Magnesium (Mg) | Sprinkle Epsom salt (1 tbsp per gallon of water) and water soil. | Mix dolomitic lime into soil 2-3 months before planting. |
| Iron (Fe) | Use chelated iron (liquid fertilizer) or iron sulfate. | Improve drainage; pole beans hate soggy roots. |
| Zinc (Zn)/Manganese (Mn) | Spray zinc sulfate or manganese sulfate (1 tsp per gallon) on leaves. | Avoid over-fertilizing with phosphorus (P), which blocks Zn uptake. |
👨🍳 Garden Hack: For magnesium, dissolve 1 tbsp Epsom salt in a gallon of water and water the base of plants every 2 weeks until leaves green up.
🥗 Step 3: Boost Soil Health Long-Term
- Mulch heavily with straw or grass clippings to retain moisture and nutrients.
- Rotate crops—never plant beans in the same spot two years in a row.
- Plant companion crops like marigolds or clover to naturally enrich soil.
Overwatering or poor drainage can suffocate roots, leading to yellowing.
🔥 Step 1: Check for Root Rot
- Gently dig around the base of the plant. Healthy roots are white or light tan; rotten roots are black, mushy, and smelly.
- If rot is present, prune affected roots with sterilized scissors and reduce watering immediately.
🍳 Step 2: Adjust Your Watering Routine
- Water deeply but less often (1-1.5 inches per week, including rain).
- Water at the base, not the leaves, to prevent fungal diseases.
- Ensure well-draining soil—amend clay soil with compost or perlite.
💡 Pro Tip: If your garden has heavy clay soil, mix in sand or coconut coir to improve aeration.
⏰ Step 3: Fix Drainage Problems
- If your raised bed or pot lacks drainage holes, add them now.
- For in-ground plants, build a slight mound around the base to encourage runoff.
Pests like aphids, spider mites, or bacterial infections can cause yellowing and stunted growth.
🔥 Step 1: Identify the Culprit
- Aphids/Spider Mites – Sticky residue (honeydew) or tiny webs on leaves.
- Whitefly – White, flying insects when disturbed.
- Bacterial Blight – Yellow halos on leaves, oozing spots.
🍳 Step 2: Treat Infestations Naturally
| Pest/Disease | Solution | Prevention |
|---|---|---|
| Aphids | Spray with soapy water (1 tsp mild soap per quart) or neem oil. | Introduce ladybugs or lacewings. |
| Spider Mites | Blast off with water spray, then apply neem oil. | Keep humidity up (mites hate moisture). |
| Whitefly | Use yellow sticky traps or spray insecticidal soap. | Reflect light with aluminum foil around plants. |
| Bacterial Blight | Remove infected leaves immediately and apply copper fungicide. | Avoid overhead watering; water early in the day. |
👨🍳 Garden Hack: For severe infestations, wrap row covers around plants to suffocate pests.
🔪 Step 3: Prune & Sanitize
- Cut off yellow/diseased leaves with sterilized pruners (wipe with rubbing alcohol).
- Dispose of infected plant debris in the trash (not compost).
Extreme heat, cold, or transplant shock can cause yellowing.
🔥 Step 1: Shield from Stressors
- Move pots to a shadier spot if leaves are scorched.
- Mulch heavily to regulate soil temperature.
- Avoid transplanting in extreme heat or cold.
🍳 Step 2: Acclimate New Plants
- If you recently transplanted, water deeply and shade cloth for a few days to reduce shock.
- Hardening off seedlings (gradually exposing them to outdoor conditions) prevents stress.
💡 Pro Tip: Mulch with straw to keep roots cool in summer and insulated in winter.
To keep your pole beans lush and green, follow this year-round care plan: ✅ Before Planting:
- Test soil and amend with compost + balanced fertilizer.
- Choose a sunny spot with 6+ hours of light.
✅ During Growth:
- Water consistently (deep but infrequent).
- Monitor for pests weekly—act fast if you spot trouble.
- Side-dress with compost every 4-6 weeks.
✅ After Harvest:
- Pull up plants and compost (unless diseased—then trash).
- Rotate crops—don’t plant beans in the same spot next year.
Your pole beans can bounce back with the right care! Start with one fix (like Epsom salt for magnesium or neem oil for pests) and observe changes within 1-2 weeks. Happy gardening! 🌿💚
Frequently asked questions about pole bean leaf yellowing
Why do pole bean leaves turn yellow first on the older, lower leaves?
This is your plant's way of conserving energy! When roots struggle (from overwatering, poor drainage, or nutrient deficiencies), the plant prioritizes new growth by sacrificing older leaves. Think of it like a bank redirecting funds to protect its most valuable assets.
Can I still eat beans with yellow leaves?
Yes, but only if the yellowing is mild and caused by environmental stress (like heat or temporary water issues). Avoid eating beans from plants with severe yellowing + black spots (fungal disease) or mushy stems (root rot). When in doubt, harvest healthy pods from unaffected vines first.
How quickly should I expect to see improvement after fixing the problem?
With proper care, you'll often see new green growth within 3-5 days, though full recovery may take 1-2 weeks. For nutrient deficiencies (like magnesium), Epsom salt treatments typically show results in 5-7 days if applied correctly. Patience is key—don't over-fertilize while recovering!
What's the difference between yellowing from overwatering vs. underwatering?
Overwatering causes yellowing with mushy, foul-smelling roots and often appears on older leaves first. Underwatering shows as crispy leaf edges and yellowing that starts at the leaf tips. The soil test is your best friend—stick your finger in 2 inches deep; if it's soggy (overwatered) or bone-dry (underwatered), adjust immediately.
Will my pole beans recover if I see yellowing after they've already started flowering?
It depends! If the yellowing is from correctable issues (like nutrient deficiency or pests) and you act fast, flowering beans can still produce pods. However, severe root problems (like rot) may reduce yields. Focus on reviving the plant first—healthy leaves mean better pollination and pod development later.