
Vegetables
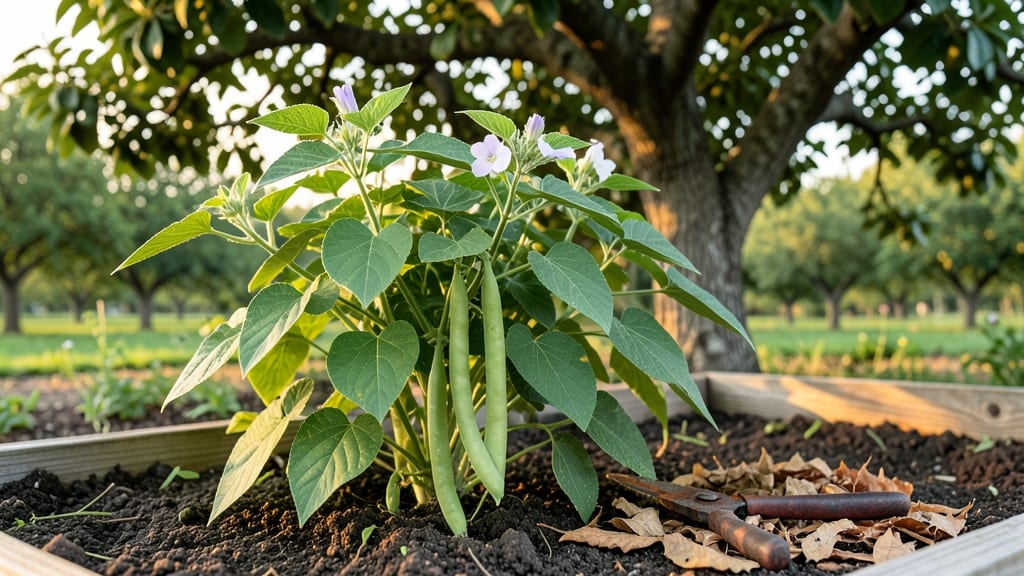
Growing green small beans is like unlocking a summer of fresh, crisp pods straight from your garden. 🌱 I've learned that choosing between bush and pole varieties determines how much space you need—and how many beans you'll harvest.
The right setup means continuous production all season long, even in small backyards or containers. Bush beans are the low-maintenance champions, maturing in 50-60 days and producing all their beans at once. Pole beans, though, keep giving for 8-10 weeks if you provide a trellis or sturdy fence.
Both thrive in well-draining soil with full sun (6+ hours daily), but pole beans need vertical support to climb. You'll start with seeds sown 1 inch deep, spaced 4 inches apart for bush types or 2-3 inches apart for poles.
Keep soil consistently moist but not soggy—beans hate wet feet. Within 2-3 weeks, you'll see those first true leaves, and by midsummer, you'll be harvesting tender pods every 2-3 days. The secret to success? Thin seedlings to avoid competition and watch for bean beetles—handpick them early.
Store harvested beans in the fridge for up to a week, or freeze them for long-term freshness. Compact gardens can still yield big rewards!
📚 In This Guide
- What you need
- Instructions
- Tips and common mistakes
- Wrapping up and next steps
What you need
- ● Seeds: Choose compact varieties like 'Mascotte' (bush) or 'Blue Lake' (pole). Aim for 50–100 seeds (adjust based on garden size).
- ● Soil: Well-draining, nutrient-rich soil with a pH of 6.0–7.0. Mix in 2–3 inches of compost per planting area.
- ● Fertilizer: Balanced 10-10-10 or organic options like fish emulsion (apply lightly at planting and mid-season).
- ● Water: Consistent moisture—1–1.5 inches per week (adjust for rain).
- ● Garden bed or containers: For bush beans, 12–18 inches deep; for pole beans, 5–6 feet tall supports (trellises, stakes, or cages).
- ● Planting markers: Small sticks or labels to track varieties.
- ● Hand trowel or transplanter: For gentle seed placement.
- ○ Mulch (optional): Straw or grass clippings to retain moisture and suppress weeds.
- ● Sunlight: Full sun (6–8 hours daily)—critical for both varieties!
- ● Warm soil: Wait until soil temps reach 60°F+ (use a soil thermometer if unsure).
- ● Spacing: 2–4 inches apart for bush beans; 4–6 inches apart for pole beans (thinner rows for better airflow).
Step-by-step instructions for planting green small beans
Here's how to maximize your space with either pole or bush varieties—both thrive with the right approach.
🌱 Step 1: Choose Your Variety and Prepare the Soil
Green small beans come in two main types: bush beans grow low and compact, while pole beans climb and need support. For compact gardens, I recommend bush varieties like 'Blue Lake' or pole types like 'Kentucky Wonder' if you have vertical space. Test your soil pH first—beans prefer a slightly acidic to neutral range of 6.0-7.0. If your soil is heavy clay, mix in 2-3 inches of compost to improve drainage and aeration.
Work the compost into the top 6-8 inches of soil, breaking up any clumps. Beans are sensitive to fresh manure, so avoid adding it directly—it can cause seed rot. Instead, use well-aged compost or a balanced 10-10-10 fertilizer at planting time. Lightly rake the surface to create a fine, crumbly texture—this helps young roots establish quickly.
☀️ Step 2: Plant Seeds at the Right Depth and Spacing
Plant bush bean seeds 1 inch deep and 3-4 inches apart in rows spaced 18-24 inches apart. For pole beans, plant seeds 1 inch deep but 4-6 inches apart along your trellis or support structure. I like to use a small stick or pencil to make holes—it keeps spacing consistent and prevents overcrowding. If you're planting in containers, use 1-2 seeds per 1-gallon pot with 6-8 inches of well-draining soil.
Water the soil thoroughly before planting to help seeds settle into place. After planting, cover the seeds lightly with soil and water again to ensure good seed-to-soil contact. Beans germinate best in soil temperatures between 60-85°F—if your spring is cool, consider using black plastic mulch to warm the soil faster. You'll see sprouts in 7-14 days, depending on temperature.
💧 Step 3: Provide Consistent Moisture and Support
Keep the soil evenly moist but never soggy—beans are sensitive to both drought and waterlogged roots. Water deeply 1-2 times per week, aiming for 1 inch of water per week. The key is consistency: let the top 1-2 inches of soil dry out between waterings, but don't let it become bone-dry. Mulch around plants with 2-3 inches of straw or grass clippings to retain moisture and suppress weeds.
If you're growing pole beans, install trellises or stakes before vines begin to climb. I use 5-6 foot tall bamboo stakes or a simple A-frame trellis made from wooden posts and twine. Train the main stems along the support as they grow—this encourages stronger vines and better airflow, reducing the risk of disease. Bush beans don't need support, but you can add a small cage or stake if winds are strong in your area.
✂️ Step 4: Harvest Regularly for Continuous Production
Bush beans are ready to harvest 50-60 days after planting, while pole beans take 55-65 days. Pick beans when they're 4-6 inches long and still crisp—this encourages more pods to form. I harvest every 2-3 days in the morning when pods are firm and full of flavor. Use sharp scissors or pruners to snip stems cleanly to avoid damaging the plant.
Don't let beans get overripe on the vine—they'll turn tough and woody, and the plant will stop producing. If you miss a pod or two, simply pick it and compost it to avoid attracting pests. With regular harvesting, a single bush plant can yield 4-6 pounds of beans, while pole beans can produce 8-10 pounds per season if given enough support. Save a few pods to dry and plant next year—beans are easy to grow from saved seeds!
Tips & tricks for perfect green small bean planting
These simple strategies will help you maximize your space and yield—whether you're working with bush or pole varieties.
Soil Preparation Secret: The key to healthy beans starts with soil prep. After mixing in 2-3 inches of compost as instructed, I recommend adding a handful of wood ash to raise the pH slightly if your soil tests below 6.0—beans thrive in that neutral range. This small adjustment prevents nutrient deficiencies that can stunt growth. The fine, crumbly texture you create by lightly raking is crucial too—it mimics the aeration beans need for strong root development.
Planting Precision: When making those 1-inch deep holes for seeds, I use a small trowel to create vertical slots rather than round holes. This helps maintain consistent spacing and prevents soil compaction around the seeds. For container planting, I always use 1-2 seeds per 1-gallon pot—thinning to the stronger seedling later prevents overcrowding. The extra seed gives you insurance against germination failures, especially in cooler soils.
Germination Boost: If you're planting in cooler conditions (below 60°F), place a clear plastic dome or even a cut-open plastic bottle over your seed beds to create a mini greenhouse effect. This raises soil temperature quickly and can cut your 7-14 day germination time by half. Just remove it once sprouts appear to prevent fungal issues. The black plastic mulch mentioned in the instructions works wonders for warming soil too—it's especially helpful in spring when nights are still chilly.
Support System Strategy: For pole beans, I install my 5-6 foot bamboo stakes at planting time rather than waiting for vines to climb. This gives roots immediate support and prevents the plants from toppling when winds pick up. For bush beans, I add small cages made from chicken wire—this keeps pods off the ground where they might rot and makes harvesting easier. The extra airflow from proper spacing also reduces disease risk significantly.
Pro Tips for Green Small Beans
- These simple strategies will help you maximize your space and yield—whether you're working with bush or pole varieties.
- Soil Preparation Secret: The key to healthy beans starts with soil prep.
- Planting Precision: When making those 1-inch deep holes for seeds, I use a small trowel to create vertical slots rather than round holes.
Frequently asked questions
Got questions about growing green small beans?
You’re not alone! Here are answers to the most common ones—whether you’re a first-time gardener or a seasoned green thumb looking for compact solutions.
What’s the difference between pole and bush green small beans?
Pole beans climb trellises or stakes (saving space!) and produce for weeks longer, while bush beans grow low and bushy, maturing faster (6-8 weeks). Choose pole for continuous harvests or bush for quick, easy pickings in small gardens.
How long do green small beans take to grow?
Bush beans sprout in 5–10 days and are ready to pick in 45–60 days. Pole beans take slightly longer (60–70 days) but reward you with a longer harvest season. Pro tip: Plant seeds 1 inch deep, 2–3 inches apart, and keep soil warm (60°F+).
Can I grow green small beans in containers or small spaces?
Bush beans thrive in 5-gallon pots (1–2 plants per container), while pole beans need tall containers (12+ inches deep) with trellises. Just ensure they get 6–8 hours of sun daily and well-draining soil. Bonus: Dwarf varieties like ‘Blue Lake Bush’ are perfect for balconies!
What pests or diseases should I watch for in green small beans?
Common threats include bean beetles, aphids, and powdery mildew. Handpick pests early or use neem oil. For mildew, improve airflow and avoid overhead watering. Preventative tip: Rotate crops yearly to break disease cycles.
Are green small beans the same as snap peas or wax beans?
Nope! Green small beans (like Phaseolus vulgaris) are flat, tender, and crisp, while snap peas (e.g., Pisum sativum) are rounder with edible pods and sugar snap peas have crunchy pods. Wax beans are yellow and have a waxy coating. Stick to labels—each has unique flavors!
Wrapping up and next steps
Green small beans are a fantastic choice for compact gardens—whether you prefer the space-saving bush varieties or the vertical-growing pole beans. With the right techniques, you can enjoy a bountiful harvest in even the tiniest of spaces! 🌱
Ready to grow? Start by picking your favorite variety, gathering your supplies, and planning your planting strategy. Whether you’re a beginner or a seasoned gardener, these green small beans will reward you with delicious, homegrown goodness. Happy planting—and here’s to your future harvest! 🌟