
Size
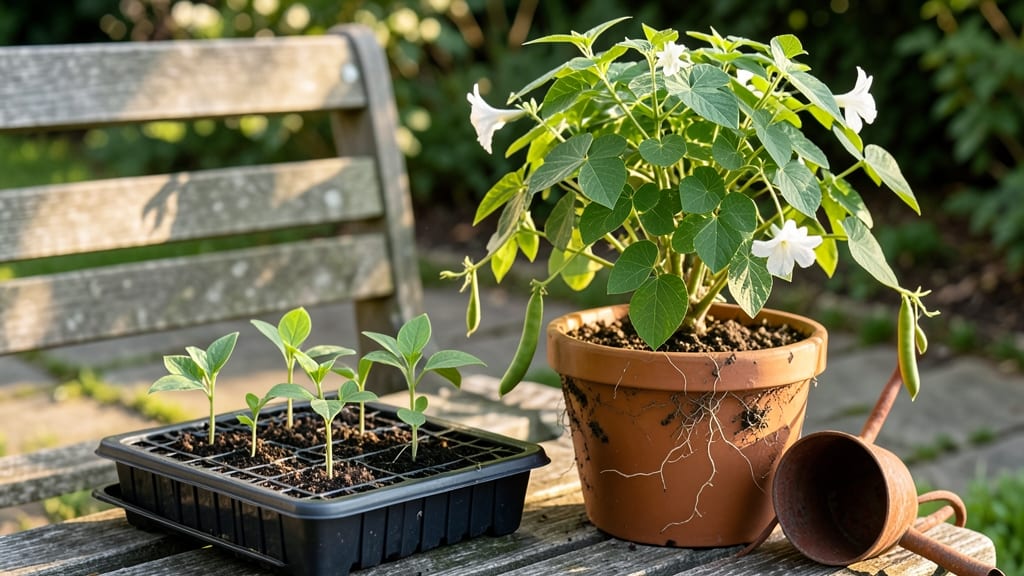
Growing string beans in pots proves you don’t need a backyard for a bumper harvest—just the right container and a little patience. 🌱 I’ve grown these quick, productive plants in 5-gallon pots on my tiny balcony, and they outperform anything I’ve tried in-ground.
The secret? Mimicking their natural climbing habit in a compact space, which means more beans per square foot than traditional rows.
You’ll need pots at least 12 inches deep (deeper for bush varieties), well-draining potting mix, and a simple trellis or stakes to support vines. Sunlight is the real game-changer: 6-8 hours daily turns those skinny seedlings into bushy plants loaded with beans in just 60 days.
Water consistently—never let the soil dry out completely—and watch those pods swell within weeks.
By mid-summer, you’ll be harvesting pint-sized pods every few days, with plants producing for weeks. The flavor? Sweeter and fresher than store-bought, with none of the fiber-heavy overgrowth. Plus, the vines stay contained, so no sprawling chaos—just neat, productive pots that fit anywhere.
Troubleshoot yellow leaves by checking water (too much or too little), and deter pests with a light spray of neem oil. For urban gardeners, this method is foolproof—no weeding, no soil prep headaches, just fresh beans from a space smaller than a microwave. Ready to grow?
📚 In This Guide
- What you need
- Instructions
- Tips and common mistakes
- Wrapping up and next steps
What you need
- ● Containers: 2–3 pots (12–18 inches deep and wide) with drainage holes. Pro tip: 💡 Use fabric grow bags or recycled buckets with holes drilled in the bottom!
- ● String beans seeds: 3–5 seeds per pot (choose bush varieties like ‘Blue Lake’ or ‘Kentucky Wonder’ for compact growth).
- ● Potting mix: High-quality, well-draining soil blend (avoid garden soil—it compacts too much!).
- ● Fertilizer: Balanced, slow-release granular fertilizer (10-10-10) or compost. Pro tip: 🌡️ Mix 1–2 tablespoons per pot into the soil before planting!
- ● Watering can or hose: With a gentle spray nozzle to avoid disturbing seeds.
- ○ Trellis or stakes: 3–4 feet tall (optional but helpful for climbing varieties to save space!).
- ● Seedling heat mat (if starting indoors in cool climates).
- ● Plant labels and markers (to track varieties).
- ● Organic mulch (straw or shredded leaves to retain moisture).
- ● Pruning shears (for trimming overgrown vines).
- ● Gloves (to keep hands clean while handling soil).
Step-by-step instructions for growing string beans in pots
Here’s how to grow bushy, productive string beans in containers—no yard needed.
🪴 Step 1: Select the Right Containers and Drainage
String beans need deep roots, so choose pots at least 12 inches deep and 10-12 inches wide for each plant. I use fabric grow bags because they prevent root circling and allow excess moisture to evaporate. Make sure each container has multiple drainage holes—clogged pots lead to root rot, and string beans hate soggy feet.
If your pots lack drainage, drill ¼-inch holes in the bottom. Place a 1-inch layer of gravel at the base before adding soil to improve airflow. For four plants, you’ll need four containers—string beans grow best when spaced this way to avoid competition. I like to use lightweight plastic or fabric so I can move them easily as the season progresses.
🌱 Step 2: Prepare Soil and Plant Seeds
Fill each pot with a well-draining potting mix—never garden soil, which compacts and suffocates roots. I blend 50% premium potting mix with 50% compost for extra nutrients. Moisten the soil until it’s damp but not soggy, like a wrung-out sponge. Press it down lightly to remove air pockets, but don’t compact it too tightly.
Plant 3-4 seeds per pot, burying them 1 inch deep and 2 inches apart. String beans germinate best in warm soil (65-75°F), so if your spring is chilly, pre-warm the soil by placing pots in a sunny window or on a seedling heat mat for a day before planting. Water gently after planting—don’t drown the seeds, just keep the soil consistently moist until germination.
☀️ Step 3: Provide Support and Optimal Light
String beans are vigorous climbers, so install 5-foot bamboo stakes or trellises in each pot as soon as you see first true leaves (about 7-10 days after planting). Gently tie the main stem to the stake with soft plant ties—this prevents snapping as the plant grows. Without support, vines sprawl and produce fewer beans.
Place pots in a spot with full sun (6+ hours daily)—string beans need intense light to set pods. If your patio only gets partial sun, choose shorter varieties like ‘Blue Lake’ or ‘Kentucky Wonder’ and supplement with a grow light for 14 hours a day. You’ll know they’re getting enough light when leaves are deep green and compact, not pale or leggy.
💧 Step 4: Water and Fertilize for Maximum Yield
Water deeply once a week, soaking the soil until water runs out the drainage holes. Let the top 2 inches dry out between waterings—overwatering causes blossom drop, while underwatering makes pods tough. I check moisture by sticking my finger 1 inch into the soil; if it’s dry, it’s time to water. Avoid wetting leaves to prevent fungal diseases like rust.
When plants are 6 inches tall, feed them with a balanced liquid fertilizer (10-10-10) diluted to half strength. Apply every 2 weeks until harvest. String beans are heavy feeders, so don’t skimp—yellowing leaves signal a nutrient deficiency. If you notice white flowers but no pods, boost phosphorus with a bone meal side-dressing to encourage fruiting.
✂️ Step 5: Harvest and Maintain for Continuous Production
Start harvesting when pods are 4-6 inches long and glossy—this is their peak flavor and tenderness. Pick every 2-3 days to encourage more production; left unharvested, pods toughen and the plant stops flowering. Use clean pruners to snip stems just above a leaf node. I like to harvest in the morning when pods are crispest and store them in the fridge for up to 5 days.
After the first harvest wave, prune back any yellow or diseased leaves immediately to redirect energy to healthy growth. If your plants finish producing after 60 days, pull them up and replace with a fast-growing variety like ‘Contender’ for a second harvest. String beans are annuals, so each season starts fresh—but with the right care, one pot can yield pounds of beans in just two months.
Tips & tricks for growing string beans in pots
Here's what nobody tells you about maximizing your container-grown string bean harvest.
Container Selection: If you're limited to smaller pots, opt for bush varieties like 'Blue Lake Bush' instead of pole beans—they thrive in 10-inch deep containers and produce just as prolifically. For drainage, I've found that fabric grow bags with built-in holes work better than plastic because they prevent root suffocation while allowing excess water to escape. If using plastic, add a 2-inch layer of coarse perlite at the bottom to improve aeration and prevent compaction over time.
Germination Hack: To speed up germination in cool conditions, soak your seeds overnight in a damp paper towel before planting. Place the towel in a sealed plastic bag for 12 hours—this mimics the warm, moist conditions beans crave. After planting, cover each pot with plastic wrap to create a greenhouse effect until sprouts appear. Remove the wrap once you see the first true leaves to prevent fungal growth.
Light Optimization: When supplementing with grow lights, position them just 6 inches above the plants to maximize light intensity. Use a timer for the full 14 hours daily—string beans need consistent light to prevent leggy growth. I've noticed that moving pots to different sun exposures throughout the day (like rotating them 90 degrees every few hours) helps create more uniform plants and prevents shading issues.
Harvest Timing: The 2-3 day harvest window is critical—pods lose tenderness quickly after reaching 4-6 inches. To tell if they're ready, gently squeeze a pod: it should feel firm with a slight give, like a fresh green bean from the store. If you miss the harvest window, the pods will quickly become tough and stringy, which is why regular checking pays off. Harvesting in the morning also means you get the crispest pods for fresh eating.
Pro Tips for Grow String Beans In Pots
- Here's what nobody tells you about maximizing your container-grown string bean harvest.
- Container Selection: If you're limited to smaller pots, opt for bush varieties like 'Blue Lake Bush' instead of pole beans—they thrive in 10-inch deep containers and produce just as prolifically.
- Germination Hack: To speed up germination in cool conditions, soak your seeds overnight in a damp paper towel before planting.
Frequently asked questions
Got questions about growing string beans in pots?
You’re not alone! Here are answers to the most common queries—from timing to troubleshooting—to help you grow a thriving harvest.
When is the best time to plant string beans in pots?
Plant string beans in pots after the last frost when soil temperatures reach at least 60°F (15°C). In most U.S. regions, this means late spring (April–June). If your growing season is short, opt for short-season varieties (50–60 days) like ‘Contender’ or ‘Blue Lake.’
How deep do pots need to be for string beans?
String beans need 12–18 inches of depth to support their roots and vines. Use 5-gallon pots or larger (minimum 12" diameter) with drainage holes. If space is tight, choose bush varieties (like ‘Mascotte’), which stay compact and thrive in 10–12" pots.
What should I do if my string beans get pests like aphids or spider mites?
Start with prevention: Use neem oil or insecticidal soap as a spray (early morning/evening). For severe infestations, introduce beneficial insects like ladybugs. Remove heavily damaged leaves and keep pots well-watered—stress attracts pests. If needed, use pyrethrin-based sprays (follow label instructions).
Can I grow string beans in pots without trellising?
Yes! Bush varieties (like ‘Blue Lake Bush’ or ‘Kentucky Wonder’) don’t need trellises—they grow in a compact bush shape. For pole beans (like ‘Rattlesnake’), a small 5-foot tall trellis or tomato cage saves space and improves airflow. Without support, vines may sprawl, reducing yield and increasing pest risks.
How do I protect string beans in pots from late-season frost?
Move pots to a sheltered spot (like a garage or under a porch) before temperatures drop below 32°F (0°C). Use row covers or frost blankets for extra protection. If frost hits, harvest any mature pods immediately—they’ll keep for a few days in the fridge. For a second crop, plant cold-tolerant varieties like ‘Christmas’ or ‘Wax’ in late summer.
Why are my string bean leaves turning yellow?
Yellow leaves usually signal overwatering, underwatering, or nutrient deficiency. Check soil moisture—pots should stay consistently moist but not soggy. If leaves are crispy, water more; if wilted, water less. Yellowing between veins often means iron deficiency—feed with a balanced fertilizer (10-10-10) or chelated iron supplement.
Wrapping up and next steps
Growing string beans in pots is a rewarding way to enjoy fresh, homegrown vegetables—even in small spaces! With the right containers, soil, and care, you can harvest tender beans in just 60 days and savor the satisfaction of a thriving mini-garden. 🌱
Now that you’re equipped with tips and troubleshooting advice, it’s time to roll up your sleeves and plant! Start with a few seeds, monitor your plants closely, and soon you’ll be reaping a bountiful harvest. Happy growing—your taste buds will thank you! 😊
Want to expand your container gardening skills? Try growing peppers, herbs, or cherry tomatoes next—your balcony or patio is the perfect canvas! 🌿