
Propagation
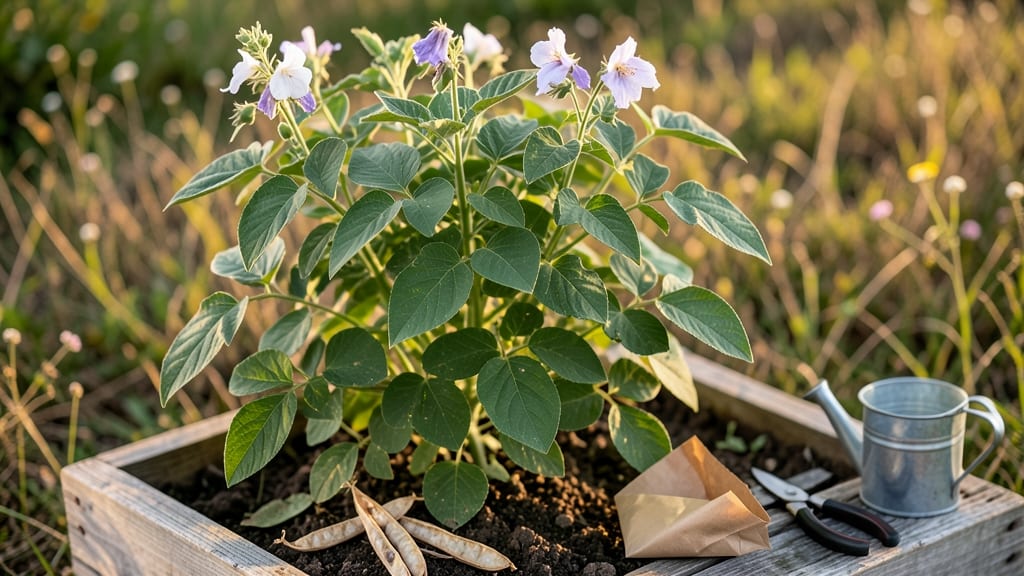
Saving bean seeds from your garden means next year’s harvest starts now. 🌱 The best varieties—like heirloom bush beans or runner beans—produce seeds that stay true to their flavor and vigor, saving you money and guaranteeing homegrown quality.
I’ve saved seeds for years, and the process is simpler than you’d think, though timing and patience are key.
The secret to success begins with selecting the healthiest plants—look for those with strong stems, abundant blooms, and pods free of pests or disease. Once the pods mature and turn dry and papery (usually in late summer or fall), harvest them before they split open.
For bush beans, this means waiting until the pods are completely brown; runner beans need a little more time to fully dry on the vine.
After harvesting, you’ll dry the seeds indoors for 2-3 weeks in a warm, dry place, then store them in airtight containers with silica gel packets to maintain moisture control. Properly stored, these seeds can last 3-5 years, though viability drops after the first year.
Label each variety clearly—nothing’s worse than opening a jar of mixed seeds and wondering what you’ll grow.
This method works for most beans, but avoid saving seeds from hybrid varieties—they won’t breed true. With a little care, you’ll have a stash of seeds ready for planting next spring, and the satisfaction of knowing every plant in your garden started with your own hands.
📚 In This Guide
- What you need
- Instructions
- Tips and common mistakes
- Wrapping up and next steps
What you need
- ● Mature, healthy bean plants: Choose disease-free plants with fully developed pods (e.g., Phaseolus vulgaris or Phaseolus lunatus). Aim for at least 10–20 plants to ensure genetic diversity.
- ○ Scissors or pruners: Clean, sharp tools to harvest pods without damaging seeds. (Optional: Sterilize with rubbing alcohol for hygiene!)
- ● Paper towels or newspaper: For drying seeds initially. Use 2–3 sheets per batch of seeds.
- ● Air-tight containers: Glass jars, plastic bags with zip locks, or seed envelopes. Size: Small (e.g., 4–8 oz jars) for short-term storage; larger for bulk.
- ○ Silica gel packets (optional but recommended): Place 1–2 packets in containers to absorb excess moisture.
- ● Permanent marker: For labeling containers with the seed type, date, and variety.
- ● Desiccant (e.g., rice or uncooked beans): Add a thin layer (½ inch) to the bottom of containers to prevent clumping.
- ● Seed catalog or notebook: Track varieties, germination rates, and storage conditions for future reference.
- ● Humidity indicator cards: Monitor moisture levels in storage containers (ideal range: 5–10% humidity).
- ● Vacuum sealer: Extends seed viability by removing oxygen (great for long-term storage).
- ● Refrigerator or freezer: For ultra-long-term storage (up to 10+ years), though most beans thrive in cool, dark pantries.
Step-by-step instructions for saving bean seeds
Here's how I preserve bean seeds year after year—simple, reliable, and perfect for gardeners who love self-sufficiency.
🌱 Step 1: Select and Harvest Mature Pods
Pick pods when they're fully mature but still slightly firm—this ensures seeds are dry inside but not shriveled. For bush beans, look for pods that have turned their mature color (often brown or tan) and feel dry to the touch. For pole beans, harvest when the pods start to dry on the vine but haven't fallen yet.
Snip pods with clean scissors or pruners, leaving a short stem attached. Avoid crushing pods—this can damage the seeds inside. I like to harvest on a dry, sunny afternoon when humidity is low. This helps prevent mold from forming during the drying process.
💧 Step 2: Dry the Seeds Thoroughly
Spread the pods out on a clean, dry surface in a well-ventilated area. I use a mesh screen or paper towel laid over a baking rack to allow air to circulate freely. Keep them out of direct sunlight—this prevents overheating and preserves seed quality.
Let the pods dry for 10-14 days until they feel brittle and the seeds rattle inside when shaken. You'll know they're ready when the pods split open easily along their seams. If you're impatient, a warm, dry spot like a sunny windowsill (not direct sunlight) speeds up the process.
✂️ Step 3: Extract and Clean the Seeds
Once pods are completely dry, gently open them and remove the seeds. I like to do this on a clean sheet of paper or inside a shallow tray to catch any loose debris. Rub the seeds between your fingers to remove any remaining pod fragments or chaff.
Inspect the seeds for quality—discard any that are shriveled, discolored, or damaged. Good seeds should feel firm and plump. I place them in a bowl and swirl them around to separate any remaining husks or debris. This step ensures only the best seeds make it to storage.
🪴 Step 4: Store Seeds Properly for Longevity
Transfer the cleaned seeds into a paper envelope or glass jar—plastic traps moisture and reduces seed viability. Label the container with the bean variety and the year harvested. I also note the germination test date (usually 1-2 years out) to track freshness.
Store the seeds in a cool, dark, dry place—a sealed jar in the refrigerator works well, but a cool basement or pantry is fine too. Aim for 35-40°F and 30-50% humidity for optimal storage. Test a few seeds annually to check viability before planting.
⏰ Step 5: Test Germination Before Planting
Before the next growing season, conduct a simple germination test. Place 10 seeds between two damp paper towels in a sealed plastic bag. Keep them in a warm (70-75°F) spot and check daily. Most bean seeds should sprout within 5-7 days—if fewer than 80% sprout, consider sourcing fresh seeds.
This test gives you confidence in your stored seeds and helps you plan planting quantities. I always test a few varieties at a time to avoid surprises when it's time to start the garden. If seeds fail to sprout, store them for another year or replace them.
Tips & tricks for perfect bean seed preservation
Saving bean seeds properly ensures you'll have healthy plants next season—here's how to avoid common pitfalls and maximize your harvest's potential.
Harvest Timing: The 10-14 day drying period in Step 2 is crucial because seeds need complete moisture removal to prevent mold. If your climate is humid, extend drying to 16-18 days—just check daily for brittleness. I've learned the hard way that rushing this step leads to seeds that won't sprout, no matter how well you store them.
Storage Environment: While the instructions mention 35-40°F, I've found that adding a small silica gel packet to your storage container helps maintain that 30-50% humidity range even in less-than-ideal spaces. The refrigerator works best, but if you use a pantry, place seeds in a sealed jar with a moisture absorber to prevent condensation buildup.
Germination Test Insight: The 70-75°F warmth for your germination test isn't just about speed—it mimics ideal soil temperatures for bean seeds to sprout. I keep mine on top of my refrigerator (not inside) where it stays consistently warm. If you notice slower sprouting, try increasing the temperature slightly—sometimes just 2-3°F makes a difference.
Labeling System: Beyond just the variety and year, I add a quick note about the plant's characteristics—like "disease-resistant" or "early maturing"—so I remember why I grew that particular bean. This simple habit saves time when planning next year's garden layout and succession planting.
Pro Tips for Save Bean Seeds
- Saving bean seeds properly ensures you'll have healthy plants next season—here's how to avoid common pitfalls and maximize your harvest's potential.
- Harvest Timing: The 10-14 day drying period in Step 2 is crucial because seeds need complete moisture removal to prevent mold.
- Storage Environment: While the instructions mention 35-40°F, I've found that adding a small silica gel packet to your storage container helps maintain that 30-50% humidity range even in less-than-ideal spaces.
Frequently asked questions
Got questions about saving bean seeds? You’re not alone! Here are some of the most common concerns—and their answers—to help you master the process like a pro.
What’s the best time to harvest bean seeds for saving?
Harvest seeds when the pods are fully mature but before they split open on the plant. For most beans, this means waiting until the pods turn dry and papery (usually 180–240 days after planting). Check the variety’s days-to-maturity label for guidance—patience pays off!
How long can I store saved bean seeds before they lose viability?
Properly dried and stored seeds typically stay viable for 3–5 years, though some varieties (like heirloom beans) may last even longer. Store them in a cool, dark place (below 40°F/4°C) with low humidity to maximize shelf life. Test germination annually if you’re unsure!
Can I save seeds from hybrid beans, or do I need heirloom varieties?
Hybrid beans rarely produce true-to-type seeds—what you grow next year might not match the parent plant. Stick to open-pollinated or heirloom varieties for reliable seed saving. Look for labels like “seed saved” or “heritage” to avoid disappointment.
What should I do if my stored seeds sprout mold or pests?
Mold or pests mean your storage conditions failed. Discard contaminated seeds immediately. To prevent this, re-dry seeds at 85–95°F (29–35°C) for 3–5 days before storing, and use airtight containers with silica gel packets or rice to absorb moisture.
Do I need to soak or treat bean seeds before storing them?
Nope! Just clean, dry, and store them—no soaking or chemical treatments required. Wet seeds can mold, so skip this step. If seeds are damp after harvest, spread them on a tray in a warm, dry spot for 1–2 weeks to fully dry before storage.
Wrapping up and next steps
Saving bean seeds is a rewarding way to cut costs and preserve heirloom varieties for future harvests!
By following these simple steps—selecting healthy plants, drying seeds properly, and storing them in cool, dry conditions—you’ll ensure a steady supply of seeds year after year. Your green thumb just grew a little greener!
Ready to level up your gardening game? Start by labeling your seed packets with the variety and harvest date, then plan your next planting schedule. Happy saving—and may your garden thrive! 🌱✨