
Advice
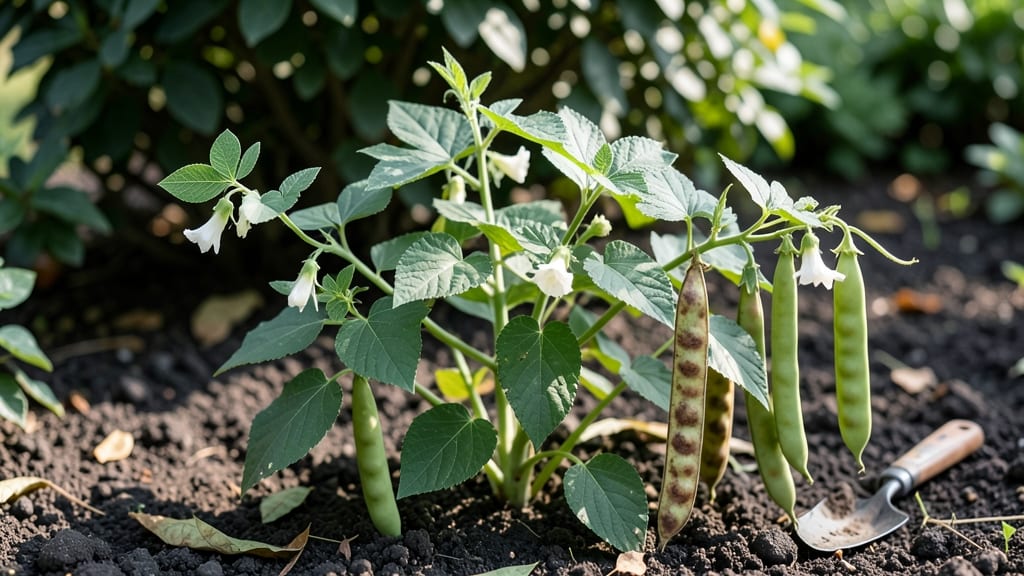
Tracking the pinto bean growth stages from seed to harvest is like watching a tiny miracle unfold in your garden 🌱 — and knowing what to expect at each step makes all the difference.
One day, you’re planting seeds; the next, you’re reaching for pods. But what happens in between? Without a clear roadmap, it’s easy to miss critical moments — like when to thin seedlings or how to tell if your plants are struggling before it’s too late.
Whether you’re a first-time gardener or a seasoned pro, understanding these stages helps you adjust care exactly when it matters most. From the first sprouts peeking through the soil to the final harvest, I’ll walk you through every phase so you can grow healthy, productive plants.
Here’s what you’ll discover: the exact timeline for each stage, how to troubleshoot common issues, and the best practices to maximize your yield — all tailored for Zone 6 conditions where Pinto Beans thrive.


Week-by-week pinto bean growth stages from seed to flowering
Watching pinto beans grow is like following a miniature botanical timeline—each week brings dramatic changes from tiny seeds to towering vines. Understanding these growth stages helps you anticipate needs and troubleshoot issues before they derail your harvest.
Pinto beans typically take 60-90 days from seed to harvest, but knowing the week-by-week milestones ensures you don’t miss critical care moments.
I’ve grown pinto beans for years, and the most common mistake gardeners make is overlooking early signs of stress or stunted growth. For example, yellowing leaves at week 3 often signals overwatering, while slow germination (beyond 14 days) usually means cold soil.
Let’s break down each phase so you can spot these cues early and keep your plants thriving.
🌱 Germination (Weeks 1-2): This is where it all begins. Pinto bean seeds need warm soil (60°F+) and consistent moisture to sprout. You’ll see the first tiny white roots emerge within 3-7 days, followed by a hook-shaped shoot breaking through the soil. Keep the soil moist but not soggy—this is the most critical time for success.
🌿 Seedling (Weeks 3-4): Once sprouted, seedlings develop their first true leaves (not the initial seed leaves). At this stage, they’re vulnerable to damping off (a fungal disease causing stems to collapse). Thin seedlings to 2-3 inches apart to reduce competition and improve airflow. If leaves look pale or wilted, it’s time to adjust watering or check for pests.
| Stage | Key Features | Timeframe | Care Tips |
|---|---|---|---|
| Germination | White roots, hook-shaped shoot | Weeks 1-2 | Keep soil warm (60°F+), moist but not soggy |
| Seedling | First true leaves, 2-3 inches tall | Weeks 3-4 | Thin to 2-3 inches apart, watch for damping off |
| Vegetative | Rapid vine growth, compound leaves | Weeks 5-8 | Add trellis, increase water to 1-1.5 inches/week |
| Flowering | White/purple flowers, 1-2 ft tall | Weeks 6-10 | Feed with phosphorus-rich fertilizer, hand-pollinate if needed |
| Pod Development | Green pods, 2-3 inches long | Weeks 8-12 | Harvest regularly, reduce water slightly |
🪴 Vegetative Growth (Weeks 5-8): This is the power phase where pinto beans shoot up like towering vines. You’ll notice compound leaves with 3-5 leaflets and rapid stem elongation. If you haven’t already, install a trellis or stakes now to support their weight. During this stage, increase watering to 1-1.5 inches per week and monitor for aphids or spider mites, which love tender new growth.
🌷 Flowering (Weeks 6-10): The first white or purple flowers appear, signaling the plant’s shift toward reproduction. Pinto beans are self-pollinating, but a gentle shake of the vines can boost pollination on windless days. Yellowing flowers mean the plant isn’t getting enough phosphorus—apply a 5-10-10 fertilizer now to encourage more blooms. This stage is also when you’ll spot early pod formation, though they’ll be tiny at first.
One of the most frustrating delays I’ve seen is stunted flowering. If your pinto beans are 3 feet tall with no flowers by week 8, check for these issues: overcrowding, nutrient deficiencies (especially nitrogen), or temperature stress (below 55°F).
Adjust care immediately—this is your last chance to salvage the crop before harvest time.
🌾 Pod Development (Weeks 8-12): Here’s where the magic happens! Green pods (2-3 inches long) begin forming, and you’ll need to harvest regularly to encourage more production. Pinto beans are
Critical care tips for each pinto bean growth stage
Pinto beans thrive when you tailor your care to their specific growth stages. Each phase—from germination to flowering and finally pod development—demands unique attention to watering, nutrients, and pest prevention.
Skipping these details can lead to stunted plants or poor yields, so let’s break it down by stage to keep your beans on track.
First, germination (weeks 1-2) is the most delicate phase. Your seeds need consistent moisture and warm soil (60°F+) to sprout. Overwatering here can cause rot, while too little moisture stalls growth. Use a moisture meter to check soil dampness—aim for evenly moist, not soggy.
⚠️ callout warning
Pinto beans hate soggy roots. Yellowing leaves or mushy stems signal root rot. Reduce watering if soil stays wet for more than 24 hours. Use well-draining soil (sandy loam works best) and mulch to retain moisture without suffocating roots.
During the seedling stage (weeks 3-4), focus on sunlight and nutrient balance. Young plants need 6+ hours of sun daily but can scorch in intense afternoon heat. If leaves turn purple, they’re phosphorus-deficient—apply a balanced 5-10-10 fertilizer lightly. Avoid heavy nitrogen, which promotes leafy growth over pods.
When flowering begins (weeks 5-6), increase watering slightly to 1.5 inches per week and switch to a low-nitrogen, high-phosphorus fertilizer (like 0-20-20). Watch for bean beetles—tiny black pests that chew flowers. Handpick them or use neem oil in the evening to avoid harming pollinators.
In the pod development stage (weeks 7-10), consistent moisture is key. Let the top inch of soil dry between waterings to prevent bloom end rot (black spots on pods).
If leaves curl or pods shrivel, it’s a sign of underwatering or heat stress. Provide afternoon shade if temperatures exceed 90°F to protect tender pods.
Finally, as pods mature (weeks 10-12), reduce watering gradually to 1 inch per week to improve flavor. Harvest within 2-3 days of maturity to avoid tough, stringy beans.
If you notice powdery mildew (white dust on leaves), prune affected foliage and spray with baking soda solution (1 tsp per quart of water).