
Container Gardens
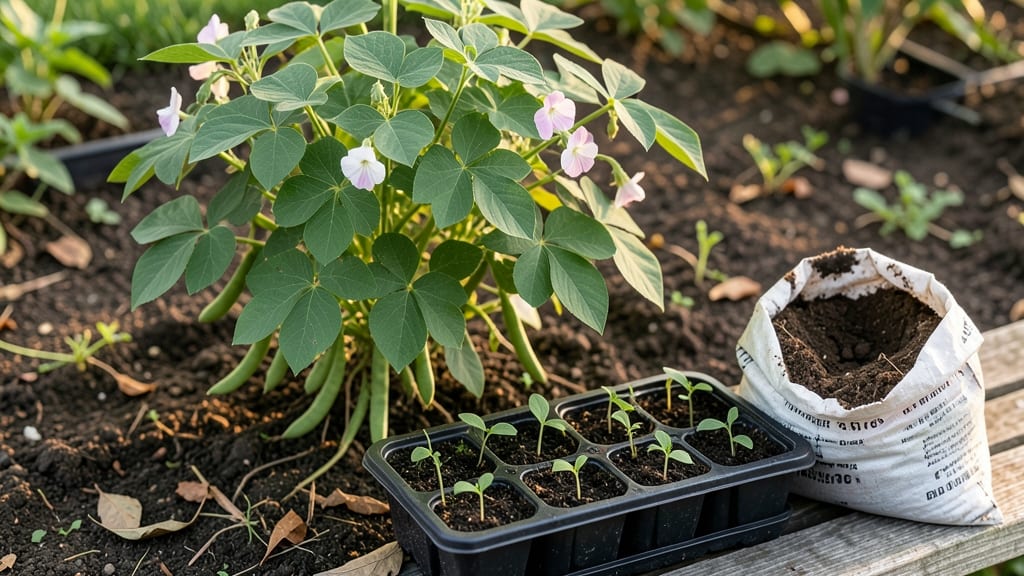
Planting beans in bags transformed my cramped balcony into a lush vertical garden—after my bush beans wilted in overcrowded in-ground beds, I discovered upright varieties flourish in fabric pots with space to climb. 🌱 The right setup gives you fresh beans without sacrificing square footage for other plants.
You’ll need sturdy grow bags (5-gallon minimum), well-draining potting mix, and a trellis or sturdy string to guide those vines upward. Plant seeds 1 inch deep, 3 inches apart, and keep the soil consistently moist but never soggy.
Sunlight is key—place your bags where they’ll get at least 6-8 hours of direct light daily, and watch those tendrils reach for the sky within days.
By midsummer, you’ll be harvesting tender pods straight from the bag—no bending over required. The plants stay compact, resist common bean pests better than ground varieties, and you can easily move them to follow the sun or protect them from sudden storms.
Plus, the bags drain excess water, preventing the root rot that stunts so many container plants.
Pair your bean bags with fast-growing companions like radishes or lettuce at their base, or cluster several bags together for a living trellis that doubles as a privacy screen. The best part? No digging, no weeding, and no wasted space—just pure, portable productivity.
📚 In This Guide
- What you need
- Instructions
- Tips and common mistakes
- Wrapping up and next steps
What you need
- ● Grow bags: 2–3 5-gallon fabric or plastic bags (with drainage holes if using plastic). Look for heavy-duty, breathable fabric (e.g., burlap or polypropylene) to prevent tearing.
- ● Bean seeds: 4–6 seeds per bag (choose bush or pole varieties like Blue Lake, Roma, or Kentucky Wonder). Save a few extra in case of germination issues!
- ● Potting mix: 1–2 bags of high-quality, well-draining soil (e.g., 50/50 mix of potting soil and compost). Avoid garden soil—it compacts too easily!
- ● Watering can or hose: With a gentle spray nozzle to avoid displacing soil.
- ○ Support structure (optional but helpful): For pole beans: A trellis, stakes, or wire mesh (3–4 ft tall) to guide vines upward.
- ● For bush beans: None needed—they’ll stay compact!
- ● Scissors or box cutter: To cut drainage holes in plastic bags (if needed).
- ● Fertilizer: Balanced, organic fertilizer (e.g., 10-10-10 or compost tea) to mix into soil or use mid-growth.
- ○ Mulch (optional): Straw or shredded leaves to retain moisture and suppress weeds.
- ● Spray bottle: For misting seeds during germination.
- ● Gloves: To keep hands clean while handling soil.
- ● Sunlight: A spot with 6–8 hours of direct sunlight daily (south-facing windowsills or balconies work great!).
- ● Temperature: Wait until soil is at least 60°F (15°C)—beans are frost-sensitive!
- ● Space: Hang bags vertically or stack them (leave 6–12 inches between bags for airflow).
Step-by-Step instructions for planting beans in bags
Here's the simple method I use to grow bushy, productive bean plants in minimal space.
🪴 Step 1: Select and Prepare Your Grow Bags
Choose sturdy 5-gallon fabric grow bags with drainage holes at the bottom—these mimic natural soil conditions while preventing root circling. I like bags with 12-18 inches of depth for pole beans or 8-12 inches for bush varieties. Cut a 4-inch slit vertically on one side of each bag to create a planting pocket.
Fill each bag ¾ full with well-draining potting mix (never garden soil—it compacts too much). Tap the bag gently on the table to settle the soil without compacting it. Leave the top 2-3 inches empty for watering and plant growth. I always add a handful of compost mixed into the top 4 inches of soil for extra nutrients.
🌱 Step 2: Plant Seeds at the Right Depth and Spacing
Plant 4-5 seeds per bag at a depth of 1 inch—this ensures strong germination even if a few seeds fail. I use my finger to make small holes, then drop seeds in and cover lightly with additional soil. Space seeds 2 inches apart in a loose cluster near the slit you cut.
Water gently until the soil feels evenly moist but not soggy. Place the bags in a warm, sunny spot (65-75°F) and cover with a clear plastic dome or plastic wrap to retain humidity. Check daily but resist watering again until you see first true leaves—usually 7-10 days. Remove the cover immediately after germination to prevent fungal issues.
☀️ Step 3: Provide Support and Optimal Light
Once seedlings reach 3-4 inches tall, install a 5-foot tall trellis or sturdy bamboo stake in the center of each bag. For pole beans, gently weave the main stems through the trellis as they grow—this encourages upward growth and prevents sprawling. I like to use soft twine to loosely tie stems to the trellis without damaging them.
Move the bags to a location with full sun (6+ hours daily). If growing indoors, place under grow lights 4-6 inches above the plants for 14-16 hours daily. Leggy growth (long, thin stems) means more light is needed—adjust immediately to prevent weak plants. Water when the top inch of soil feels dry, usually every 2-3 days in warm weather.
💧 Step 4: Fertilize and Maintain Through Growth
When plants reach 6 inches tall, mix a balanced liquid fertilizer (10-10-10) at half-strength into the watering can. Apply every 2-3 weeks during the growing season. Beans are nitrogen-fixers, so I avoid heavy nitrogen feeds—they focus on leaves instead of pods. Instead, I side-dress with compost tea monthly for steady nutrients.
Check for pests like aphids or spider mites weekly. A strong spray of water usually removes them, but I keep neem oil on hand for stubborn infestations. Prune any yellow or diseased leaves immediately to keep the plant healthy. Harvest begins when pods are firm but still tender—usually 50-60 days after planting.
✂️ Step 5: Harvest and Extend the Season
Pick beans every 2-3 days to encourage continuous production. Use clean scissors to snip stems just above the pod—this prevents damage to the plant. I always harvest in the morning when pods are crispest. For bush beans, harvest is complete when pods stop forming; for pole beans, you can keep harvesting until frost.
After the first harvest, trim back any dead foliage and add 1 inch of compost to the soil surface. Water deeply and watch for a second flush of beans in 3-4 weeks. When the season ends, compost the bags or repurpose them for next year's plants—just rinse them thoroughly first.
Tips & tricks for growing beans in bags
A few simple tricks that'll help your bean plants thrive in minimal space without the usual growing headaches.
Soil Preparation Secret: When filling your 5-gallon bags with well-draining potting mix, I like to add a thin layer of perlite or vermiculite at the bottom (about 1 inch) before the soil. This improves drainage and prevents waterlogging, which can cause root rot—especially important since fabric bags don't drain as efficiently as containers with holes. The extra layer mimics the natural aeration beans love.
Germination Hack: For faster and more reliable germination, I soak the seeds overnight in warm water (around 70°F) before planting. This softens the seed coat and speeds up sprouting. Just make sure to plant them within 24 hours of soaking—don't let them dry out. You'll notice tiny sprouts peeking out in just 3-5 days instead of the usual 7-10 days.
Lighting Strategy: If you're growing indoors, position your grow lights 4-6 inches above the plants and keep them on for the full 14-16 hours daily mentioned in the instructions. I've found that using a timer makes this effortless—just set it and forget it. For extra efficiency, use cool white LED bulbs (they generate less heat) and rotate the bags every few days to ensure even growth all around.
Pest Prevention: The weekly pest check in Step 4 is crucial, but I've found that adding a layer of diatomaceous earth around the base of your plants (just a light sprinkle) acts as a natural deterrent for many common pests. It's non-toxic to plants and works by dehydrating soft-bodied insects like aphids. Reapply after watering or rain—it's a simple way to reduce the need for neem oil.
Pro Tips for Planting Beans In Bags
- A few simple tricks that'll help your bean plants thrive in minimal space without the usual growing headaches.
- Soil Preparation Secret: When filling your 5-gallon bags with well-draining potting mix, I like to add a thin layer of perlite or vermiculite at the bottom (about 1 inch) before the soil.
- Germination Hack: For faster and more reliable germination, I soak the seeds overnight in warm water (around 70°F) before planting.
Frequently asked questions
Got questions about growing beans in bags? You’re not alone—this method is clever but can feel tricky at first. Here’s what you need to know before you start!
What size bags work best for planting beans?
Use 5-gallon grow bags (18–24 inches deep) or fabric pots with drainage holes. Avoid plastic bags without holes—they trap water and rot roots. For pole beans, opt for taller bags (24+ inches) to support vines. Pro tip: Cut a few extra holes in the bottom if your bag lacks drainage!
When is the best time to plant beans in bags?
Beans thrive in warm soil (60–85°F), so plant after the last frost when nighttime temps stay above 50°F. In cooler climates, start indoors 2–3 weeks before transplanting. Quick fix: Use a heat mat under bags to extend the season in chilly areas.
Can I reuse bags from last year’s harvest?
Yes, but sterilize them first! Scrub with soapy water, rinse, and soak in a 1:10 bleach-water solution (1 part bleach to 10 parts water) for 10 minutes. Rinse thoroughly to avoid chemical residue. Bonus: Add fresh potting mix and compost to refresh nutrients.
How do I keep pests away from beans in bags?
Prevent pests with row covers (for early stages) or neem oil sprays. Avoid overwatering—soggy soil attracts slugs. DIY trick: Crumble eggshells around the base to deter snails. Monitor for aphids; blast them off with water if spotted!
What if my beans aren’t growing well in bags?
Check these fixes:
Not enough sunlight? Move bags to a sunnier spot (6+ hours daily).
Yellow leaves? Overwatering! Let topsoil dry between waterings.
Slow growth? Fertilize with a balanced organic fertilizer (10-10-10) every 3–4 weeks.
Remember: Beans are nitrogen-fixers—they’ll struggle if over-fertilized!Wrapping up and next steps
Planting beans in bags is a game-changer for small spaces—whether you're a city dweller with a balcony or a gardener looking to maximize efficiency. 🌱 With minimal tools and a little creativity, you’ve got a thriving vertical garden that’s both productive and stylish.
The best part? You’re just steps away from fresh, homegrown beans without sacrificing your yard (or budget!).
Ready to harvest your success? Start small—try one bag this season, then expand your setup next year. Share your green thumb wins with fellow gardeners, and soon, you’ll be the go-to expert for bag-grown beans! 🌟