
Vegetables
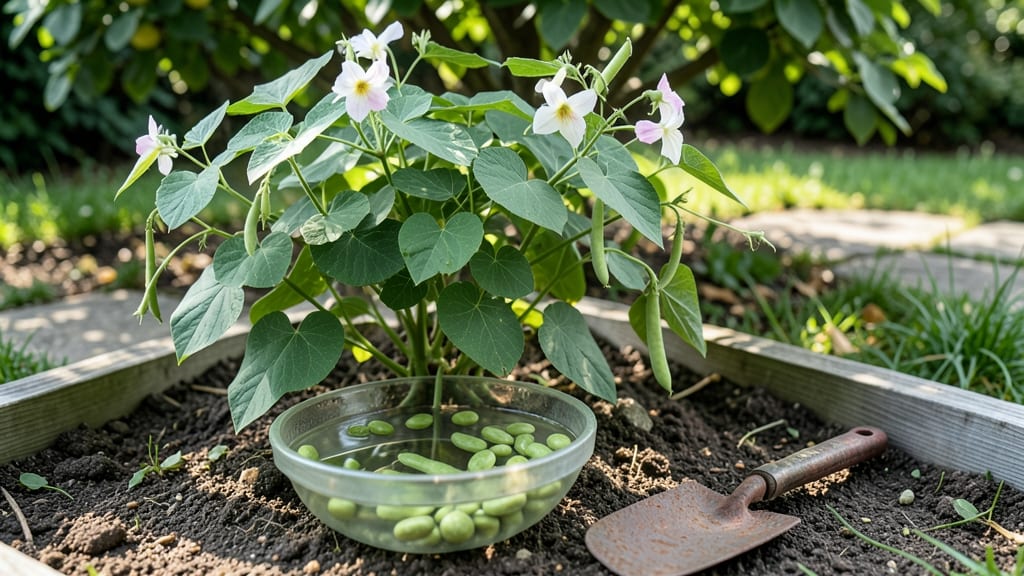
Soaking green bean seeds before planting cuts germination time in half—from two weeks to just 5-7 days—and gives you stronger, more uniform seedlings. 🌱 I learned this trick after struggling with slow starts in cool spring soil, and now my beans pop up reliably every year.
The process is simple: warm water, a few hours of soaking, and a quick rinse before planting. It’s especially helpful for varieties like Kentucky Wonder or Blue Lake that can be slow to sprout.
You’ll need just three things: green bean seeds, warm water (not boiling), and a clean container. The soaking time varies—4-12 hours depending on seed age—but never let them sit overnight.
After soaking, rinse them to remove excess moisture, then plant them ½ inch deep in well-drained soil. This method also reduces the risk of fungal diseases, which love damp, slow-to-germinate seeds.
What you’ll end up with is a garden where beans emerge evenly and quickly, giving you a head start on pests and weeds. The seedlings grow taller and sturdier, too, because they’ve already broken through their seed coats.
By mid-summer, you’ll be harvesting pods that are crisp, tender, and far ahead of neighbors who planted dry seeds.
Not all green beans need soaking—large seeds like those from pole varieties often germinate fine without it—but for bush beans or smaller seeds, this step is a game-changer. If you forget to soak, don’t worry: just plant them dry, but expect a slower start.
The key is consistency—warm water, proper timing, and good soil prep. Ready to try it?
📚 In This Guide
- What you need
- Instructions
- Tips and common mistakes
- Wrapping up and next steps
What you need
- ● Green bean seeds: Choose fresh, high-quality heirloom or hybrid seeds (e.g., Blue Lake, Contender, or Provider). Aim for 10–20 seeds per soaking batch, depending on your garden size.
- ● Clean water: Use room-temperature (68–75°F) distilled, filtered, or tap water (chlorine-free if possible). Plan for 1–2 cups per 10 seeds.
- ● Soaking container: A glass jar (wide-mouth, 16–32 oz) with a lid or
- ● A bowl or ceramic dish (non-reactive, like ceramic or glass).
- ● Paper towels or damp cloth: 2–3 sheets of unbleached paper towels or a clean kitchen towel for draining.
- ○ Optional germination aid: Hydrogen peroxide (3%): 1 tsp per cup of water (boosts oxygen and prevents mold).
- ● Apple cider vinegar: 1 tbsp per quart of water (adds trace minerals).
- ● Warmth: Soak in a spot with consistent warmth (70–80°F). A sunny windowsill or seedling heat mat works great!
- ● Timing: Soak seeds 8–12 hours before planting (overnight is ideal).
- ● Planting supplies (post-soak): Well-draining potting mix or garden soil (amended with compost).
- ● Small pots, seed trays, or a prepared garden bed.
How to soak green bean seeds for faster, healthier germination
Here’s the simple method I’ve used for years to get bush beans and pole beans sprouting reliably within days.
🌱 Step 1: Select and Prepare Your Seeds
Start with fresh seeds—older than two years and germination drops sharply. For this method, you’ll need 4 seeds (enough for a small patch). Place them in a small bowl or jar, then cover completely with lukewarm water (about 90°F). The water should be deep enough to fully submerge the seeds but not so deep they can’t float freely.
Let them soak for 12-24 hours—this is key. You’ll see the seed coats soften and tiny white sprouts emerge. Don’t skip this step; it breaks dormancy and ensures even germination. If your seeds are particularly tough (like heirloom varieties), give them the full 24 hours.
💧 Step 2: Drain and Plant at the Right Depth
After soaking, drain the seeds thoroughly using a fine-mesh strainer or paper towel. Plant them 1 inch deep in well-drained soil—this depth prevents rot while keeping them moist enough to sprout quickly. I like to make small holes with my finger, drop in 2-3 seeds per spot, then cover lightly with soil.
Water gently but don’t oversaturate the area. The soil should feel damp, like a wrung-out sponge, not soggy. If you’re planting in cooler weather (below 60°F), consider covering the row with a thin layer of straw or mulch to retain warmth and moisture until sprouts appear.
☀️ Step 3: Maintain Warmth and Moisture for Germination
Green beans germinate fastest in 70-85°F soil. If your garden runs cooler, use a seedling heat mat or plant in a black plastic mulch to warm the soil. Keep the planting area consistently moist—not wet—until you see first true leaves (the second set after the initial seed leaves).
Watch for sprouts in 5-10 days. If the soil dries out before germination, the seeds may fail to sprout. A light misting daily keeps things ideal. Once sprouts break through, thin to the strongest plant per spot, leaving 4-6 inches between plants for bush varieties or 6-8 inches for pole beans.
⏰ Step 4: Transition to Outdoor Conditions
After 7-10 days, when seedlings have 2-3 sets of true leaves, they’re ready for full outdoor exposure. If nights are still chilly, harden them off gradually by moving them to a sheltered spot for a few hours each day. This prevents shock and ensures strong stems.
Here’s the thing—soaked seeds germinate so quickly that you’ll often see them popping up within a week. The real payoff? Stronger, more uniform plants that mature faster. Just avoid overwatering after planting; soggy soil at this stage can cause rot before the seeds even sprout.
Tips & tricks for perfect green bean germination
Here's what nobody tells you about getting every seed to sprout reliably—these tricks save time and frustration.
Water Temperature Matters: That 90°F lukewarm water isn't just a suggestion—it's the sweet spot for breaking dormancy without shocking the seeds. Fill your jar with cool water first, then warm it gradually to avoid sudden temperature shock. I use a thermometer to confirm the temp, especially when working with heirloom varieties that need extra coaxing.
Soaking Strategy: The 12-24 hour window is your germination goldilocks zone—too short and seeds won't soften enough, too long and they can start rotting. For particularly tough seeds (like those old packets in your pantry), I recommend the full 24 hours, but set a timer so you don't forget. Change the water after 12 hours if it gets cloudy—this prevents bacterial growth that can inhibit germination.
Planting Depth Precision: That 1-inch depth isn't arbitrary—it's the perfect balance between keeping seeds moist enough to sprout and preventing rot. Use a ruler or even a pencil to mark your planting depth if you're unsure. For sandy soils, you might plant slightly deeper (1.25 inches) to maintain moisture, while clay soils can handle shallower planting (3/4 inch).
Germination Timing: Those 5-10 days can feel like forever, but consistency is key. I keep a small spray bottle nearby for daily misting—just enough to keep the soil damp like a wrung-out sponge. If your seeds haven't sprouted by day 10, gently dig one up to check for signs of life. The seed should feel plump and firm, not shriveled.
Pro Tips for Soak Green Beans Before Planting
- Here's what nobody tells you about getting every seed to sprout reliably—these tricks save time and frustration.
- Water Temperature Matters: That 90°F lukewarm water isn't just a suggestion—it's the sweet spot for breaking dormancy without shocking the seeds.
- Soaking Strategy: The 12-24 hour window is your germination goldilocks zone—too short and seeds won't soften enough, too long and they can start rotting.
Frequently asked questions
Got questions about soaking green beans before planting? You’re not alone—this step can feel tricky at first! Below, we’ve rounded up the most common queries to help you grow like a pro.
Why should I soak green beans before planting?
Soaking speeds up germination by softening the seed coat and kickstarting hydration. This means faster sprouts, stronger roots, and a head start on your growing season—especially helpful in cooler climates or for impatient gardeners!
How long should I soak green beans before planting?
For most varieties, 6–12 hours in room-temperature water is ideal. Avoid over-soaking (beyond 24 hours), or the seeds may rot. Pro tip: Use a breathable cloth or paper towel to drain excess water afterward—this prevents mold and keeps seeds fresh!
What’s the best water temperature for soaking green beans?
Lukewarm water (around 70–80°F) works best—it mimics natural soil warmth and encourages faster germination. Avoid hot water (above 100°F), as it can damage delicate seeds. If your tap water is cold, let it sit for a few minutes to reach room temp. →
Can I plant soaked green beans directly, or do I need to dry them first?
You can plant them straight from the soak, but patting them dry with a paper towel first helps prevent mold and improves soil contact. If planting in dry soil, a quick rinse afterward ensures moisture retention. For best results, aim to plant within 24 hours of soaking.
What if my soaked green beans sprouted too early?
If sprouts appear before planting, don’t panic! Store them in a damp paper towel in the fridge for 1–2 days to slow growth, then plant as usual. Avoid letting them dry out completely—keep them slightly moist until you’re ready to transfer.
What if I forget to soak my seeds?
No worries—green beans can still germinate without soaking, but it may take 7–14 days longer. For faster results, try scarification (lightly nicking the seed coat with sandpaper) as an alternative. Patience pays off, but soaking is a game-changer for speed!
Wrapping up and next steps
Soaking green beans before planting is a simple yet powerful trick to boost germination speed and give your plants a healthier, stronger start.
Whether you’re a seasoned gardener or just beginning your green thumb journey, this method saves time and ensures better yields. Now that you’re armed with the know-how, grab those seeds, and get ready to watch your garden thrive!
🌱 Next step: Try soaking your green beans tonight and plant them in the morning. Track your progress and share your success—your future harvest will thank you!