
Vegetables
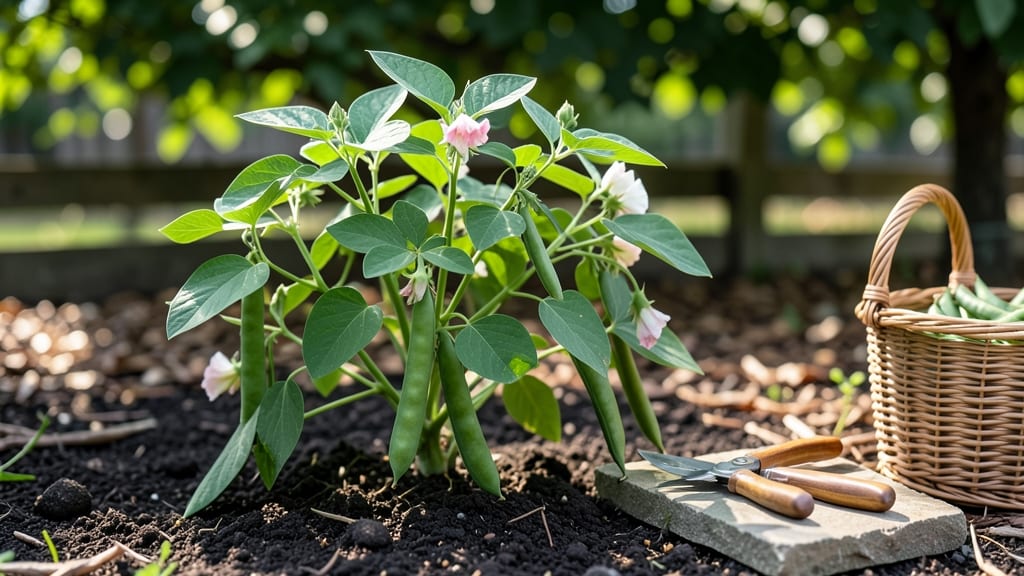
Growing fresh shell beans from seed is one of the most rewarding vegetable gardening projects—crisp, tender pods straight from your yard to the table. 🌱 I’ve grown both bush and pole varieties for years, and the key to success isn’t complicated: it’s timing, soil, and a little patience.
The right conditions turn a handful of seeds into a harvest that feeds you all summer long.
Start with well-draining soil rich in compost (beans are nitrogen-fixers, so they don’t need heavy fertilizer). Plant seeds 1 inch deep after the last frost when soil reaches 60°F, spacing bush beans 4 inches apart in rows 18 inches apart or pole beans 4-6 inches apart along a trellis.
They thrive in full sun (6-8 hours daily) and prefer consistent moisture—never soggy soil. Most varieties mature in 50-60 days, so plan ahead for a continuous harvest.
Harvest begins when pods are firm but still tender, picking every 2-3 days to encourage more production. Watch for pests like Mexican bean beetles (handpick or use neem oil) and diseases like powdery mildew (space plants for airflow).
With proper care, you’ll end up with pounds of fresh beans—enough to freeze, can, or enjoy straight from the vine. The first bite of a homegrown shell bean is a game-changer.
Whether you choose compact bush beans for small spaces or climbing pole beans for vertical gardens, this method works in containers or in-ground beds. The real magic? No fancy equipment needed—just good soil, sunlight, and a little attention. Ready to grow your own? Let’s get those seeds in the ground!
📚 In This Guide
- What you need
- Instructions
- Tips and common mistakes
- Wrapping up and next steps
What you need
- ● Bean Seeds: Pole beans (e.g., Kentucky Wonder, Blue Lake): 5-10 seeds per 6-foot pole
- ● Bush beans (e.g., Blue Lake Bush, Contender): 3-5 seeds per 2-foot row
- ● Growing Space: For pole beans: Trellis, fence, or sturdy poles (6+ feet tall)
- ● For bush beans: Well-draining soil in garden beds or containers (12+ inches deep)
- ● Soil: Loamy, well-draining soil with a pH of 6.0–7.0 (amend with compost if needed).
- ● Fertilizer: Balanced, organic fertilizer (e.g., 10-10-10) or compost.
- ● Watering Supplies: Hose with gentle spray nozzle or drip irrigation.
- ● Plant Markers: Small stakes or labels to track varieties.
- ● Mulch (straw or grass clippings) to retain moisture.
- ● Row covers or shade cloth for early planting.
- ● Bean trellis kit for pole beans (if DIY isn’t your style!).
- ● Hand pruners (for trimming pole beans).
- ● Pest deterrents (neem oil or row covers for aphids).
Step-by-step instructions for growing fresh shell beans
Here's how to grow beans that produce tender, flavorful pods straight from your garden.
🌱 Step 1: Choose Your Variety and Prepare the Soil
Decide between bush beans (compact, 2-3 foot plants) or pole beans (vining, 6-10 feet tall). Both thrive in full sun with 6-8 hours of direct light daily. Test your soil—beans prefer slightly acidic to neutral pH (6.0-7.0). If your soil is heavy clay, amend it with 2-3 inches of compost mixed into the top 12 inches.
Beans are nitrogen-fixers, meaning they pull nitrogen from the air, so avoid fresh manure or high-nitrogen fertilizers. Instead, work in aged compost or well-rotted manure to improve soil structure. I like to rake the area smooth and break up any clods—beans hate compacted soil that restricts root growth.
🌱 Step 2: Plant Seeds at the Right Depth and Spacing
Sow seeds 1 inch deep when soil reaches 60°F—waiting too long risks poor germination. For bush beans, space plants 4-6 inches apart in rows 18-24 inches apart. Pole beans need 4-5 inches between seeds and 3-4 feet between rows to support their vines.
I plant seeds in early spring as soon as the ground is workable, or again in late summer for a fall harvest. If planting in cool climates, cover seeds with black plastic mulch to warm the soil faster. Water gently after planting—just enough to settle the soil without disturbing the seeds.
☀️ Step 3: Provide Support and Consistent Watering
Bush beans don’t need support, but pole beans require sturdy trellises, cages, or strings tied to stakes. I use 5-foot tall bamboo stakes with twine for a simple, rustic look. Train vines to climb as they grow—this improves airflow and reduces disease risk.
Keep soil evenly moist but not soggy—beans are drought-tolerant once established, but inconsistent moisture causes pods to crack. Water 1-1.5 inches per week, focusing on the roots rather than overhead spraying. Mulch around plants with straw or grass clippings to retain moisture and suppress weeds.
⏰ Step 4: Monitor for Pests and Harvest at Peak Ripeness
Watch for bean beetles and aphids—spray with neem oil or insecticidal soap if needed. Beans also attract Mexican bean beetles, which chew holes in leaves. Handpick adults and drop them in soapy water to control infestations early.
Harvest begins 50-60 days after planting when pods are 3-5 inches long and snap easily when bent. Pick every 2-3 days to encourage more production—left on the vine, pods toughen and yield fewer beans. I harvest in the morning when pods are crispest, and store them in the fridge for up to 5 days.
✂️ Step 5: Extend the Season with Succession Planting
For continuous harvests, plant new seeds every 2-3 weeks until 6-8 weeks before your first frost. Beans grow quickly, so this strategy maximizes your yield. In warm climates, you can even grow a winter crop by choosing heat-tolerant varieties.
After harvest, pull up plants and compost them—don’t leave old bean plants in the soil, as they can harbor diseases. Rotate next year’s beans to a different spot in the garden to maintain soil health and prevent pest buildup.
Tips & tricks for perfect shell bean harvests
These insider strategies will help you grow beans that are sweeter, more productive, and easier to manage than ever before.
Soil Preparation Secret: The key to healthy beans starts with soil prep—don't just amend the top layer. Dig down 12 inches and mix in 2-3 inches of compost thoroughly. I've found that adding a handful of wood ash (from untreated wood) to each planting hole can help raise the pH slightly if your soil tests below 6.0. This creates an ideal environment for those nitrogen-fixing bacteria that beans rely on.
Planting Timing Hack: For cooler climates, use black plastic mulch to warm the soil faster—this can give you a jumpstart of 1-2 weeks on your growing season. I've planted in April with mulch when I would normally wait until May, and still gotten excellent germination. Just remember to remove the mulch once plants are established to prevent overheating.
Pest Prevention Strategy: The early bird gets the worm—and the early gardener gets the pests. Start your pest control before you see the first beetle. I mix 1 tablespoon of diatomaceous earth (food-grade only) into the planting hole for each plant. This creates a protective barrier that deters many common bean pests without chemicals. Combine this with weekly inspections for Mexican bean beetle eggs (tiny yellow ovals on the underside of leaves) and you'll catch infestations before they become serious.
Harvesting Technique: When checking for ripeness, don't just look at size—listen too! Mature pods should make a crisp snapping sound when bent. I harvest with a small pair of pruning shears for cleaner cuts, and always pick in the morning when pods are most tender. The 2-3 day harvesting window is crucial—beans lose flavor and texture quickly once they reach full maturity.
Pro Tips for Fresh Shell Beans
- These insider strategies will help you grow beans that are sweeter, more productive, and easier to manage than ever before.
- Soil Preparation Secret: The key to healthy beans starts with soil prep—don't just amend the top layer.
- Planting Timing Hack: For cooler climates, use black plastic mulch to warm the soil faster—this can give you a jumpstart of 1-2 weeks on your growing season.
Frequently asked questions
Got questions about growing fresh shell beans? You’re not alone! Here are answers to the most common queries to help you grow a thriving harvest—whether you choose pole or bush varieties.
How long does it take for fresh shell beans to grow?
Fresh shell beans typically take 50–60 days to mature after planting, depending on the variety. Bush beans mature faster (45–55 days), while pole beans may take slightly longer (55–65 days). Check seed packets for specific harvest times—patience pays off with tender, flavorful pods!
What’s the best temperature for growing fresh shell beans?
Beans thrive in warm soil (60–85°F). Plant after the last frost when the ground is consistently above 60°F. They’re sensitive to cold—if nights dip below 50°F, use row covers to protect young plants. Too hot? Provide afternoon shade in extreme heat to prevent wilting.
Can I eat fresh shell beans raw, or do I need to cook them?
While most fresh shell beans are best cooked (boiled, sautéed, or roasted) for tenderness, some varieties like green beans can be eaten raw if young and tender. Always check for firmness—overly fibrous or stringy pods need cooking. Pro tip: Snap a pod—if it snaps cleanly, it’s ready to eat!
What’s the difference between pole and bush beans, and which should I choose?
| Trait | Pole Beans | Bush Beans |
|---|---|---|
| Growth Habit | Vining (6–12 ft tall, needs trellis) | Compact (1–3 ft tall, bushy) |
| Harvest Time | Extended (produces over weeks) | Short (3–4 weeks, then done) |
| Space Needs | Vertical (saves ground space) | Wide (needs more garden real estate) |
| Best For | Large gardens, trellises, or small spaces | Container gardens, small plots, or quick harvests |
Choose pole beans for continuous harvests or bush beans for ease and speed!
Why are my fresh shell bean leaves turning yellow?
Yellowing leaves (chlorosis) usually signals overwatering, nutrient deficiency, or disease. Check soil moisture—beans hate soggy roots. Lack of nitrogen? Side-dress with compost. Fungal issues? Improve airflow and avoid wetting foliage. Act fast—yellow leaves can spread to pods!
Wrapping up and next steps
Growing fresh shell beans—whether pole or bush—is a rewarding journey that brings crisp, flavorful harvests straight to your kitchen! 🌱 With the right soil, sunlight, and care, you’ll enjoy a bountiful yield that’s both nutritious and delicious.
Whether you’re a beginner or a seasoned gardener, these tips will set you up for success.
Ready to dive in? Start by sketching your garden layout—mark where you’ll plant seeds or seedlings—and gather your supplies. Then, follow the steps to nurture your beans from sprouts to harvest. Happy gardening, and may your harvest be extra satisfying!